Sometimes we need captcha to protect anonymous submission of forms to our Liferay portal. Liferay already have captcha library from which we can generate captcha and verify the captcha. Liferay 6.2 have Google reCAPTCHA v1.0. I will show you how to use Google reCAPTCHA v2.0(No CAPTCHA reCAPTCHA) with Liferay 6.2. To use Google reCAPTCHA v2.0 with your Liferay 6.2 portal, you need to follow some steps:
- Get reCAPTCHA Keys
- Deploy Liferay Hook and Ext plugin
- Enable reCAPTCHA
I will first show you how to register your domain and get keys to use reCAPTCHA with your Liferay portal.
1. Get reCAPTCHA Keys:
Go to Google reCAPTCHA site by clicking here. You will see a Get reCAPTCHA button at the top-right corner. It will redirect you on Google reCAPTCHA Admin page(It will ask for login to Google, if already not). You will see a screen like below:
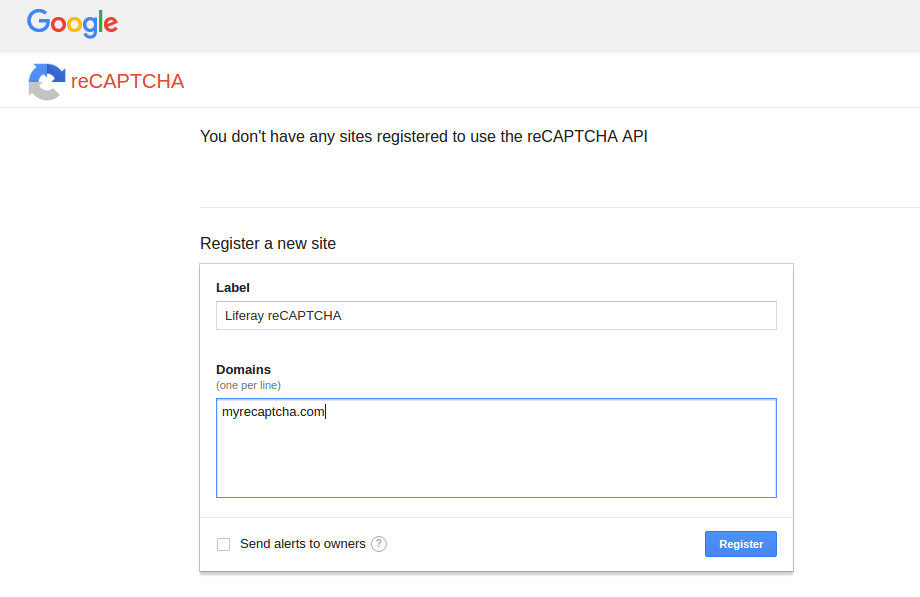
You can give value whatever you want for Label field. You need to add your domain to Domains field as shown in the above image. You can use multiple domains with single key/secret. You need to add the domain(one per line) to the Domains field. After adding values to Label and Domains fields, click on Register button.
You will redirected to a page where you will get Site key and Secret key as shown in below image:
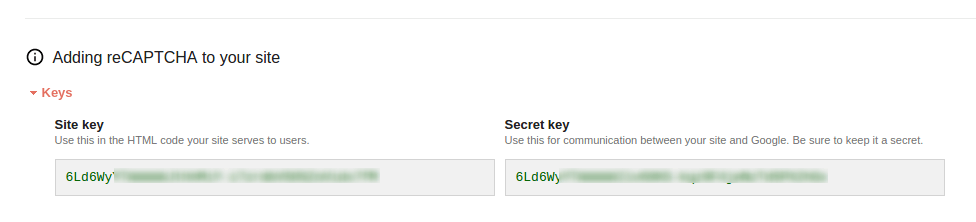
Note down these both keys, it will require to authenticate your site with Google reCAPTCHA.
2. Deploy Liferay Hook and Ext plugin:
Disclaimer: Hence, this is an Ext plugin deployment, it is advised to first try with the Liferay server other than the Production Liferay server and test properly as per your environment configuration. We will not be responsible for any kind of damage to the Liferay server and data loss.
Now, you have to deploy attached Hook plugin first and then deploy Ext plugin. On successfully deploy ext plugin, you must have to restart your Liferay server.
3. Enable reCAPTCHA:
Now, Login to Liferay portal with administrative user’s credential and go to Liferay > Control Panel > Configuration > Server Administration > CAPTCHA as shown in below:
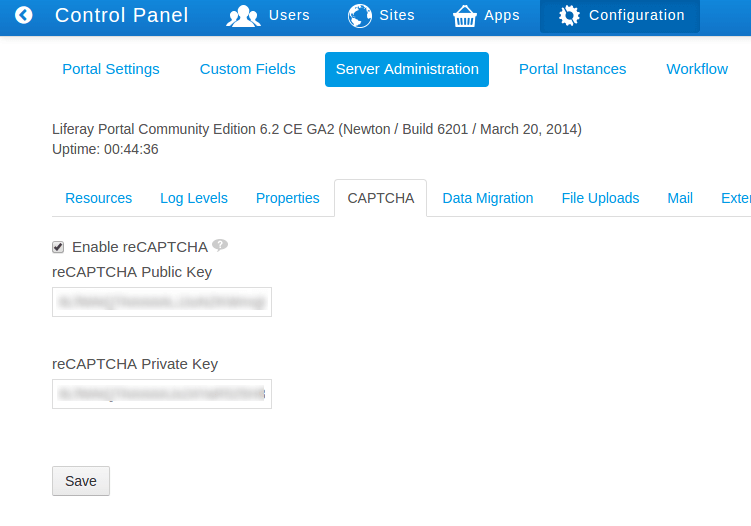
Tick Enable reCAPTCHA. Provide Site key to reCAPTCHA Public Key and Secret key to reCAPTCHA Private Key fields, and then Save your changes(Take Site key and Secret key from the Google reCAPTCHA Admin page).
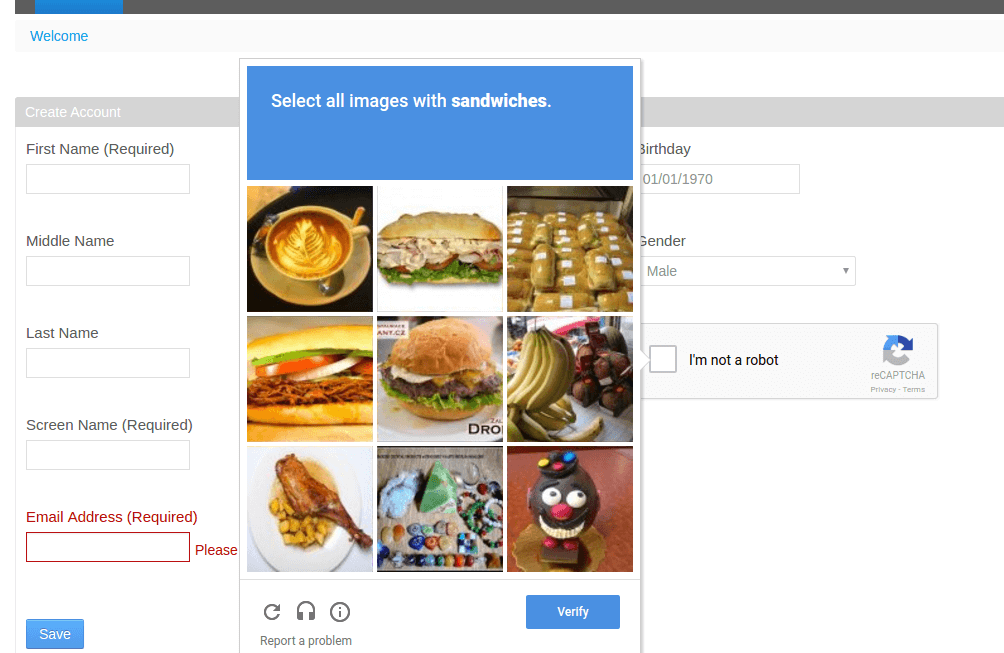
Now, Logout from Liferay and go on Create Account page. You can see a default Liferay captcha is replaced with the new Google reCAPTCHA as shown in the below image:
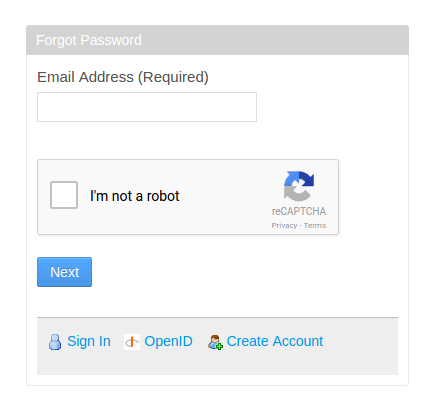
Similarly, now go on Forgot Password page and you will see a new Google reCAPTCHA in place of default Liferay captcha view as shown in below image:
Download:
For more implementation details or support you may contact us at [email protected].
For professional paid support, you may contact us at [email protected] .

