Language translation in Odoo is a feature that gives an advantage to translate words, labels, and strings in our require language. One of the most powerful use of Language translation is that you can use your own customized terms for a specific business or to use industry specific terms within Odoo without customizing views or your model. So Let’s start to do that by following these steps:
STEP 1: To Load (To Install) Language:-
To add our own translations for particular language that language should be installed in Odoo. So for that,
-
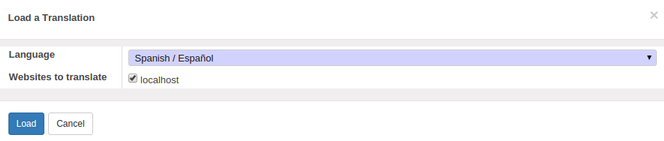
Go to Settings -> General Settings -> Translations -> Load a Translation.
-
Select the language you want to install and tick on ‘Website to translate’ check box. After that click on Load.
-
If the Language installed successfully then success message will appear.
-
To see all installed languages go to Languages Tab. But make sure that ‘Developer Mode’ is turned on.
STEP 2 : Set Installed Language in Odoo:-
To change language,
-
Go to Administrator -> Preferences -> Language -> Select Language -> Click on Save
-
Now go to anywhere in Odoo. You can find that the language is changed.
-
Now to customize our own translations we have to export the PO file for particular language. So before moving further we should know that what is PO and POT file and how it is used in Odoo.
What is POT file:-
-
POT files are basically the template files for PO files. They will have all the translation strings left empty, for example:
-
msgid "Hello world"
-
msgstr ""
What is PO file:-
-
PO files are the files which contain the actual translations. Each language will have its own PO file, for example, for French there would be a fr.po file, for german there would be a de.po. You can even use po files to customise the displayed text without changing the code.
-
The structure of each PO file is very simple; it is made of simply pairs of the original text - that which is in the code - and target text, the text which we want in the translation. For example, in the French PO file you might have a translation of a string as follows:
msgid "Hello world"
msgstr "Hola Mundo"
-
The msgid contains the text actually in the code, and the msgstr contains the text into which it is going to be translated. If there is no translation given in the msgstr, then the default msgid string will be displayed.
-
So in general, PO files are simply text files and can thus be edited by any text editor, and also there are lots of tools available to edit them easily.
STEP 3 : Export PO file:-
As discussed above, In order to set our own translations we have to export the PO file and we have to change translations as per our requirement. So follow below steps:
-
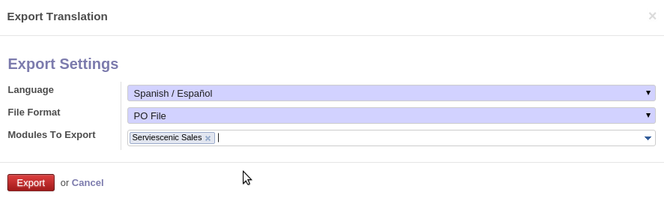
Go to Settings -> General Settings -> Translations -> Import/Export -> Export Translation
-
Now the window will be open as above and now fill the details as following:
-
Language: Select the Language you want to Export.
-
File Format: Select the file format as PO File
-
Apps to Export: Select the module to which you want to change translations.
Then, click on Export button.
-
After that the confirmation message will be shown below.
-
Click on ‘Download <language>.po’ and close the dialog box.
-
Now go to your module and create ‘i18n’ folder in your module and put this downloaded file in this folder. i.e. ‘your_module_name/i18n/’ directory.
-
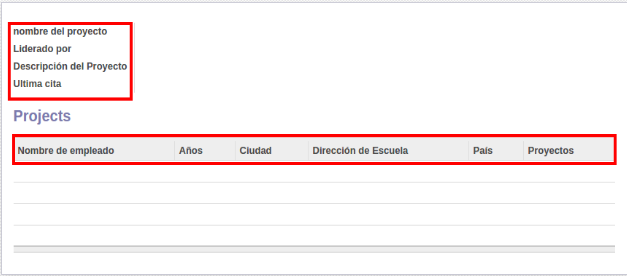
Open this po file with any text editor. Search for the fields or message string that you want to change translate. I am changing my translation in es.po as below:
#. module: leave_approve
#: model:ir.model.fields,field_description:leave_approve.field_project_details_name
msgid "Project Name"
msgstr "nombre del proyecto"
#. module: leave_approve
#: model:ir.model.fields,field_description:leave_approve.field_employee_details_address
msgid "School Address"
msgstr "Dirección de Escuela"
-
Similarly this way, you can change translations for fields as per your requirement.
-
Save this po file. Now to reflect these changes, we have to load language again by making tick on ‘Overwrite Existing Terms’ and ‘Website to translate’ as described in STEP 1.
STEP 4 :Check Result:-
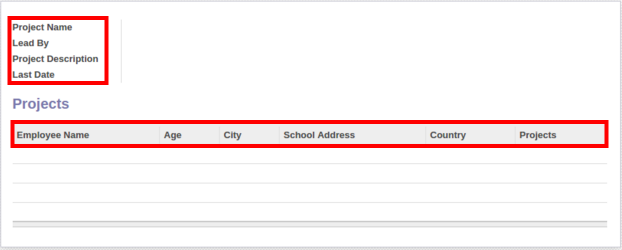
Before Translation
After Translation
-
Similarly this way you can translate the string of Dialog box messages, buttons etc. Just change the ‘msgstr’ string in the corresponding module’s PO file and see your results.
For professional paid support, you may contact us at
[email protected]
.
