Prerequisite: Knowledge of Liferay portal and Vaadin framework.
I am going to show how to integrate vaadin 7 in Liferay portal.
A Vaadin portlet requires resources such as the server-side Vaadin libraries, a theme, and a widget set. By Default, Liferay portal comes with vaadin 6. For running portlet with vaadin 7, we need to install vaadin 7 in Liferay portal. We can install vaadin 7 in Liferay either by using vaadin control panel or install it manually. I am demonstrating both of them here.
Manual Integration
Step 1
Remove the vaadin installation from Liferay by removing vaadin 6 library jar from “tomcat-x.x.x/webapps/ROOT/html/VAADIN” and VAADIN directory from “tomcat-x.x.x/webapps/ROOT/WEB-INF/lib/vaadin.jar”.
Step 2
Download the vaadin 7 installation package from https://vaadin.com/releases.
Step 3
Extract the VAADIN folder from the vaadin-server.jar, vaadin-themes.jar and vaadin-client-compiled.jar into tomcat-x.x.x/webapps/ROOT/html/VAADIN.
You can do this from terminal as follows:
$ cd tomcat-x.x.x/webapps/ROOT/html
$ unzip path-to/vaadin-server-7.1.7.jar 'VAADIN/*'
$ unzip path-to/vaadin-themes-7.1.7.jar 'VAADIN/*'
$ unzip path-to/vaadin-client-compiled-7.1.7.jar 'VAADIN/*'
Step 4
Copy vaadin-server.jar, vaadin-shared.jar, vaadin-shared-deps.jar and jsoup.jar into tomcat-x.x.x/webapps/ROOT/WEB-INF/lib.
Remove the version numbers from these jars if you want to follow the Liferay standard.
Step 5
Use portal-ext.properties to define a widget set, theme and resource path.
Here is a sample portal-ext.properties to define a widget set, theme and resource path. We have to add following properties in portal-ext.properties.
# Path under which the VAADIN directory is located.
# (/html is the default so change is not required.)
# vaadin.resources.path=/html
# Portal-wide widget set
vaadin.widgetset=com.vaadin.server.DefaultWidgetSet
# Theme to use
vaadin.theme=liferay
Now, you need to restart liferay portal. Your portal is ready to work with vaadin 7.
Integration via Control Panel
Step 1
Install Vaadin Control Panel from Liferay marketplace. You can find control panel at https://marketplace.liferay.com/p/vaadin-7-control-panel.
I am assuming, now that vaadin control panel is deployed in your liferay portal.
Step 2
Login into Liferay Portal.
Step 3
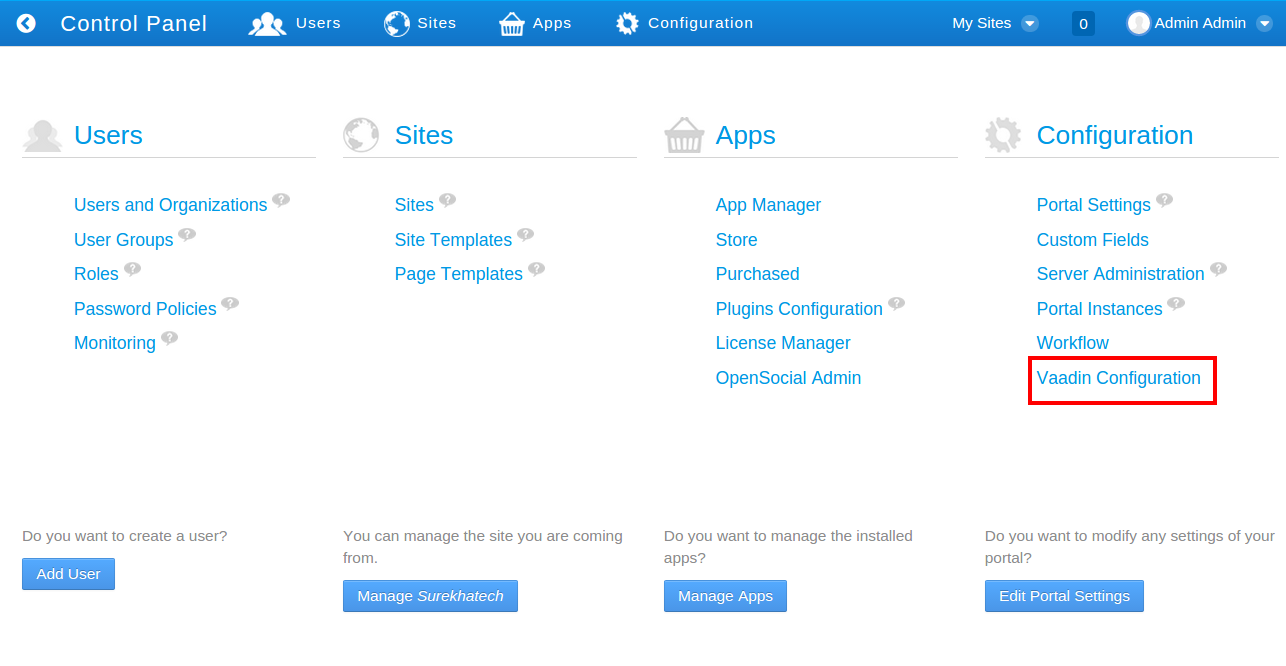
Go to control panel of Liferay portal and you will find Vaadin Configuration in Configuration section as below.
Step 4
Navigate to Vaadin Configuration from Configuration section.
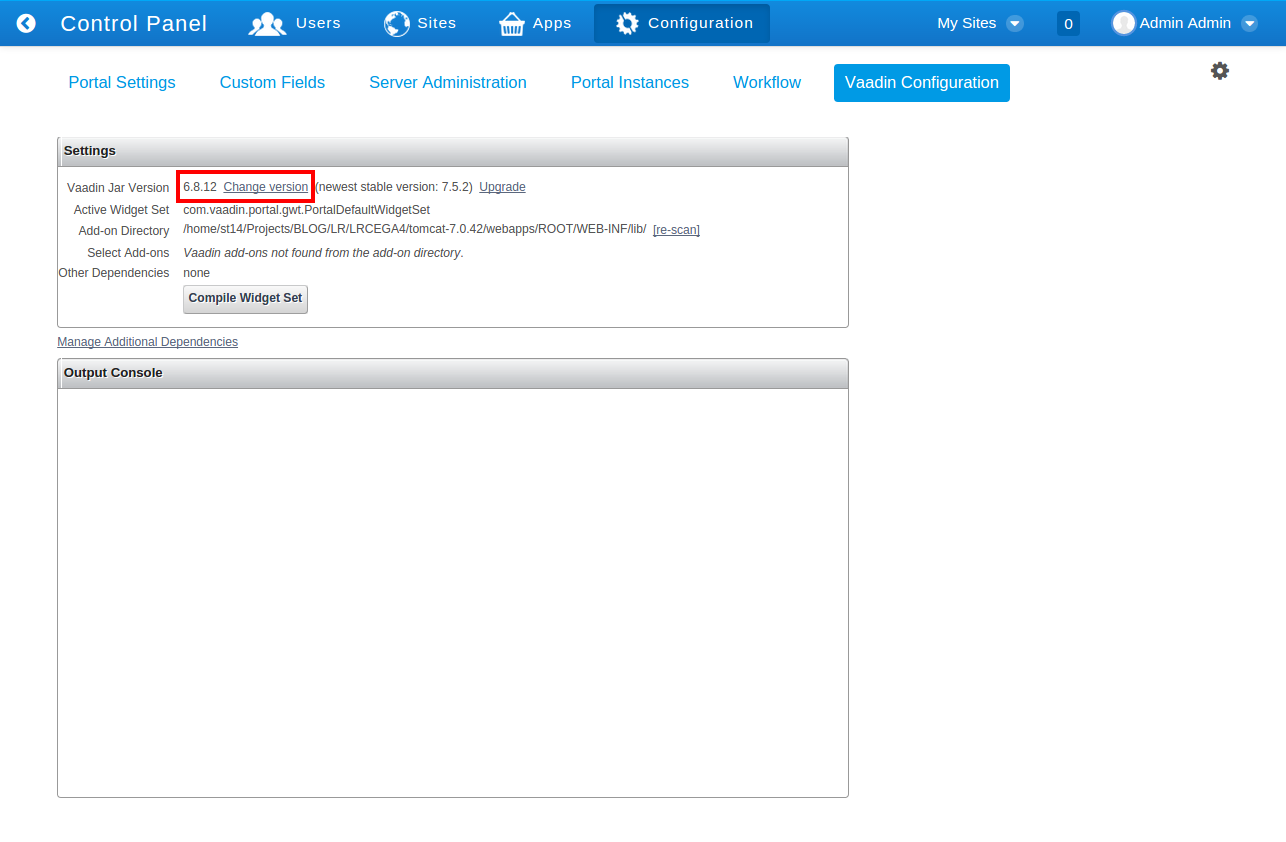
Step 5
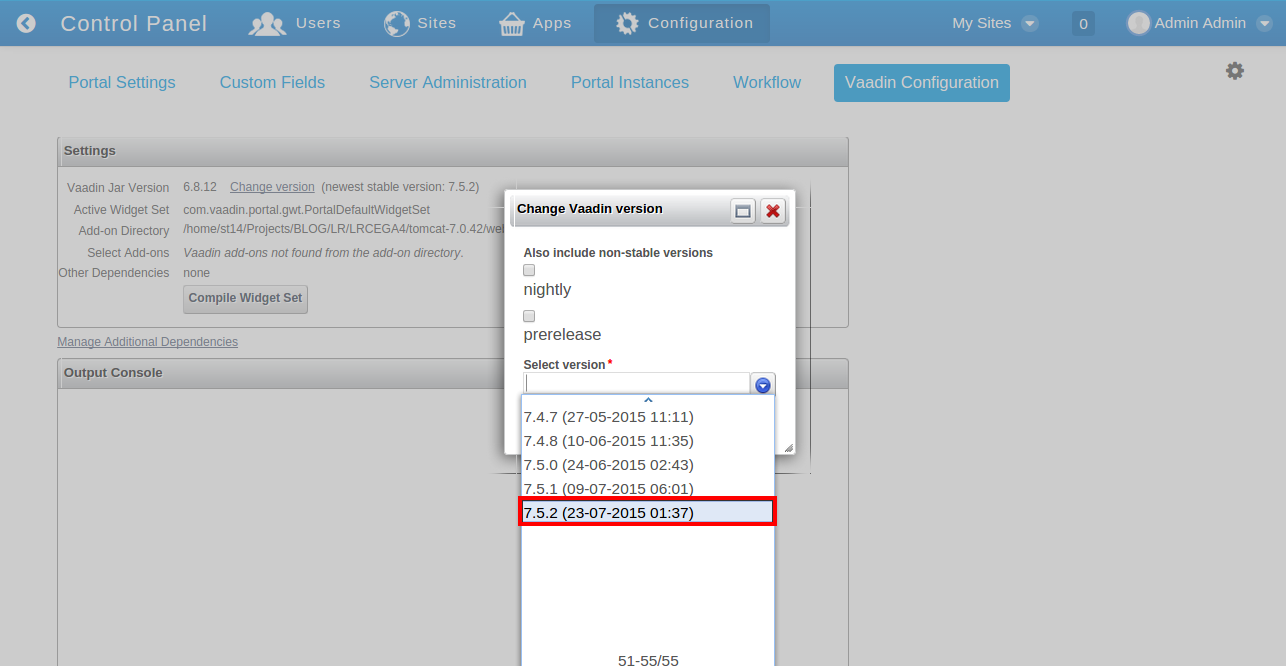
Click on change version and you will have lists of the available versions of vaadin, choose appropriate version and go ahead. It will install vaadin version you have selected. You can see logs related to installation in the output console.
Step 6
Please refer last step of placing portal properties in portal-ext.properties to define a widget set, theme and resource path from manual installation discussed above.
For more implementation details or support you may contact us at [email protected].
For professional paid support, you may contact us at
[email protected]
.
