Boost Your Liferay Portal: Migrate React Portlets to Client Extensions
 December 14, 2023
We have experimented with various React development approaches for Liferay over time, including Jetray react portlets, blade-based react portlets, and Liferay react portlets generated using the yo Liferay js generator. Nonetheless, as the project and portlet grow in size, the initial loading time for React becomes excessive.
Migrating your React portlet to a client extension in Liferay 7.4 can be a ideal alternative and highly beneficial as it enhances the development process, improves application performance, supports reusability, and offers modern framework integration.
However, migrating React portlets to a client extension involves intricate steps, from creating custom elements to updating the portlet, requiring proper expertise to implement. Please go through the following blog and help yourself with seamless migration of react portlets to client extension in Liferay.
Migrating React Portlets to Client Extension
Prerequisites for migrating reach portlets to the client extensions
- Liferay Version: Liferay introduced the client extension in the 7.4 U1 version. So it’s compatible with the 7.4+ versions.
- Boilerplate Code
Follow below steps to create React application
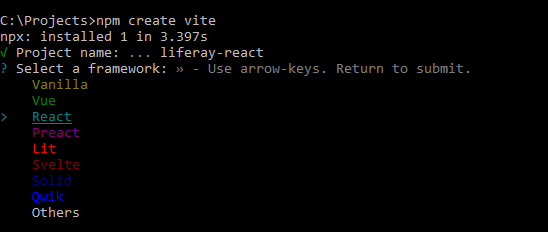
- Set up a fresh React application, and I highly recommend using the Vite bundler for improved performance.
- Create a React application by running the below command.
- Create an HTML element in the index.js file.
class WebComponent extends HTMLElement {}
- Within that, render your App component.
class WebComponent extends HTMLElement {

      ReactDOM.render(<App />);

}
- In index.js create a custom element with a specific ElementId if it doesn't already exist.
const ELEMENT_ID = 'react-app';

if (!customElements.get(ELEMENT_ID)) {

customElements.define(ELEMENT_ID, WebComponent);

 }
- Place your custom element within the <body> tag of the index.html file.
<body>
<react-app>
</react-app>

</body>
- Create a "chunks.sh" file in the root directory of your React project and include the following script to modify the names of chunk files generated after the project is built.
ORIGIN=dist/assets

cp $ORIGIN/*.js $ORIGIN/react-app-js.js

cp $ORIGIN/*.css $ORIGIN/react-app-css.css
- Update the build script into the package.json file to initiate the project build.
"build": " vite build && ./chunks.sh"
Inside the "public" folder, create a folder named with your module or project name. Place your static resources like images and fonts in this folder to make them accessible through an Apache server.

Internationalization
LIferay doesn’t support internationalization yet in the Client Extensions. One of the videos team had said it’s in the plan but it will be in 7.5 so until then we can use the React Internationalization library which is “React-intl”.
An alternative way for localization support is through Liferay's Language Override feature, which has been available since Liferay version 7.4.
Create Client Extension from the Admin Panel
Follow below steps to create client extension
Select "Add custom element" when creating a new client extension and complete all the required information as specified below.
Provide a suitable name for your client extension.
In the “HTML Element Name” field, enter the ELEMENT_ID of the custom element you've created in your React application. In our case, it is "react-app."
Upload the renamed chunk file of JavaScript and CSS in the document and media. In the “JavaScript URL” and “CSS URL” (optional) fields, specify the paths to the javaScript and CSS files from the document and media respectively.
Ensure that the “Instanceable” option is enabled to enable the use of our client extension multiple times as a widget.
Now our client extension is ready to be published. Once published, it will be accessible as a widget that we can place on our page.
Configurations
Include properties from configurations for our client extension in a key-value format (e.g., propertyName=propertyValue). These properties can be accessed within our React application using the method provided below.
-
this.getAttribute('propertyName');
One of the key benefits of this feature is that it allows us to implement a micro frontend architecture within a single React application by segmenting frontend modules according to route paths defined in the configuration.
In order to achieve this, you need to specify the routePath for your page within the configuration properties of the widget when using the client extension as a widget. Now you can conditionally display your frontend components based on this routePath. This approach will enhance code and dependency reusability.
Serve static assets through Apache web server
From a performance perspective, it's advisable to consistently deliver our assets through the web server.
To implement this functionality, you can place your images and media files in the public folder and make the following configurations in your Apache configuration file to serve them.
RewriteEngine on

DocumentRoot /var/www

RewriteRule ^/public/react-web/images(/.*)?$ %{DOCUMENT_ROOT}/react-web/images$1 [L]

RewriteRule ^/static/media(/.*)?$ %{DOCUMENT_ROOT}/react-web/media$1 [L]
- Production Deployment
- Liferay provides a chank.js file, it will rewrite the hash file name to main.js and main.css. Only Problem we face is once we update the same file, Changes will not affect the end user. Users have to do mannually clear the caching which we can not ask thousands of users. So I came to a solution: deploy hash files and update new file urls to the admin panel.
- It’s always good to have a backup of the js and css files.
- Key factors that will boost in the performance
- Using minified javaScript and CSS for client extension will reduce the load of react bundle.
- Vite-based React application improves build performance.
- Serving static resources through Apache.
- Micro frontend architecture using configurations.
Conclusion
In summary, adopting client extensions presents a promising avenue for overcoming React's loading time challenges in Liferay, with your blog serving as a comprehensive guide for developers looking to execute this migration. It's a meticulous process demanding expertise, but the performance and development benefits make it a worthy investment.