Creating and Managing Objects in Liferay 7.4
 January 22, 2024
Liferay's primary focus is on expanding and improving the functionality and features of its user interface. One of those new features includes Objects. Let's explore the universe of objects, where the core principle is "low code, no code."
What is an Objects in Liferay?
Liferay object is a way of creating a custom entity without any service builder or deployment of the module. With the help of Liferay Objects, you may build custom apps that are personalized to your company's needs without having to write any code. Objects can be used to manage and expand both system and customized objects. This includes adding new fields, connections, operations, relationships, layouts, views, validations, and customized states.
What are the prerequisites?
- Liferay DXP/Portal 7.4
- Basic knowledge of Liferay
- Liferay service builder
- Liferay custom entity
- Basic knowledge of Liferay object (CRUD)
Creating Your First Objects in Liferay
Create Object:
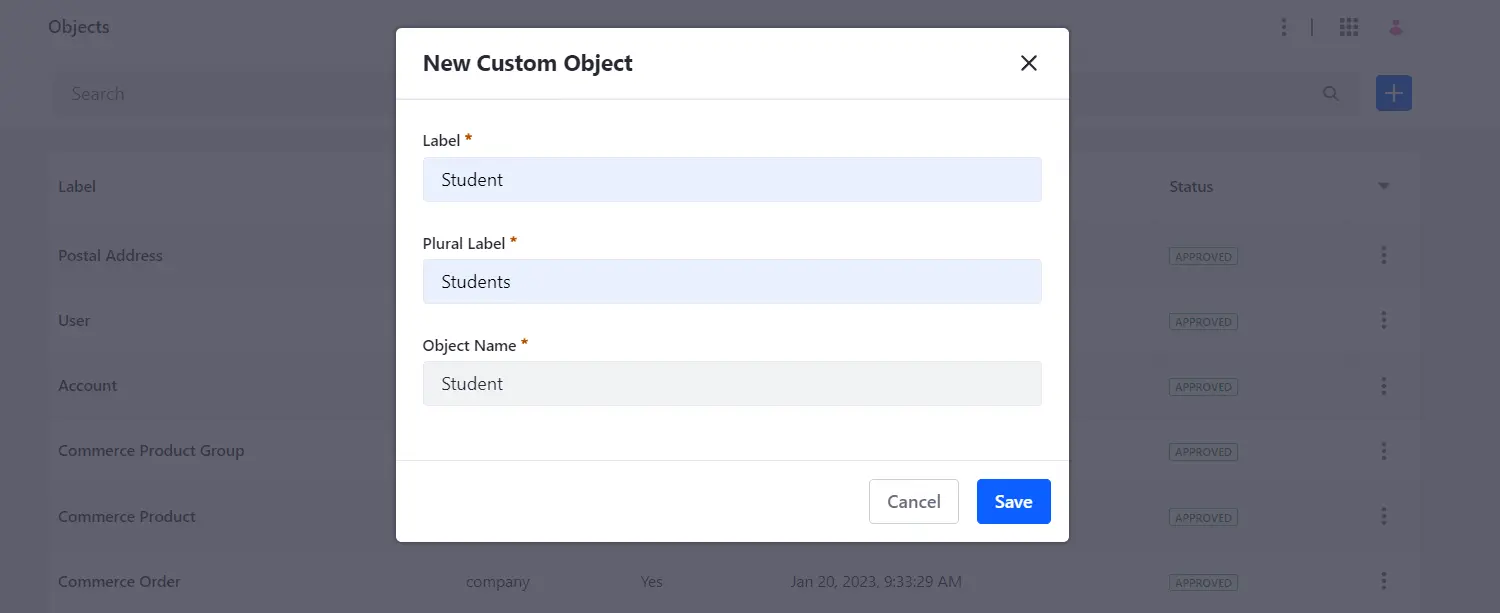
- For create object Go to Control Panel tab -> open Objects -> click on plus icon
- This will open a form for the creation of new object.
- Label: This is used to identify an object in applications that support it, such as Workflow, Display Page Templates, and Forms.
- Plural Label: This is used as the object application's display name in the UI.
- Object Name: This is used to specify the name of the object definition and cannot be altered after the object is published.
- A new object instance is produced without any fields, relationships, layouts, actions, views, validations, or a defined scope once your object has been properly saved.
- There are two sorts of scope that can be defined in the object draft state:
- Company: Object data is stored per Liferay instance when you select the scope of the object company. It is visible in the Global Menu.
- Site: The object data is stored per site when you select the scope of the object. It is visible in the site menu.
- To choose the location of the Object in the Liferay UI, select a Panel Category Key.
- After the object has been created, it must be edited and published.
- Once an object is published, its name and scope cannot be changed.
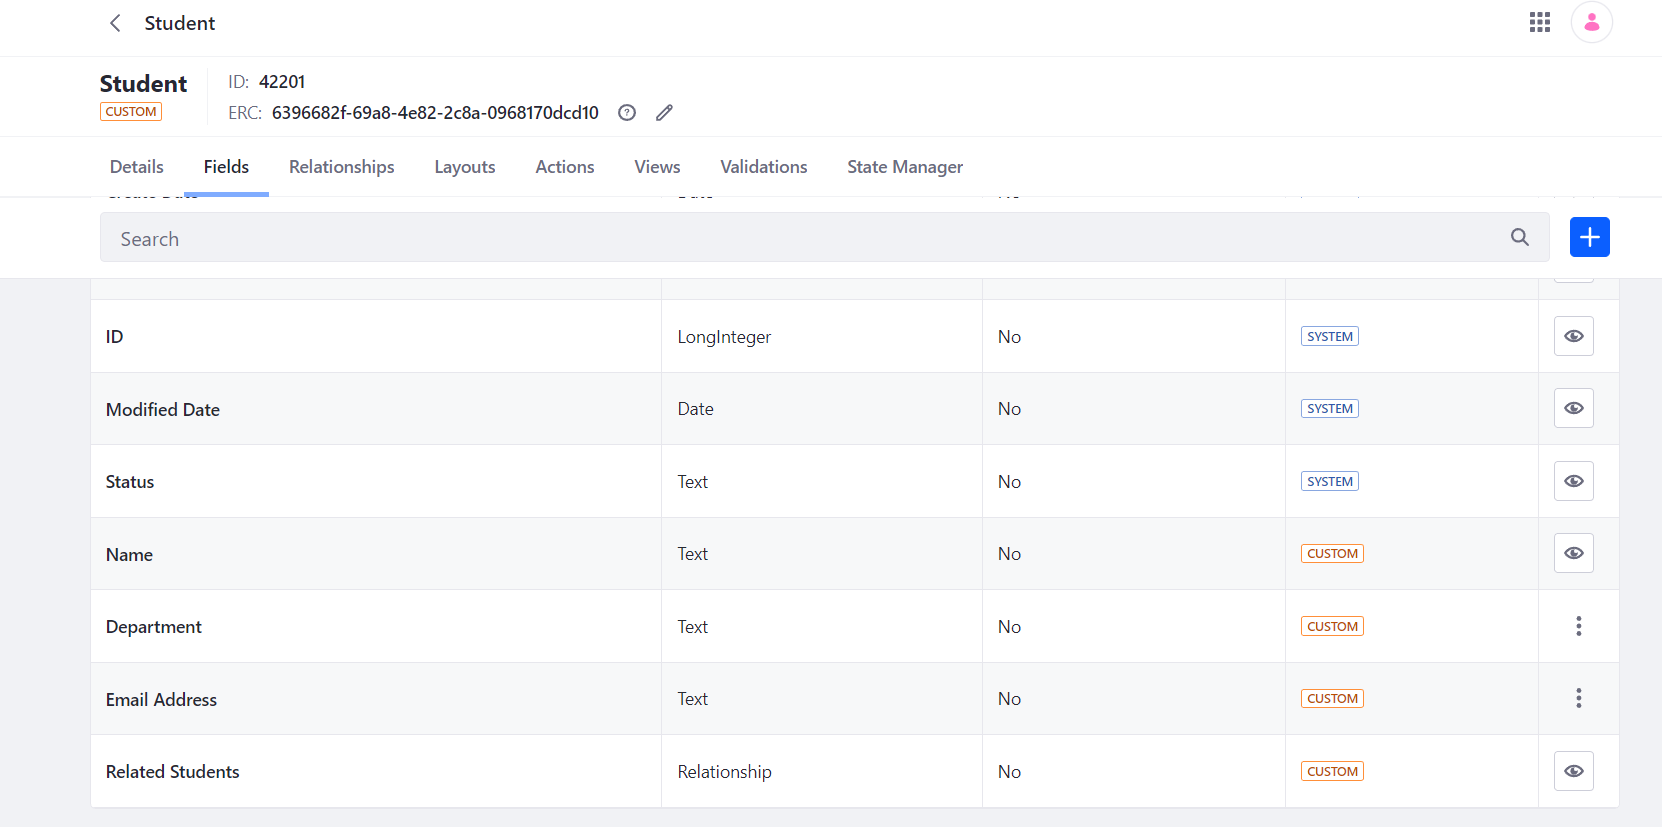
Object Fields:
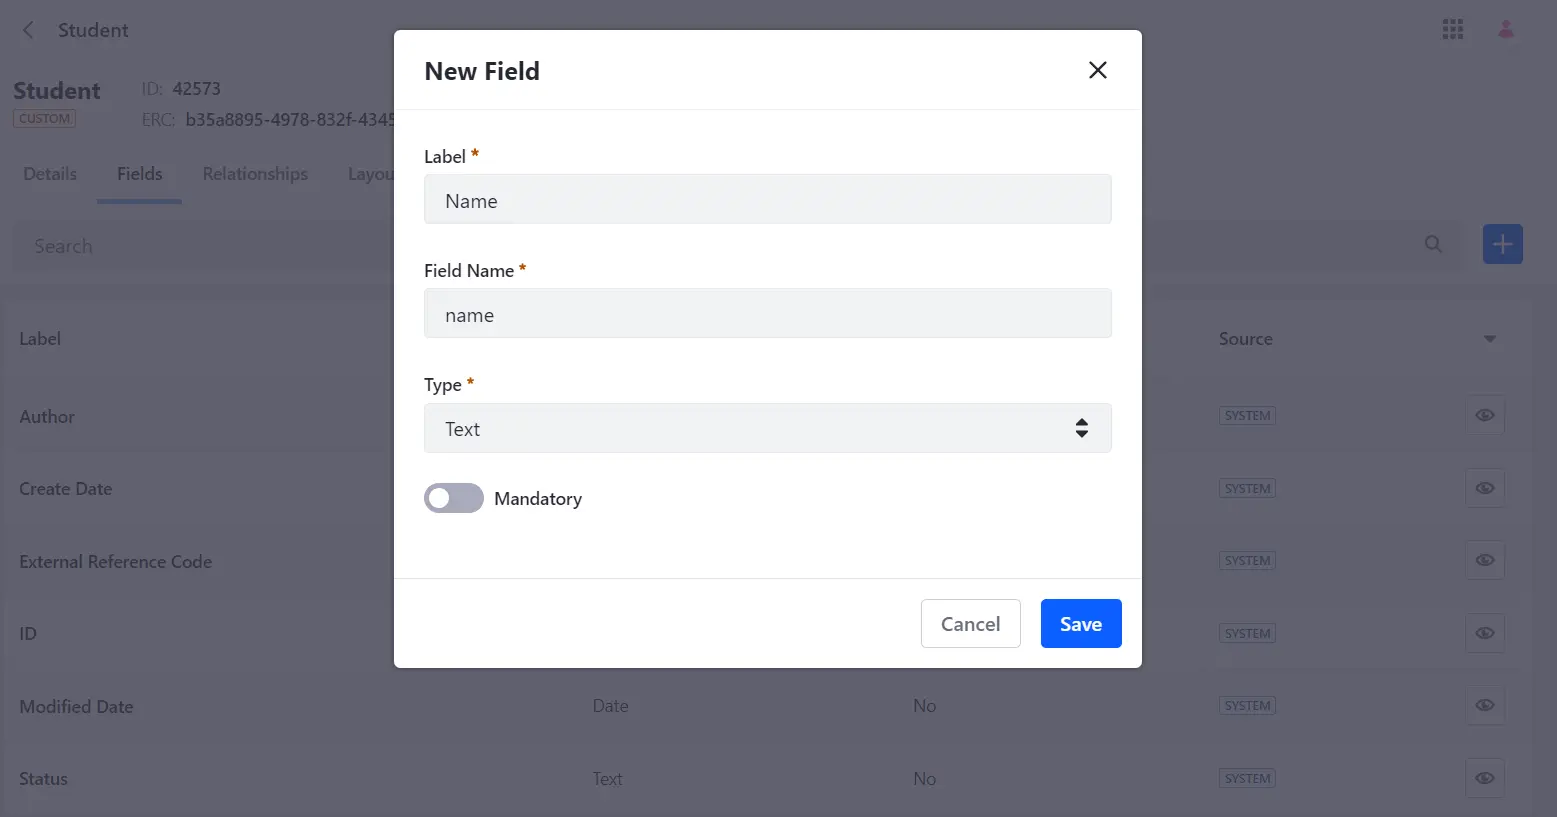
- Go to existing custom object -> open fields tab -> click on plus icon
- This will open a field form for the creation of new field.
- Label: After the field is created, its value can be localised and serves as the field's identification in the Objects UI.
- Field Name:This value chooses the field's name at the database's back end and utilises camel case. This value cannot be altered after a field is published.
- Choose a Field Type based on the Datatype that you need.
- Choose whether the field is required.
- Once you've added an all field to an object, you can choose an entry title by going to the Object Details tab. This controls which field is used for an Object's entries' titles.
Custom Actions executors


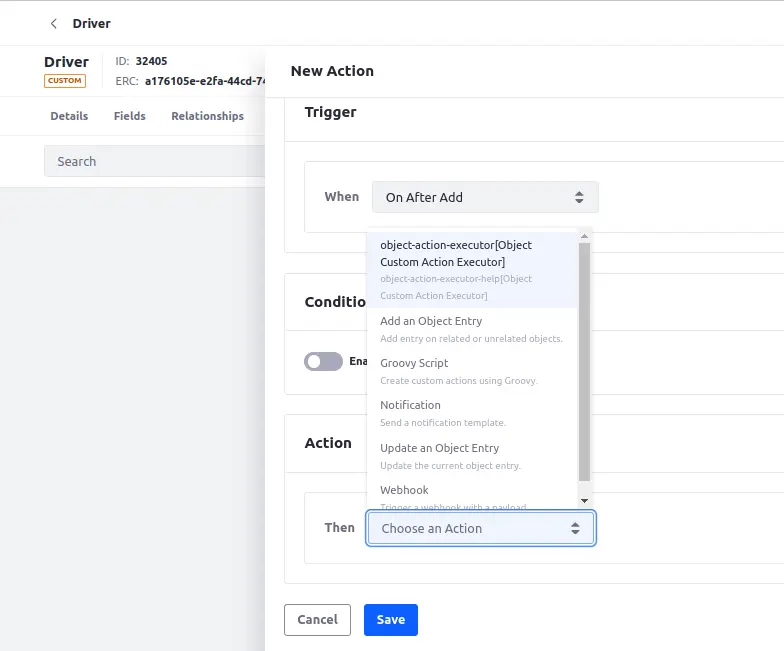
- Now liferay provides functionality to create custom action methods by creating their own method in object “Action section”.
- Workflow of Custom Actions will be like below.
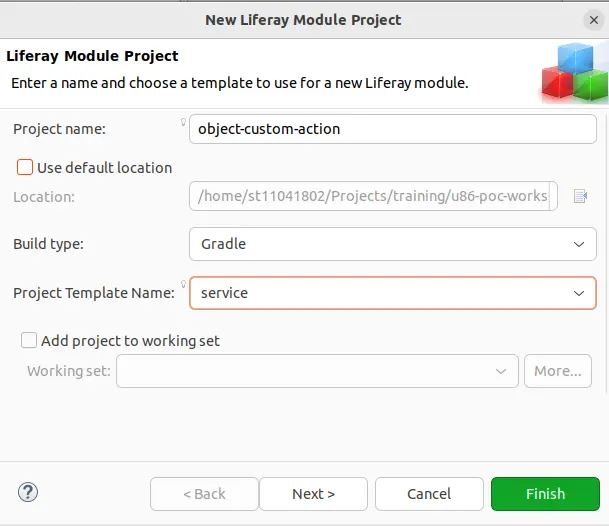
- Create a new liferay module with service type.
- Import com.liferay.object.action.executor.
- All this process will create class with service type = ObjectActionExecutor.class.
- Override necessary methods like(execute, getkey).
- Write your business logic and make build.
- Created action will be shown to action under “new action” form.
Expression builder and Validations
- Expression builder is used for creating validation for each field of a custom object which we define. With the help of the integrated editor provided by this tool, complex validation rules can be written way too easily, and straightforward.Expression builders provide a predefined list of existing validation with drag and drop functionality to impediment them.
- Go to existing custom object -> open validations tab -> click on plus icon
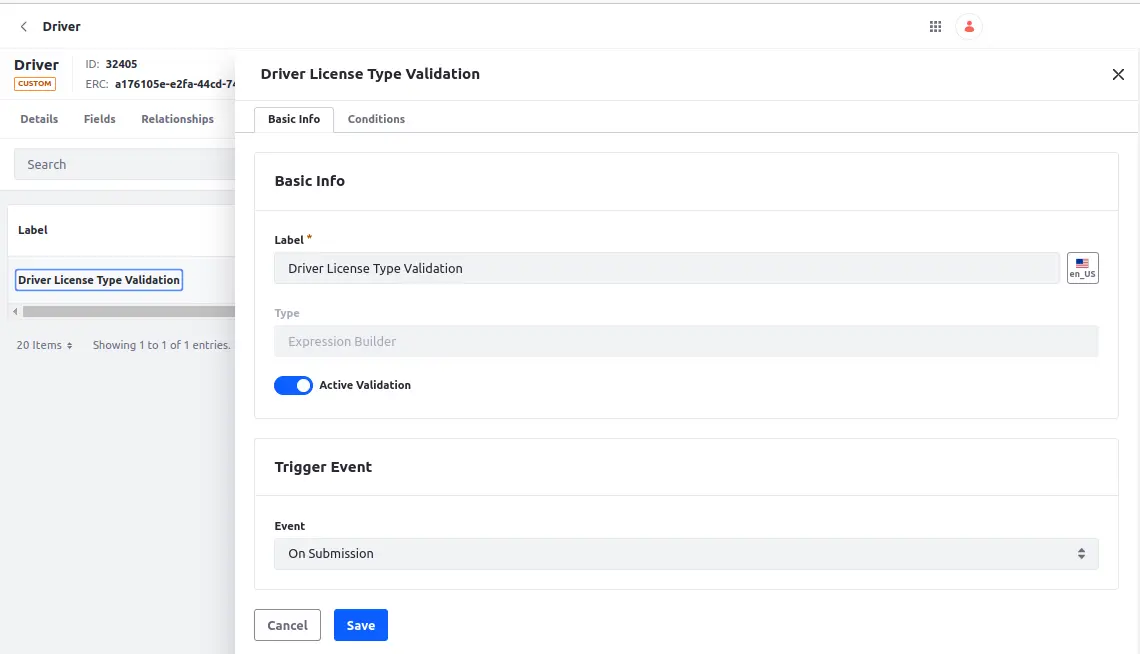
- This will open a validation form for the creation of new validations.
- Add Lable, active validation, and make an event “on submission”.
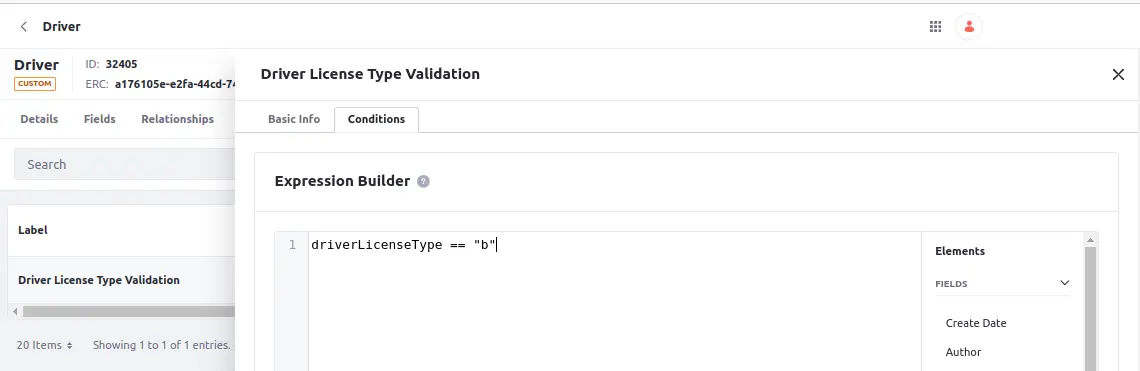
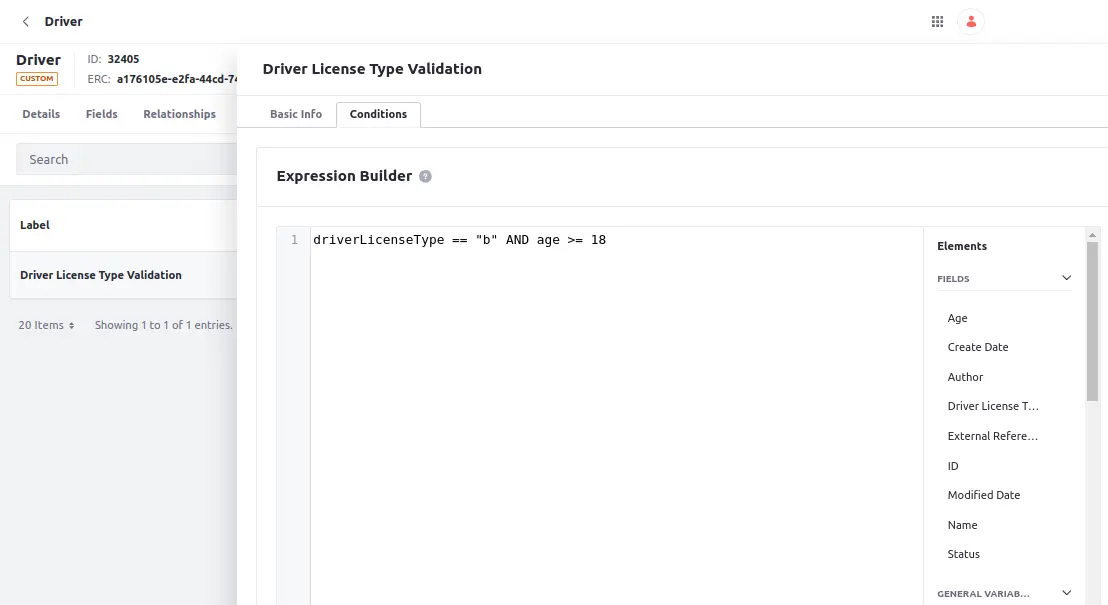
- Go to conditions tab beside basic info and you will see expression builder.
- Field, operators, and functions, are the 3 sections you will see in side panel list.
- Choose field you want to validate and put operation and condition for validation.
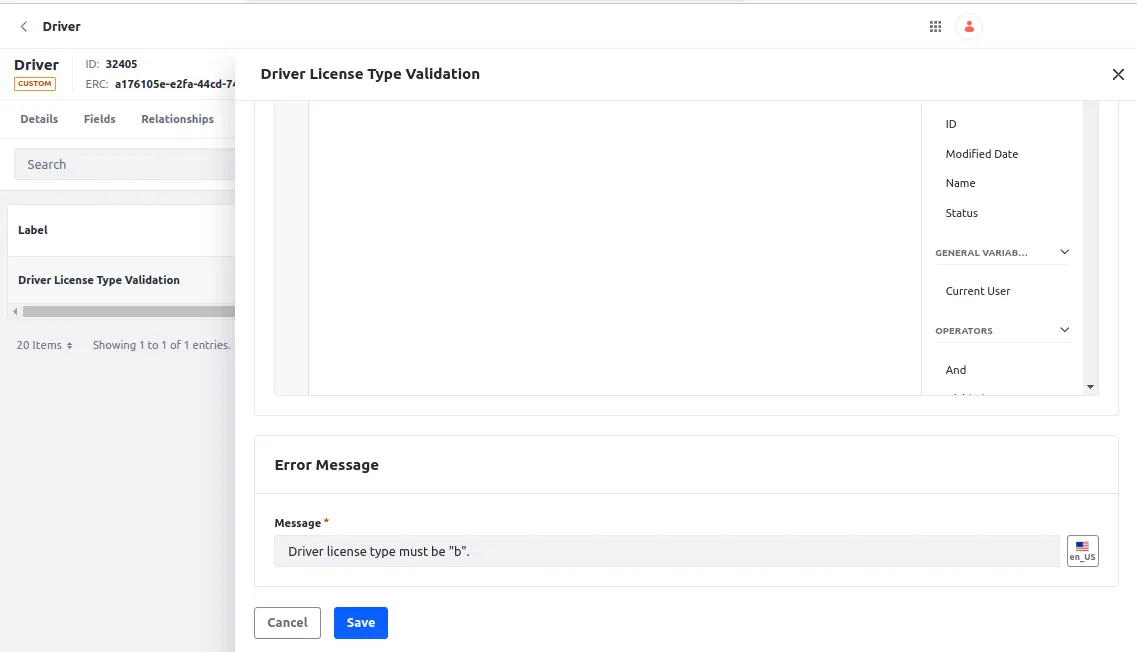
- You can also add error message you want to show when a user adds some wrong input to the validated field.
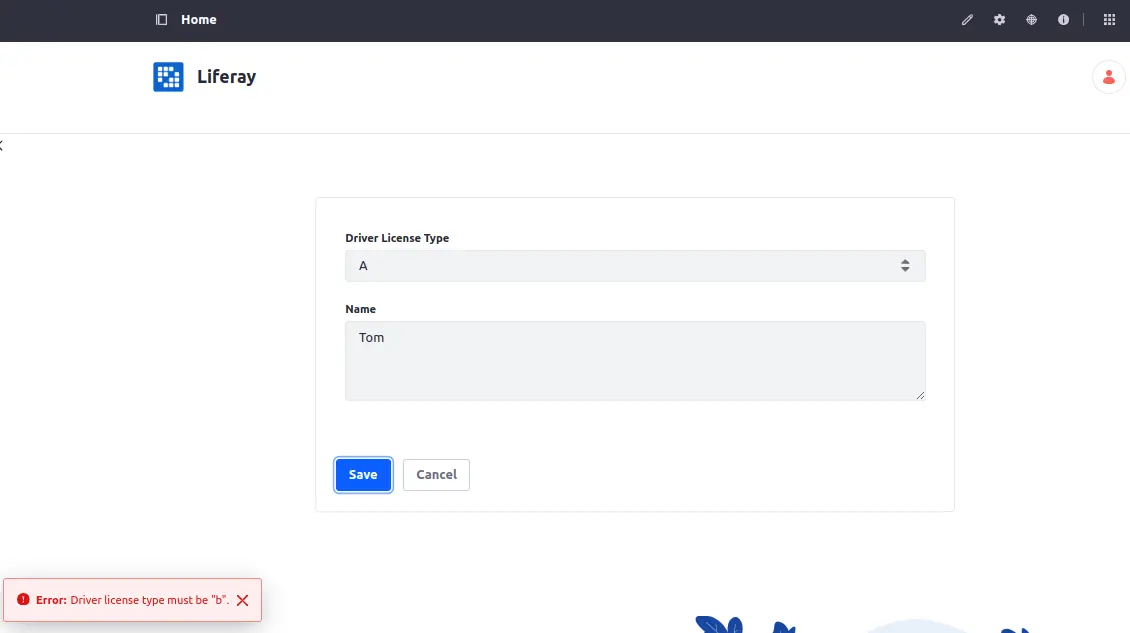
- Save it at the end and you are good to go. Whenever user submits some value this validation check will trigger and check for the expected output.
- And here's what our final output will look like.
- Also we can add all validation in a single expression as well but this won’t be convenient for the error message, Like below.
Object Relationships:
- A relationship is used for mapping the one object entry to another object.
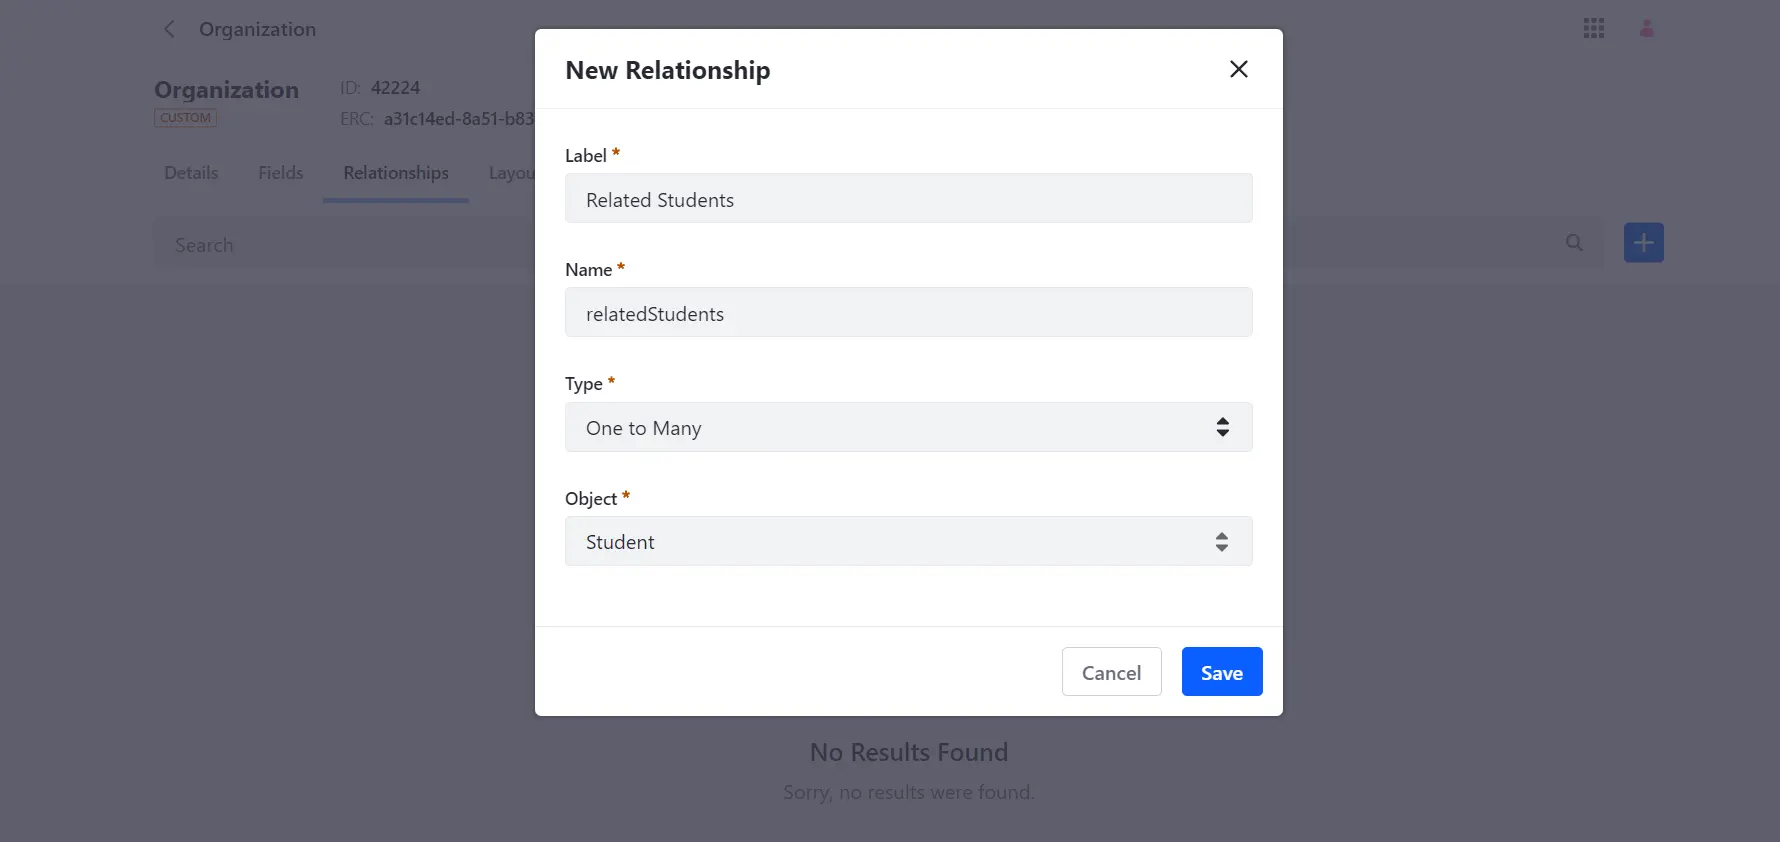
- Go to existing custom object -> open layouts tab -> click on plus icon
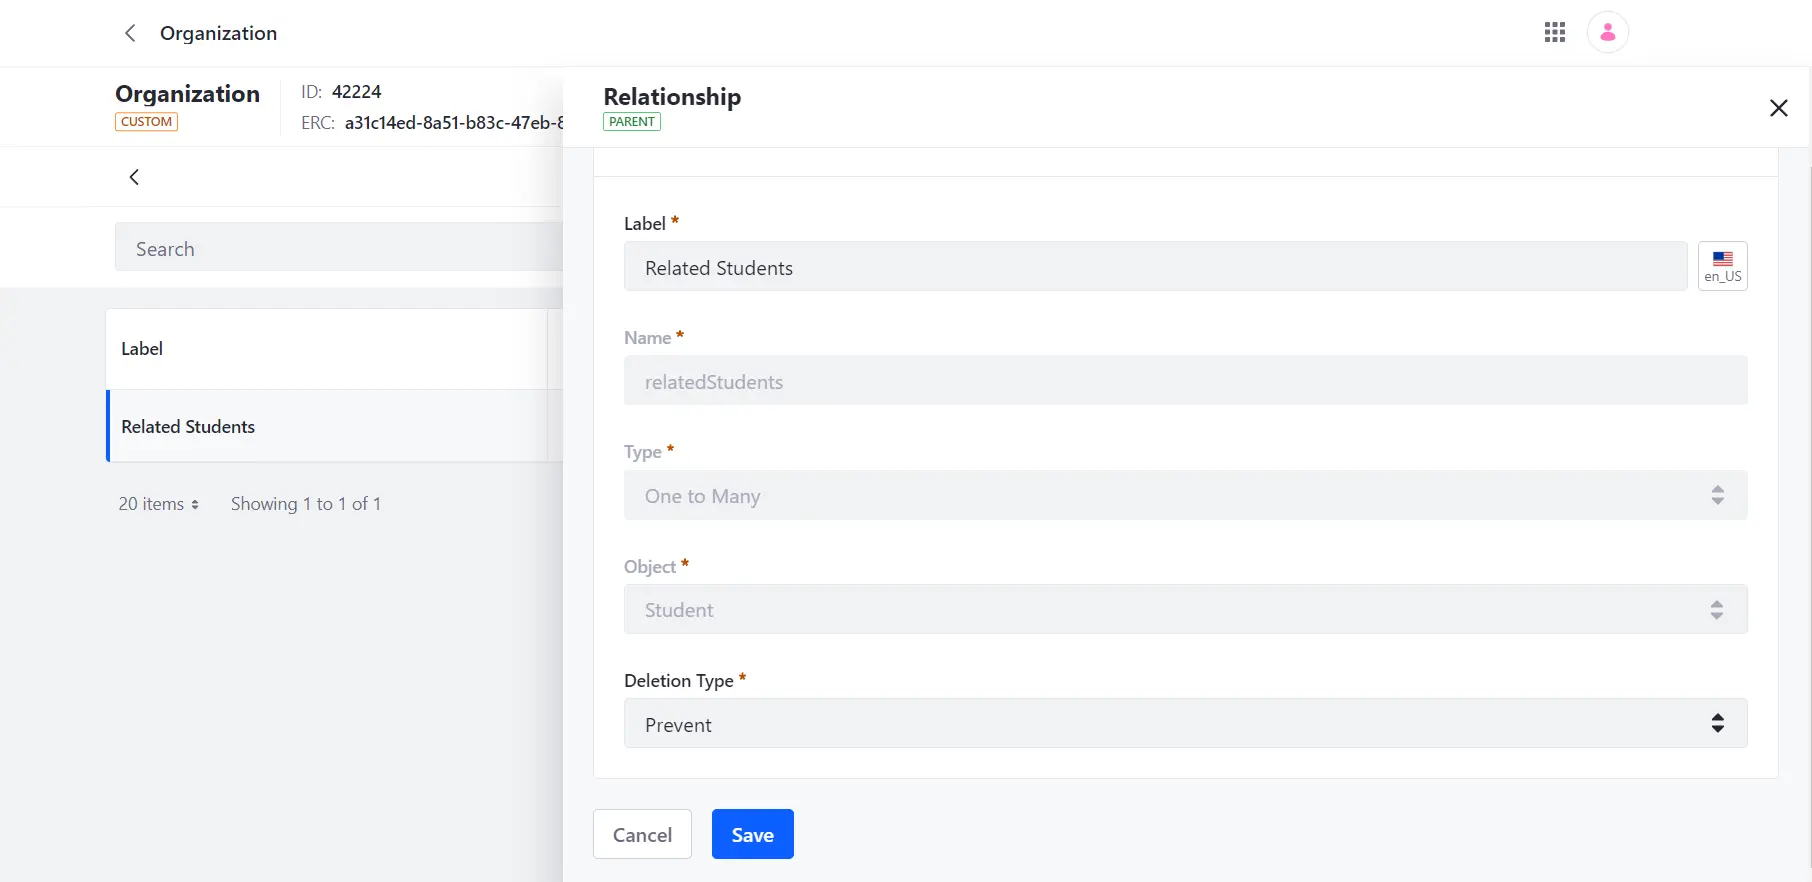
- This will open a relationship form for the creation of new relationship.
- In relationship there are two types of relationship types:
- One To Many: In this one object entry is mapped with multiple object entries. The parent object has a relationship definition and the child object entries have a field for relationships.
- Many To Many: In this multiple object entries are mapped with multiple object entries. Relationship is defined on both sides of the relationship.
- Deletion Type:
- Define the how relationship object entries deletion handle.
- In deletion type three options is available.
- Prevent (Default): If a parent is connected to a child, you cannot delete the parent object.
- Disassociate: You can remove the parent entry even if it is connected to child entries. When you delete information about the parent, it doesn't change anything about the linked information.
- Cascade: You can remove the parent entry even if it is connected to child entries. When you remove the parent entry, the linked entries will also be removed if the user has permission to delete entries in the child object.
- You can now check the connection between two objects.
Liferay Objects Layouts:
- Object layouts mean how the fields and relationships look when making or changing object entries.
- The layout has many tabs, and each tab has different fields on it.
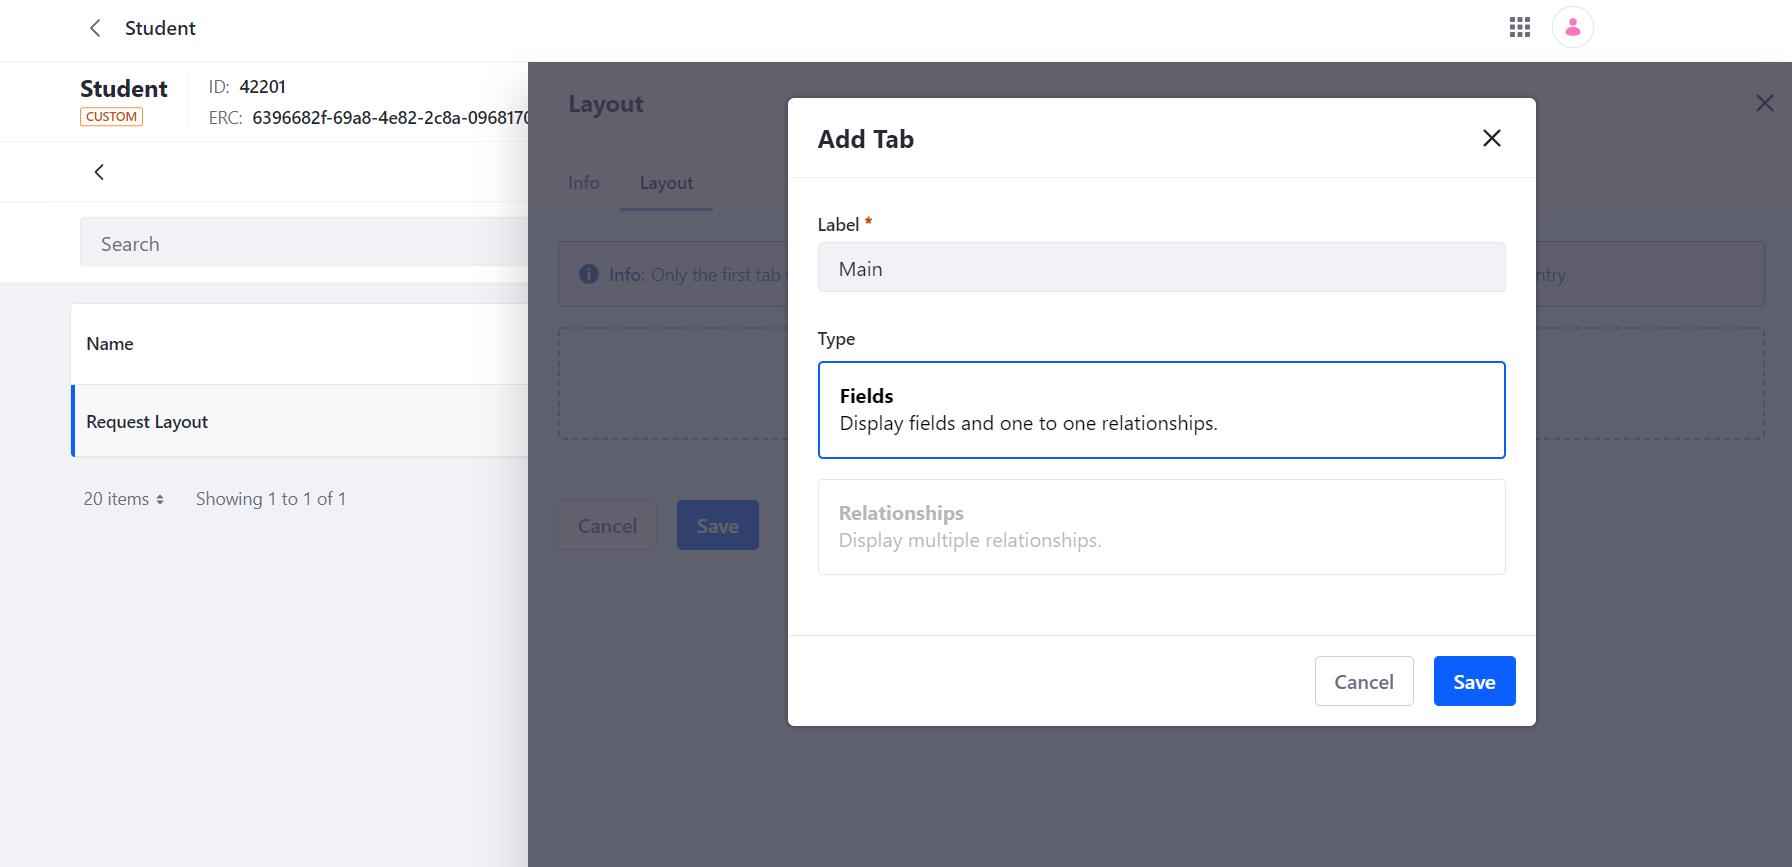
- In layout there are two types of tabs:
- Field tabs can display the fields created in the object.
- Relationship tabs only shows the relationship fields from object relationships tables from one-to-many or many-to-many relationships.
- Before incorporating Additional tabs, it is essential to initially insert a field tab when developing layouts. The initial tab is sole one visible while generating an object entry. Additional tabs become visible during the process of modifying object entry. After completing design of your layout, set it as default option for further usage.
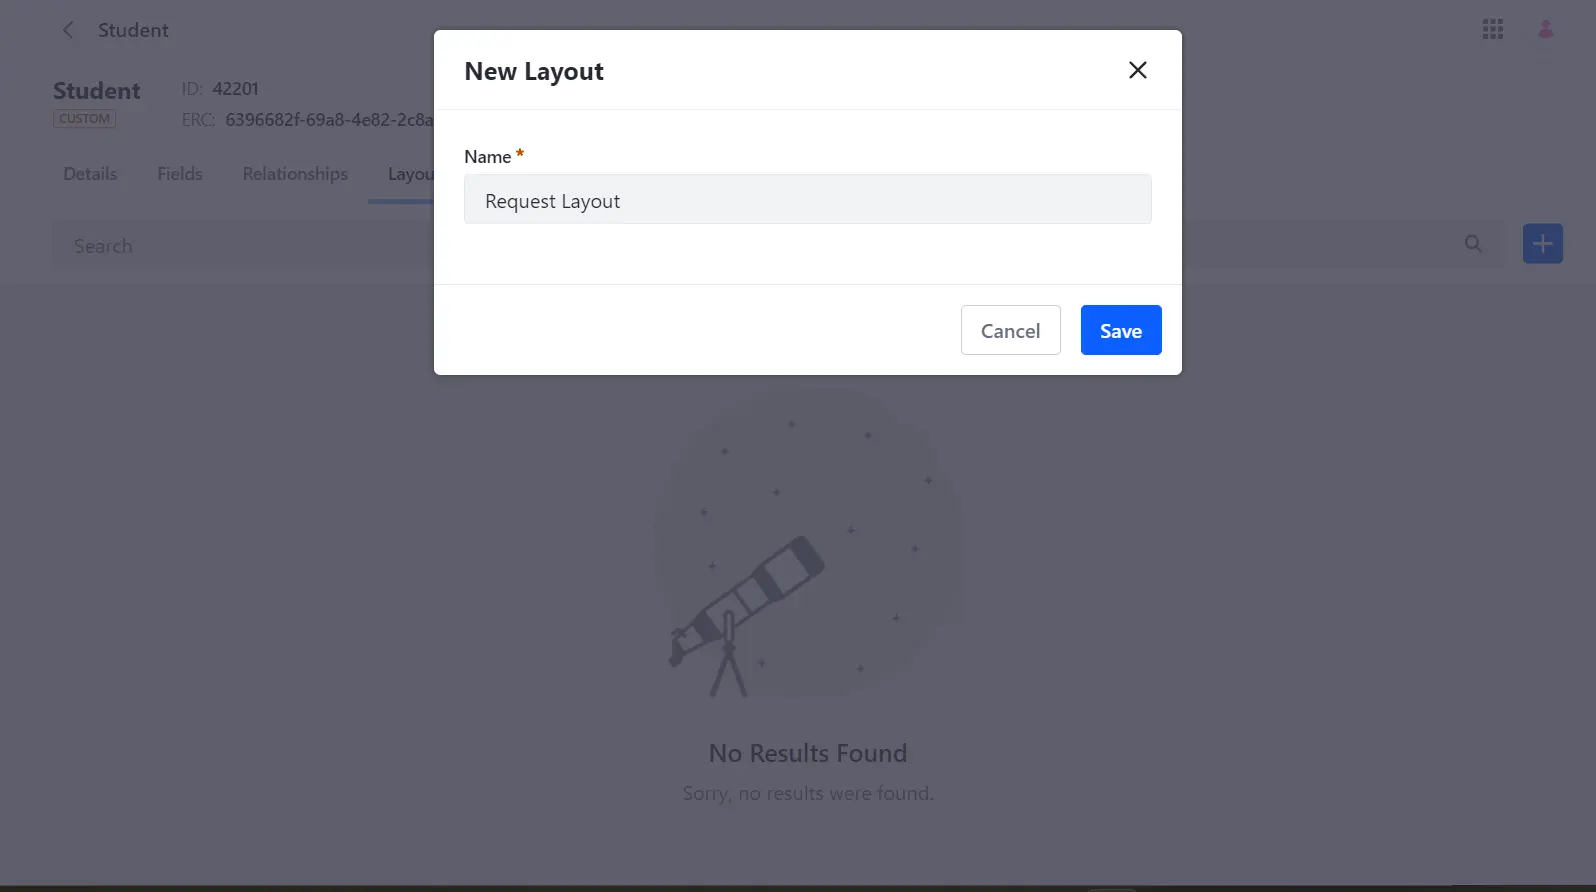
- Go to existing custom object -> open layouts tab -> click on plus icon
- This will open a layout form for the creation of new layout.
- Add Fields tabs:
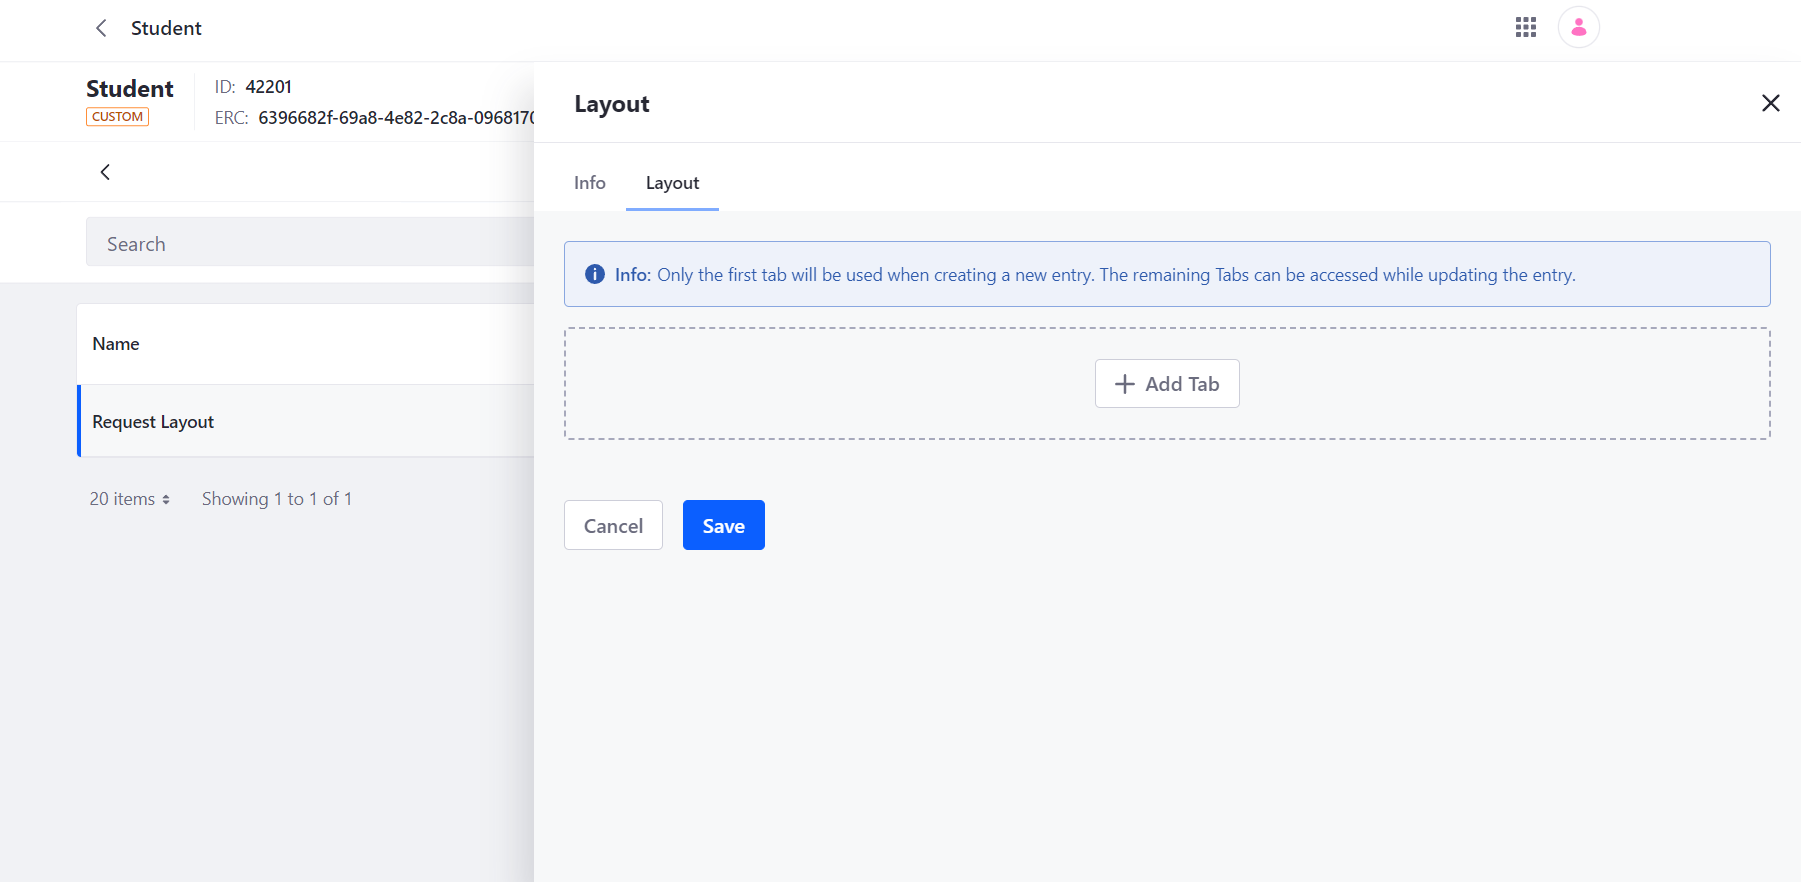
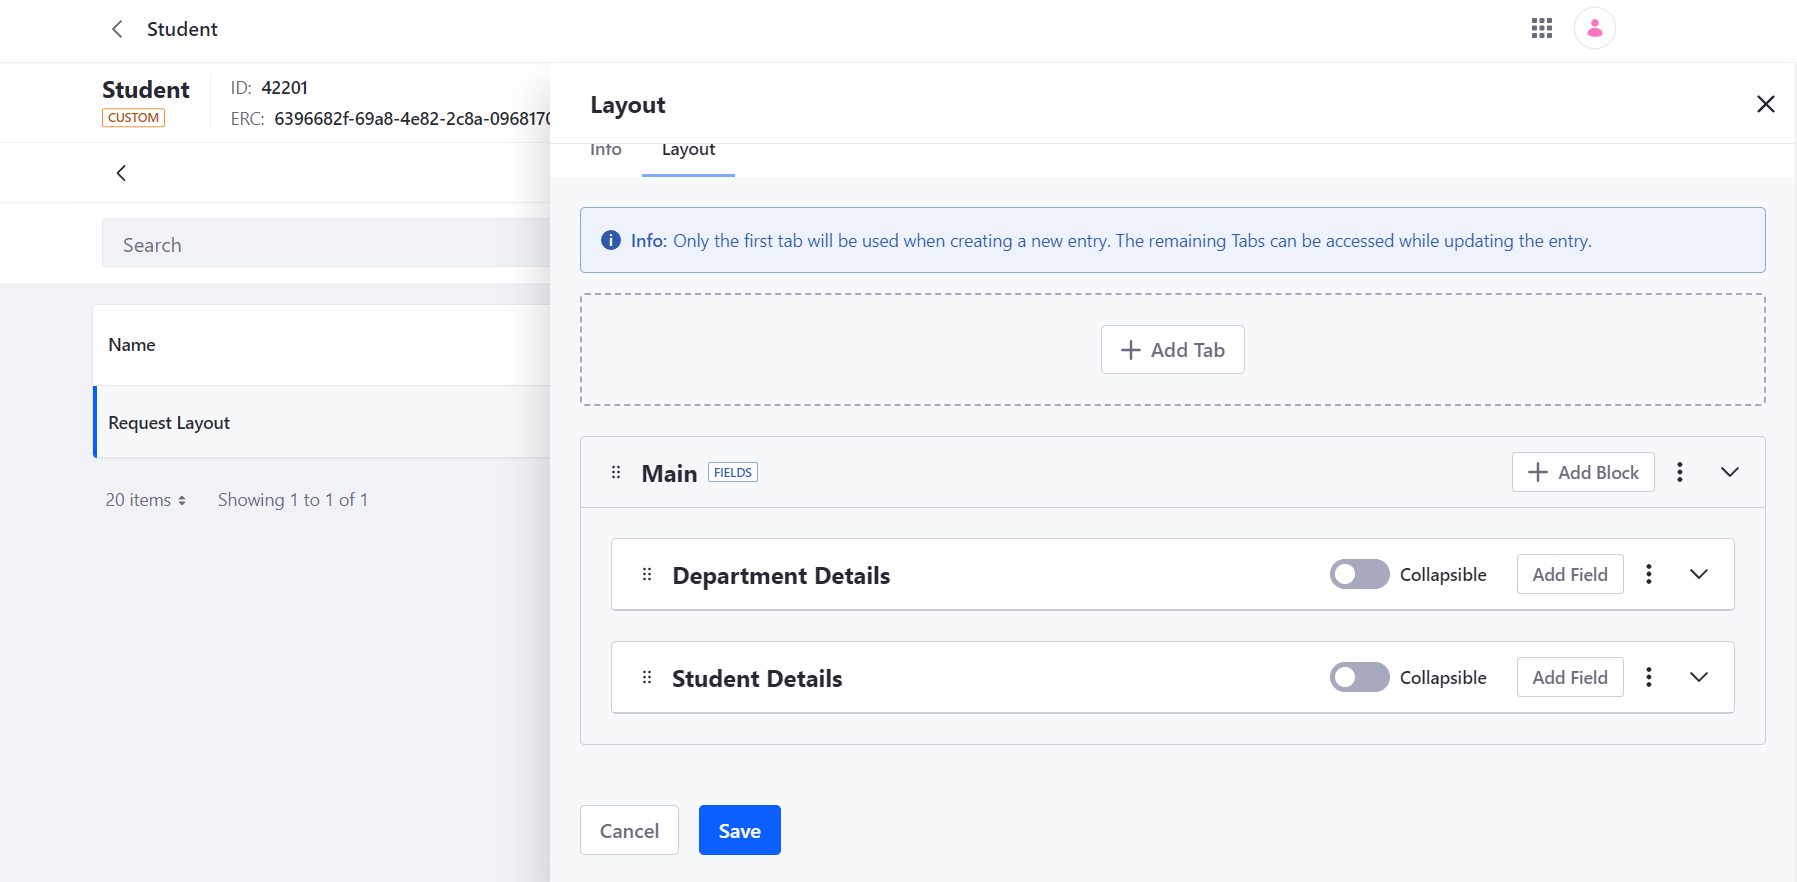
- Go to new created layout and open it.
- Add the new tab in layout.
- Add blocks in the main tab.
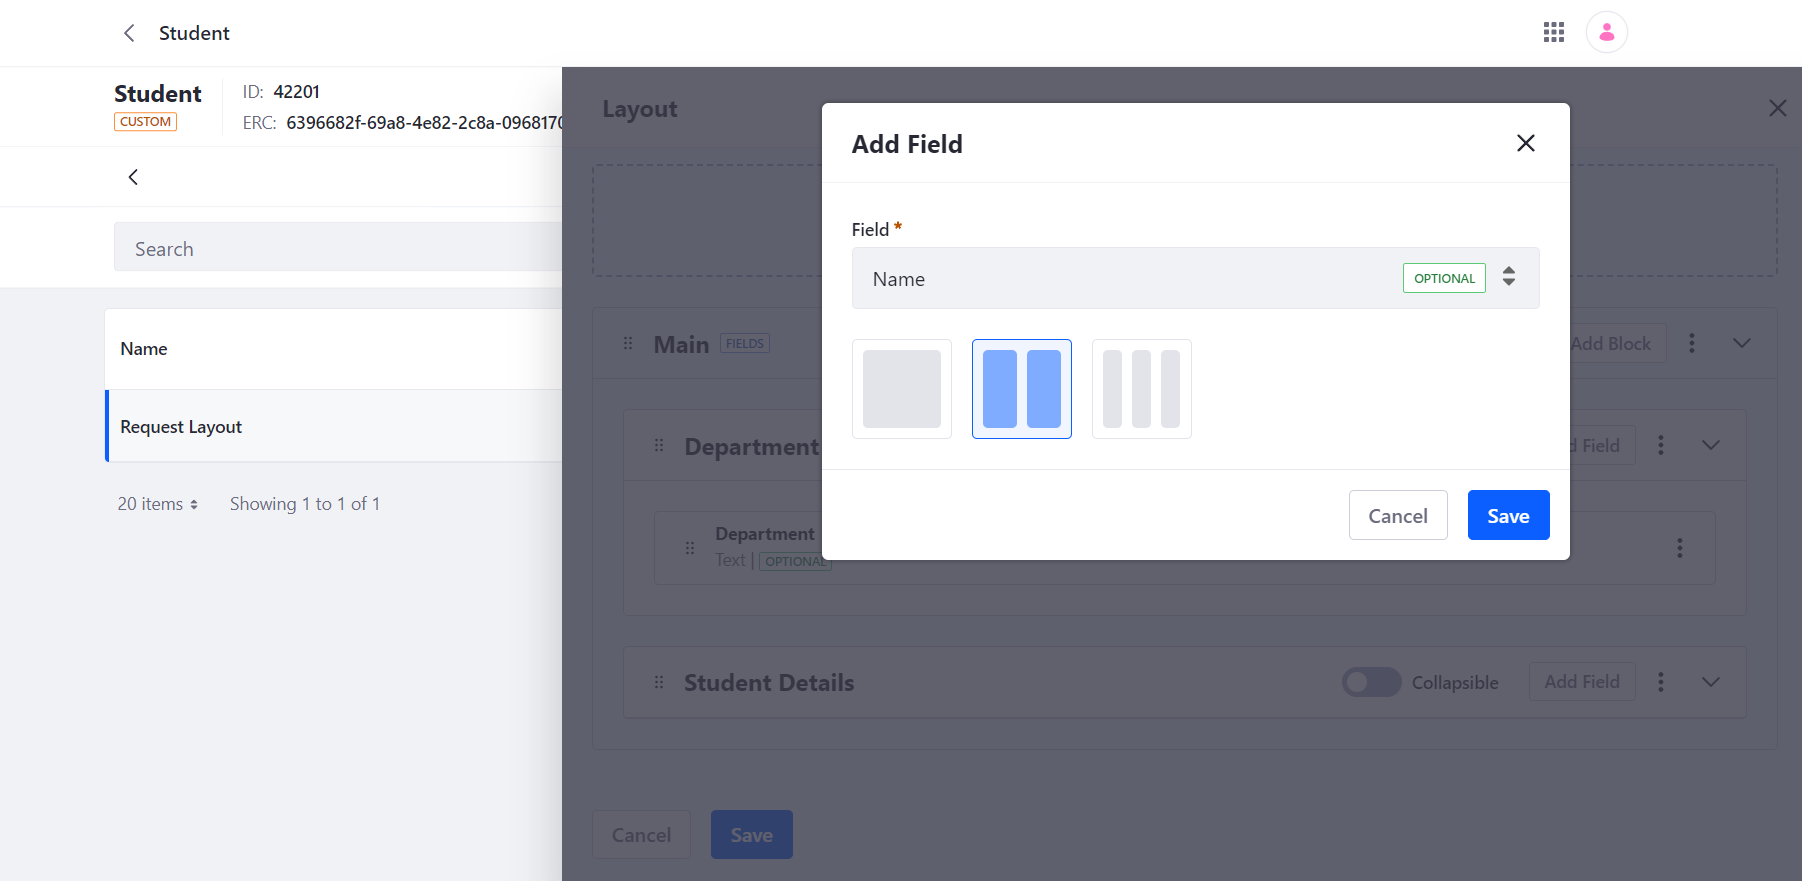
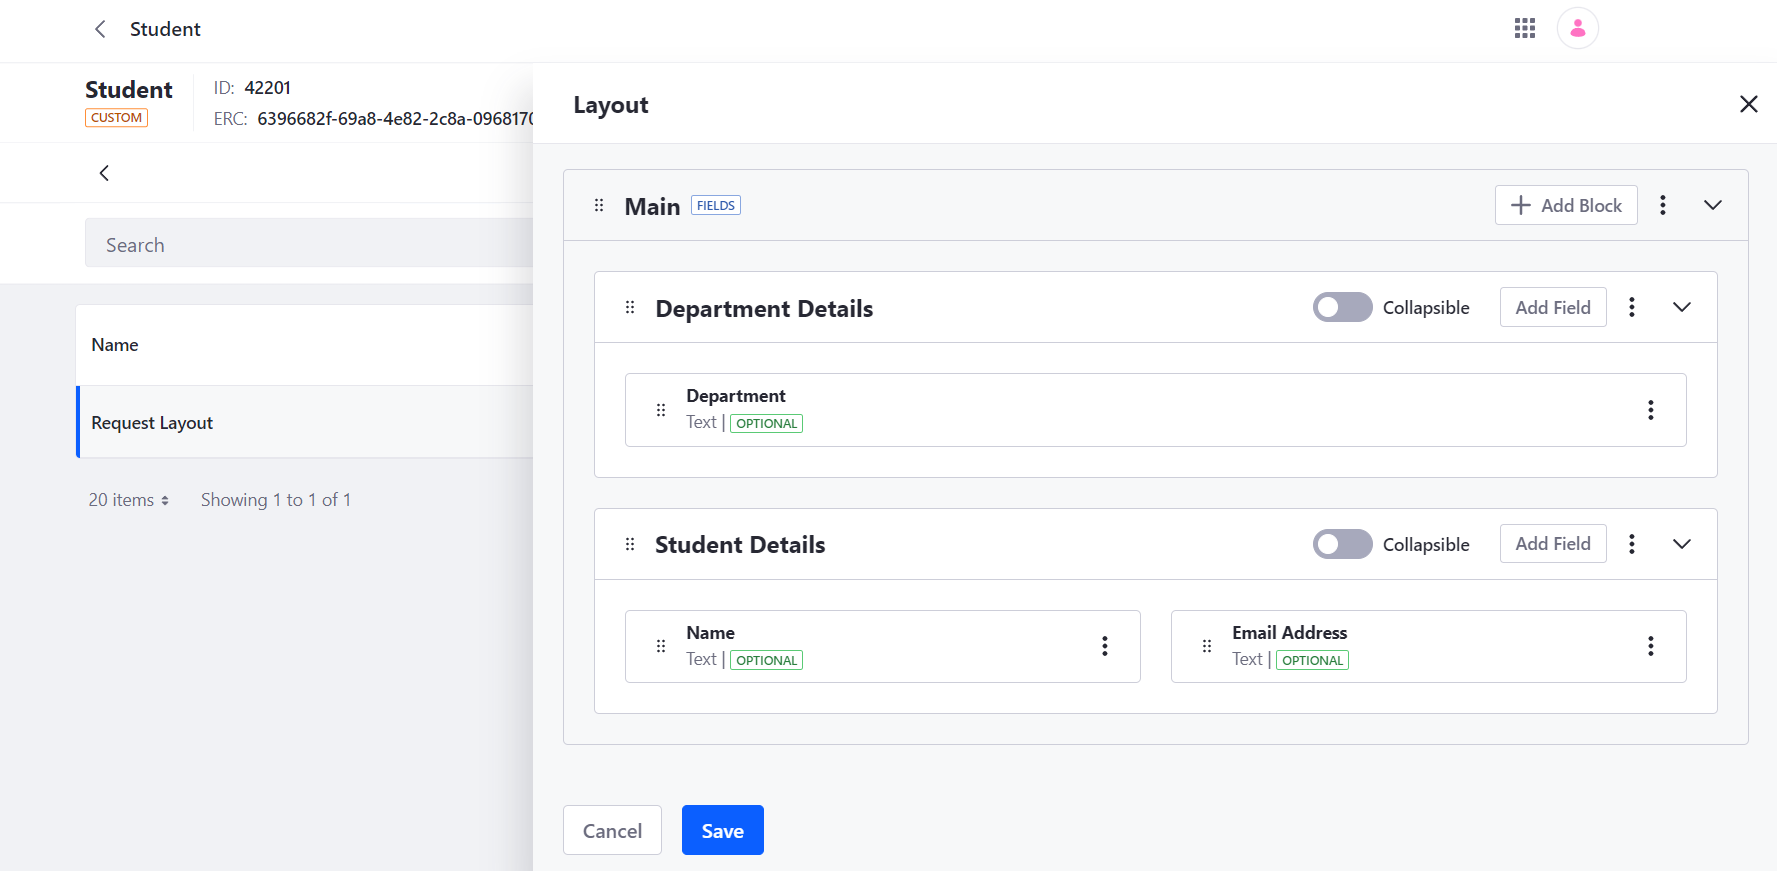
- Add fields in the blocks of the main tab.
- Add Relationship tabs:

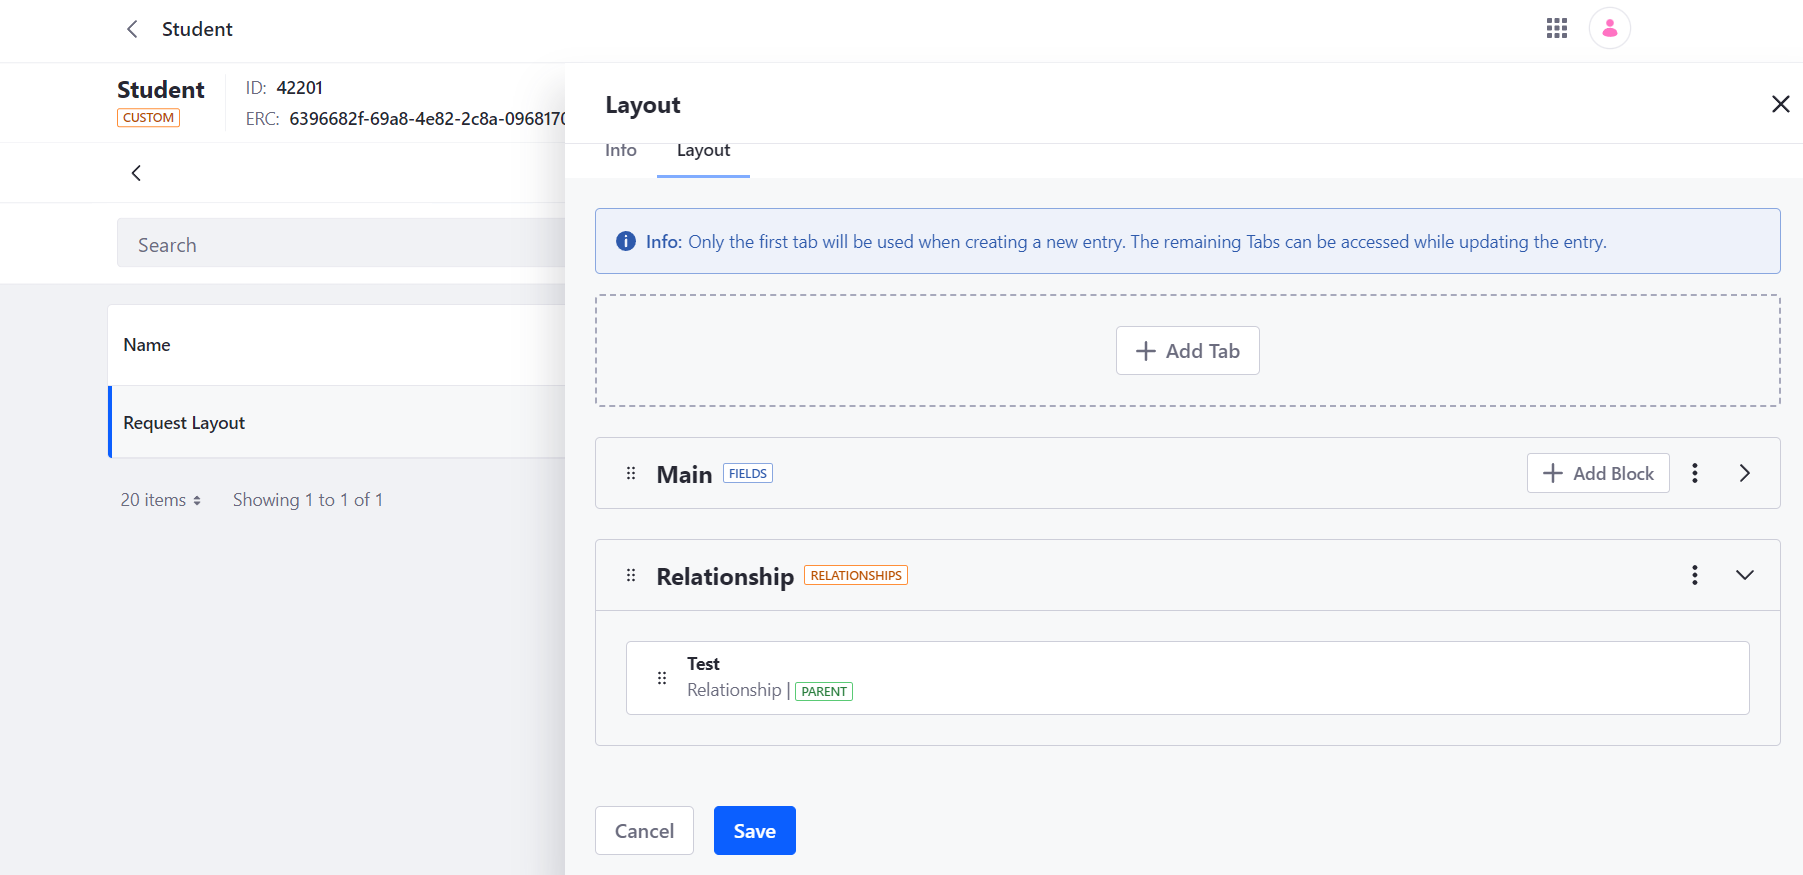
- Add new relationship tab in layout.
- Save the layout and make object’s default layout. Now this layout is used for creating and editing the object’s entries.
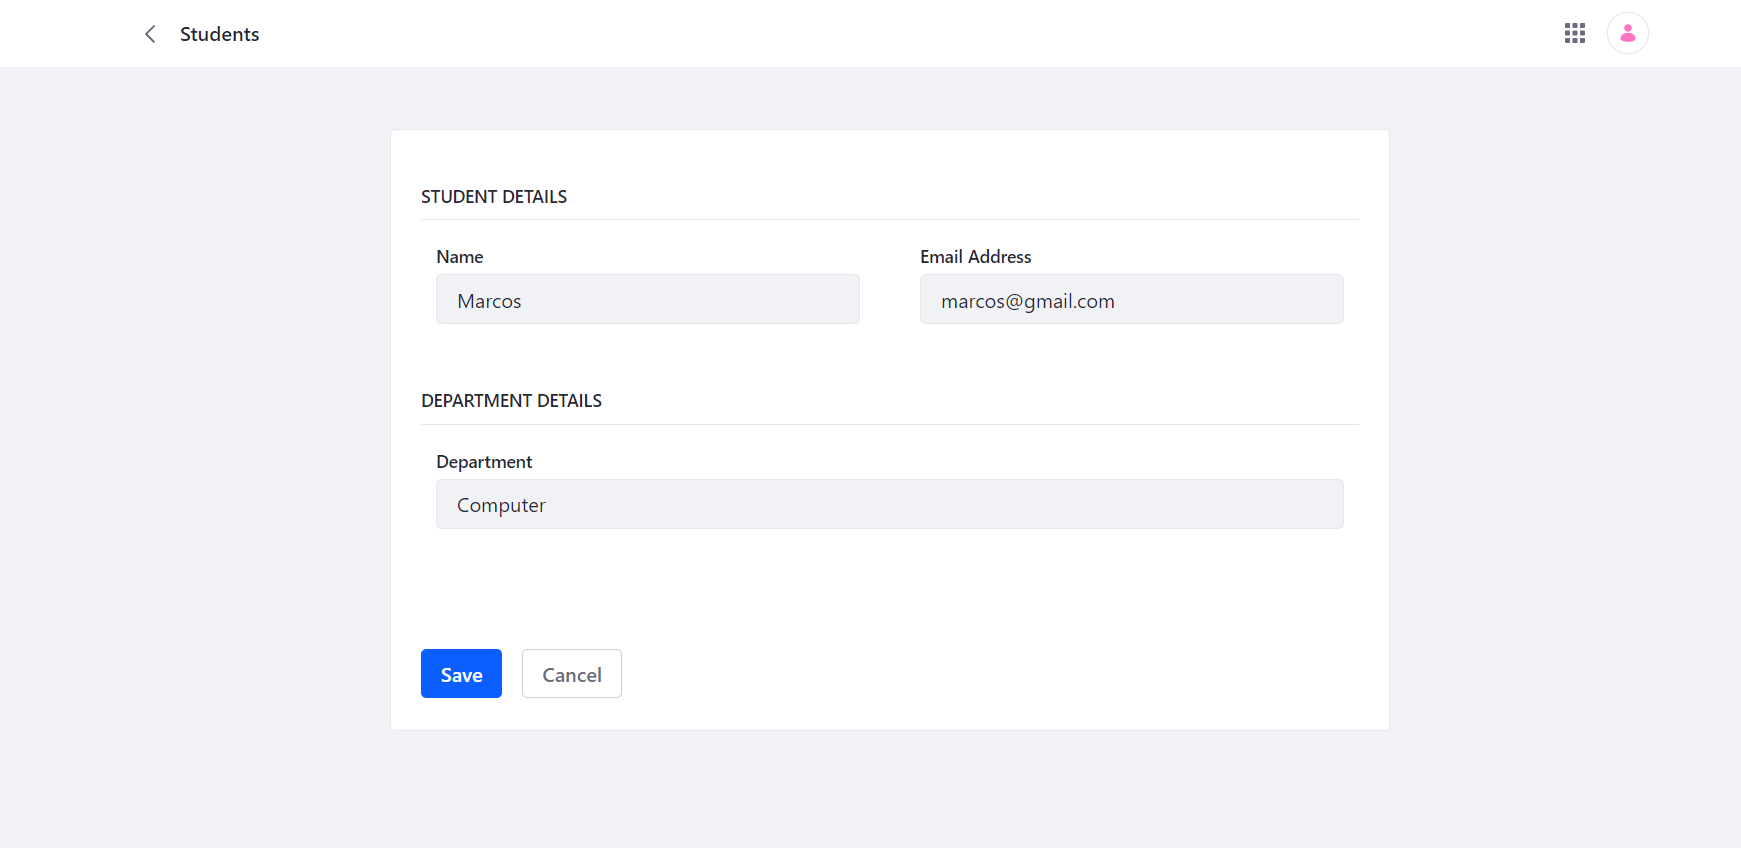
Object View:

- View is used for the how object entries display in the pages.
- Go to existing custom object -> open views tab -> click on plus icon
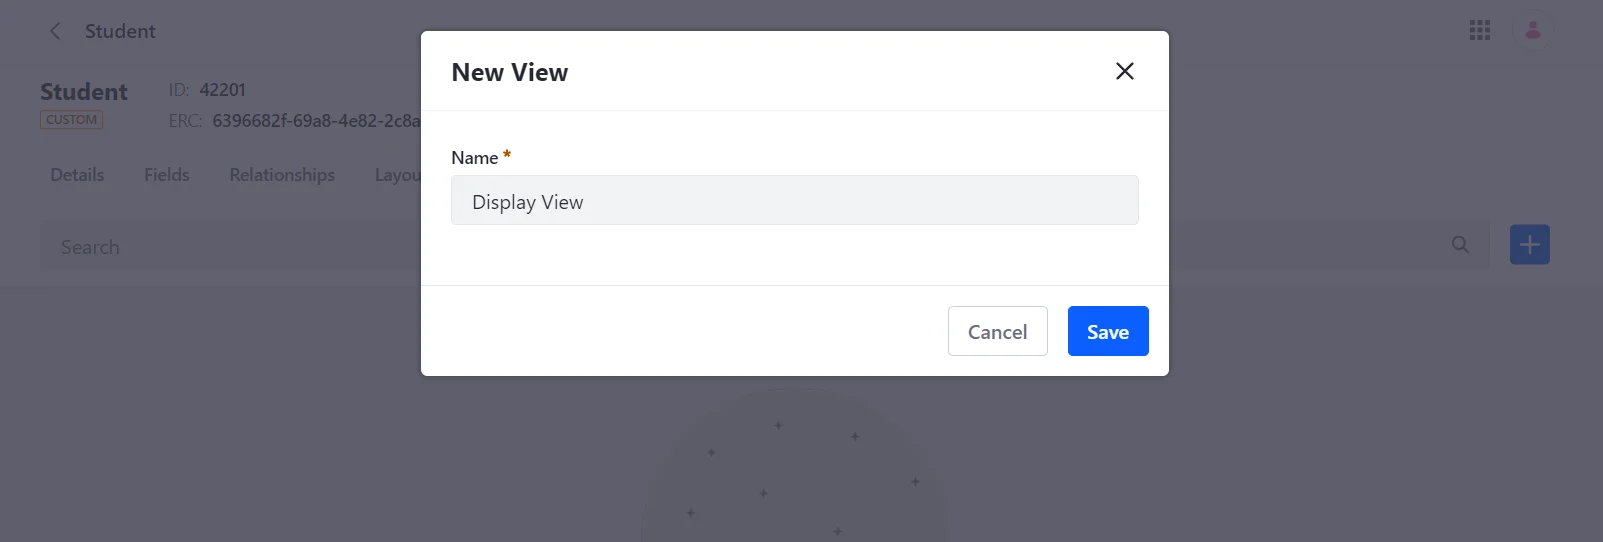

- This will open a view form for the creation of new view.
- To create a display, we use something called a view builder. This lets us choose which columns we want to show in the display.
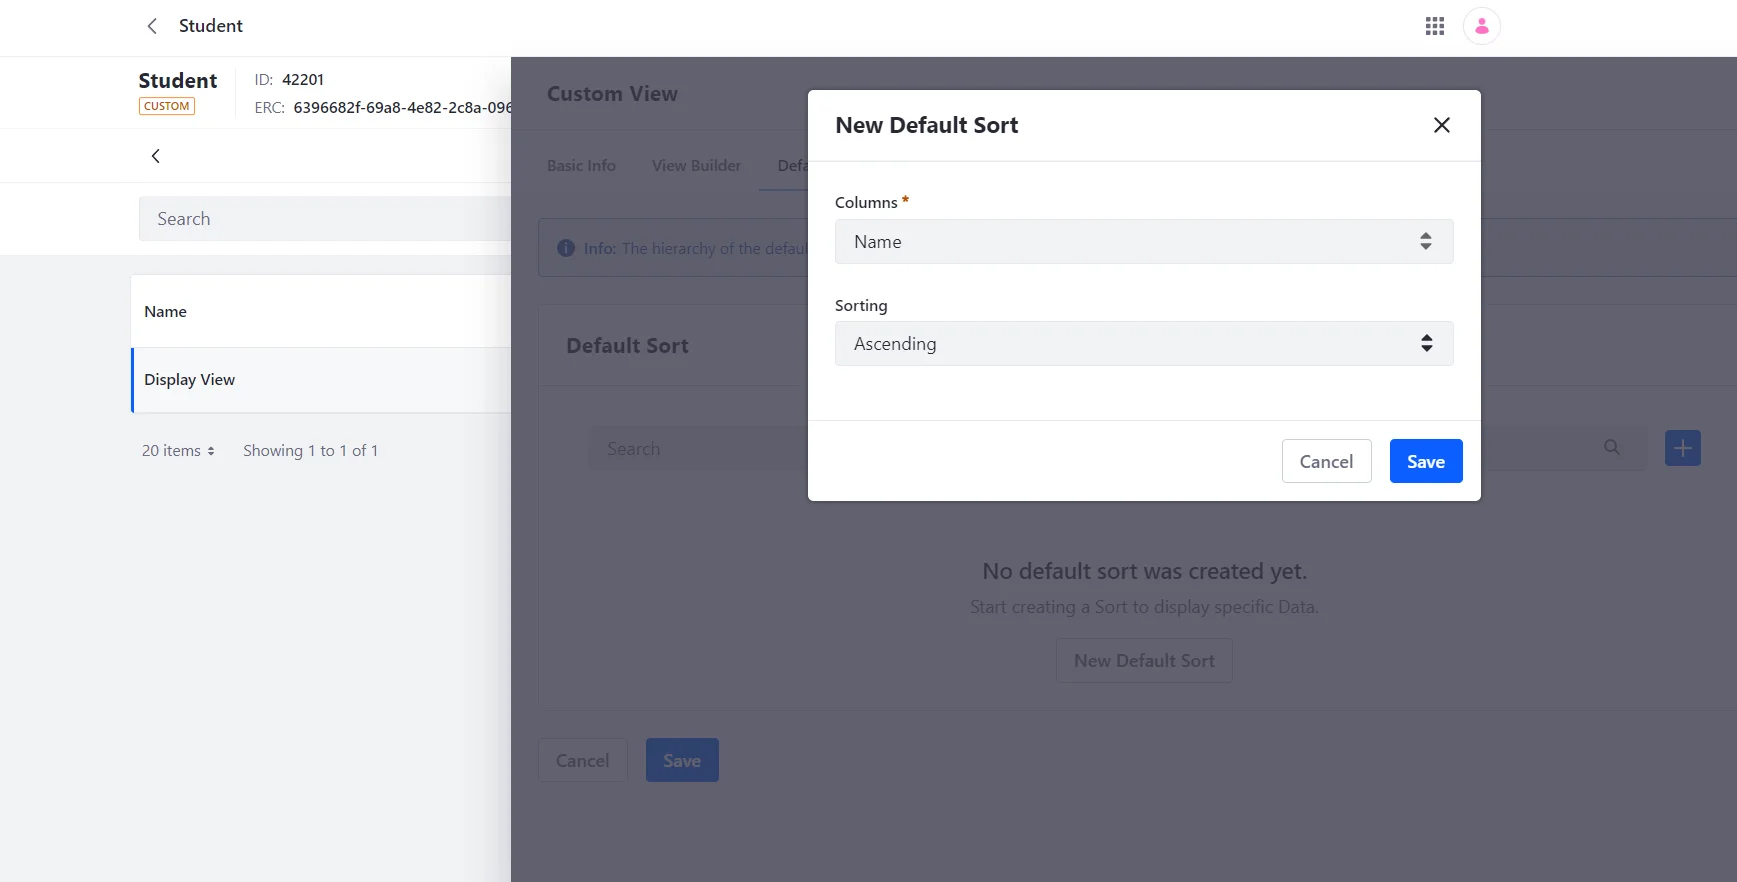
- We use a default sort to sort and display entries based on certain columns.
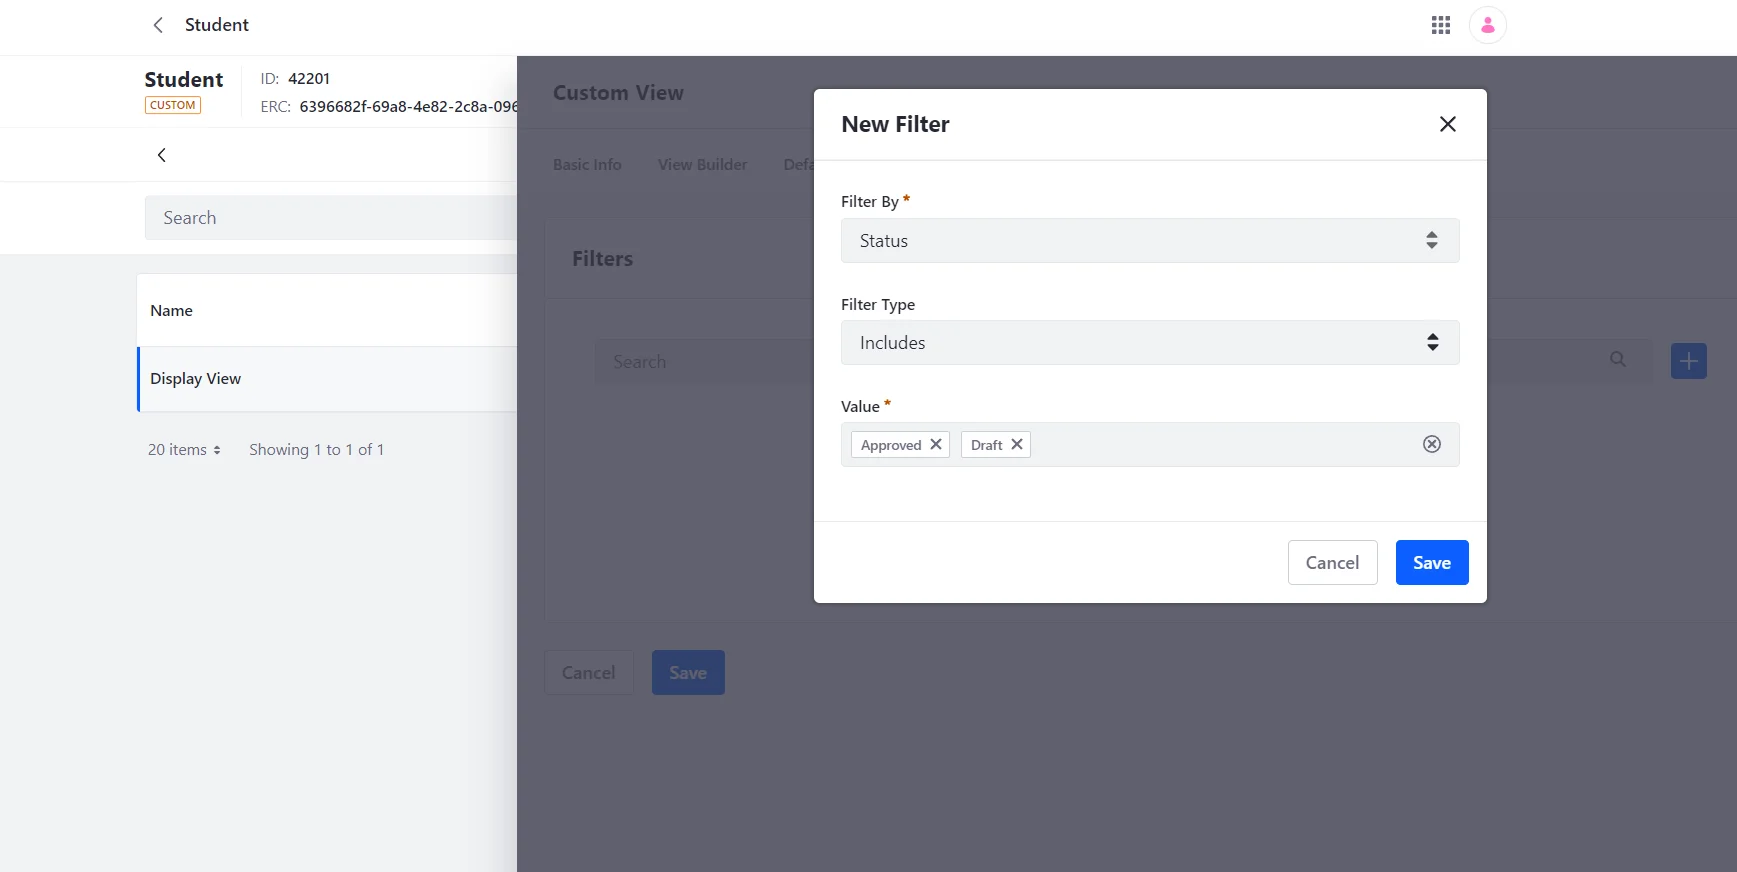
- We use a filter to sort and show information based on specific conditions.
- Save the view and make the object’s default view. This view shows information about the object.
Conclusion of Liferay Objects:
You can create and deliver apps with Liferay Objects without writing code or deploying modules. Since each application created with Objects relates to Liferay's fundamental frameworks, you can create and administer adaptable solutions rapidly that allow you to leverage Liferay DXP to meet your organization's demands while maintaining a smooth user experience.