Overview
SAML stands for Security Assertion Markup Language, which is an XML based framework for authentication and authorization between two entities. Entity stands for service provider and an identity provider. So basically identity provider provides an identity of a user and service provider trust of this user identity.
SAML provides a framework for implementing Single Sign-on. You Will get more information about SAML from following links.
In Liferay, we have a Liferay portal for Identity provider same as the service provider. So in the example, we are taking two Liferay from which one will work as Identity provider & the second one will work as a service provider
SAML Use Cases
1) SSO
2) Attribute-Based authorization service
3) Identity Federation
4) WS-Security
Purpose of SAML
1) Simple password-free login
2) Phishing prevention
3) One click use experience
How to Install SAML in Liferay 7 / DXP
Liferay Provide SAML connector app for Liferay enterprise edition versions. Now for SAML integration in Liferay, we need Liferay 7.0+ version.
1. Download Liferay Connector to SAML 2.0 app from Liferay MarketPlace .
2. Deploy SAML app on your Liferay enterprise edition portal.
3. After Successful Installation of SAML App, You need to restart your Liferay Portal Server.
4. You will get SAML setup portion in Liferay Control Panel.
5. Now you have to configure SAML in your Liferay portal.
How to setup SAML in Liferay 7 / DXP
1. After successful installation of SAML app, you have to open Control Panel of the Liferay portal.
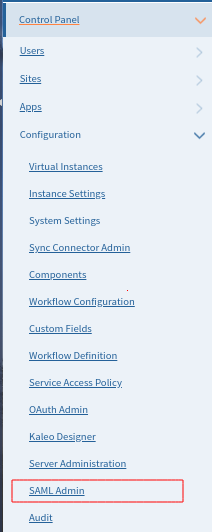
2. You can setup Liferay with SAML by following two ways:
- Using portal-ext.properties
- Using Liferay SAML APP (From UI)
Note: In this example, we are following UI approach of setting up SAML in Liferay.
3. Open SAML configuration from Control Panel.
4. Now setup Identity Provider by selecting Identity Provider and adding Entity Id in SAML configuration section.
5. Setup Service Provider by selecting Service Provider and adding Entity Id in SAML configuration section.
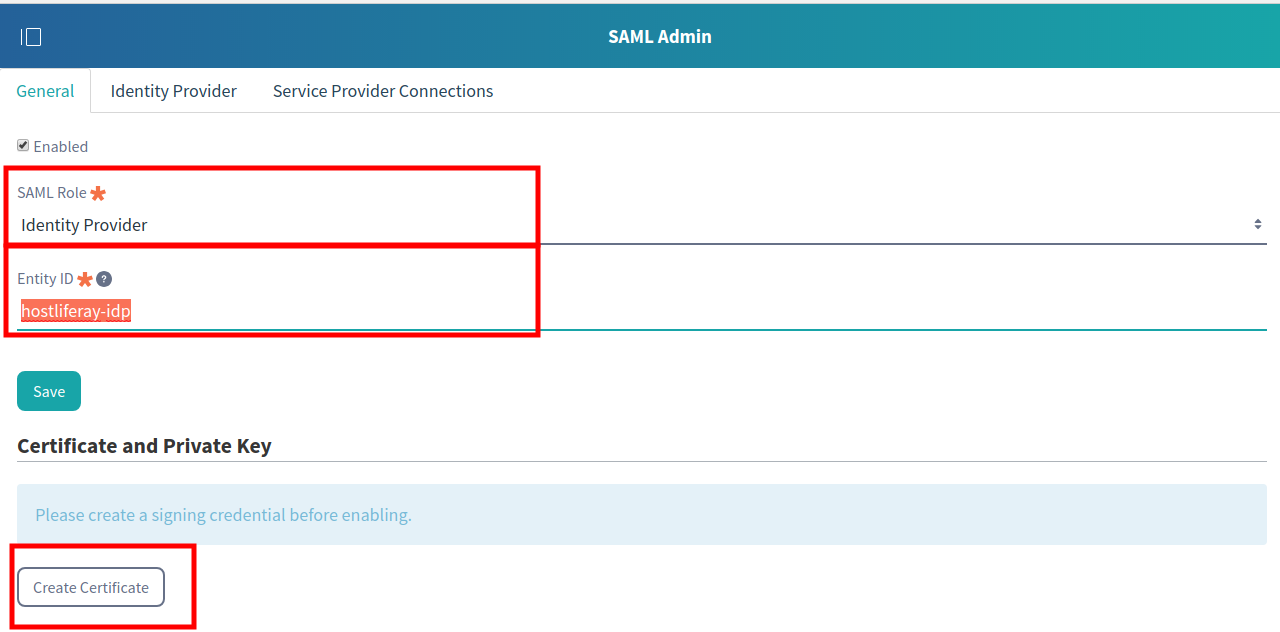
6. Now we have to generate certificate by clicking on create certificate button and fill the required information on the next screen and submit.
Note: For certificate, we have to add information like Common name, Organization, Organization unit, Locality, State, Country, Validity, Key algorithm, Key length and Key password.
7. After that, we have to add details of Identity provider in the service provider configuration section.
8. Now we have to add details of a service provider in the Identity provider configuration section.
Note: We can also add multiple service providers in IDP. Each service providers should be configured to same Identity provider for the authentication.
- For more information about SAML Attributes - Liferay SAML
9. Now enable Identity Provider and Service Provider.
10. If you have setup correctly then you will get XML metadata from this URL. http://localhost:8080/c/portal/saml/metadata
11. It’s Done !!
12. Now If you hit service provider then you will be redirected to the identity provider.
Flow Of SAML in Liferay
We have set up two Liferay from which one will work as an Identity provider and the second one will work as a service provider. How to set Service provider/Identity provider in Liferay that details are already added in this above section.
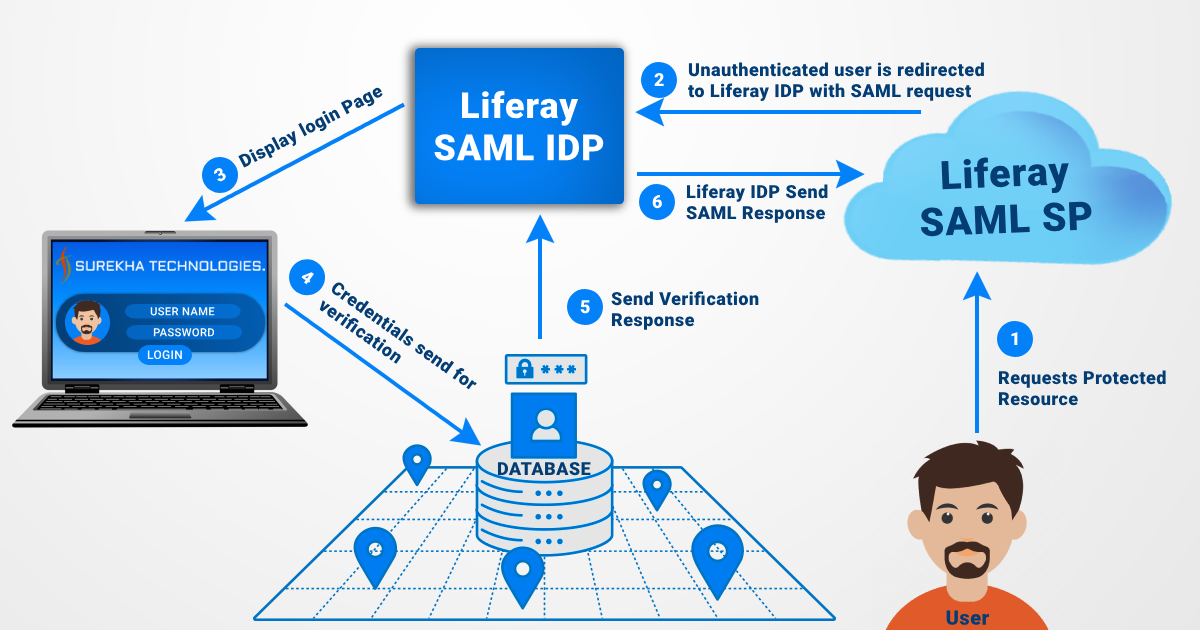
So basically flow of SAML will start from a user access service provider portal and redirect to the identity provider and after that, it will redirect back to the service provider.
1. If a user tries to log in to service provider portal then they will be redirected to the Identity provider to authenticate the user.
2. Identity Provider gets information from a user (Id, Password, Social network details) for authentication.
3. IDP check If a user exists or not in the database. If user not exists then it will create a new user in the database. Then it returns the SAML response accordingly.
4. Service provider checks If a user exists or not and accordingly create the user and logged in. So basically, Identity provider provide an identity of a user to the service provider.
Example
So we will set up two Liferay portal one is running on our machine and the second one is running on virtual machine. I have set up local machine Liferay as an Identity provider and virtual machine Liferay as the service provider.
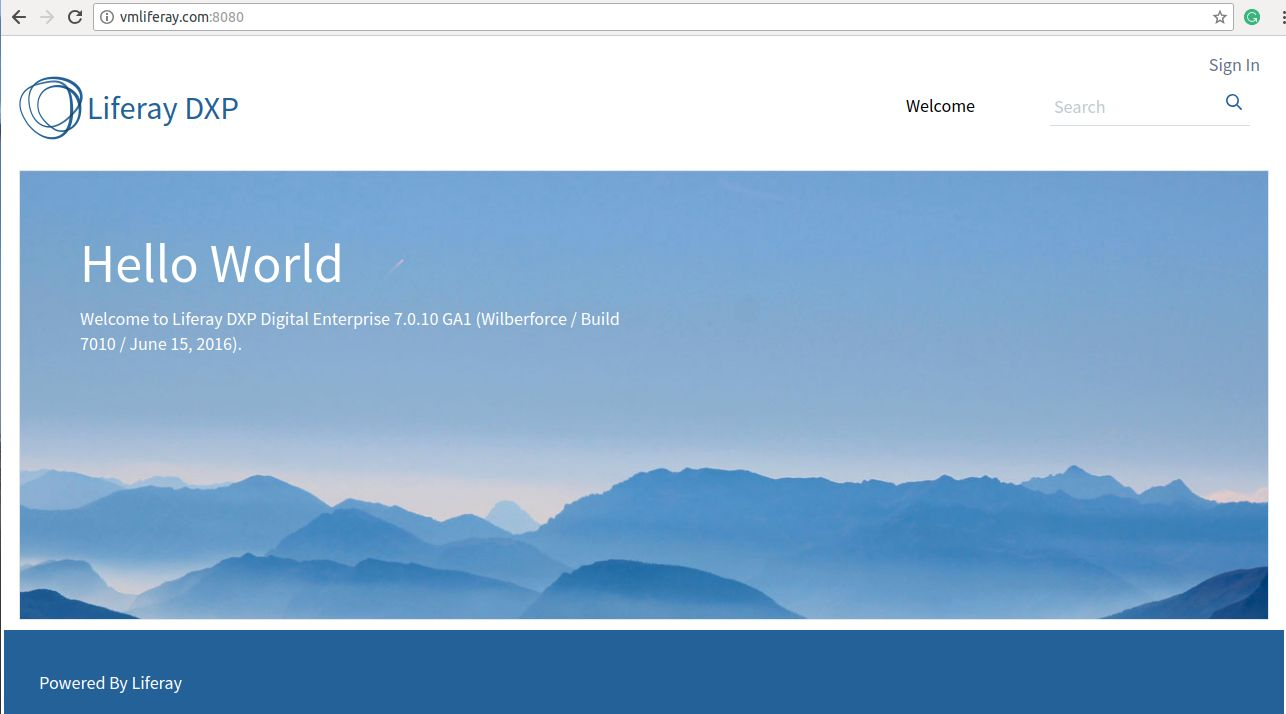
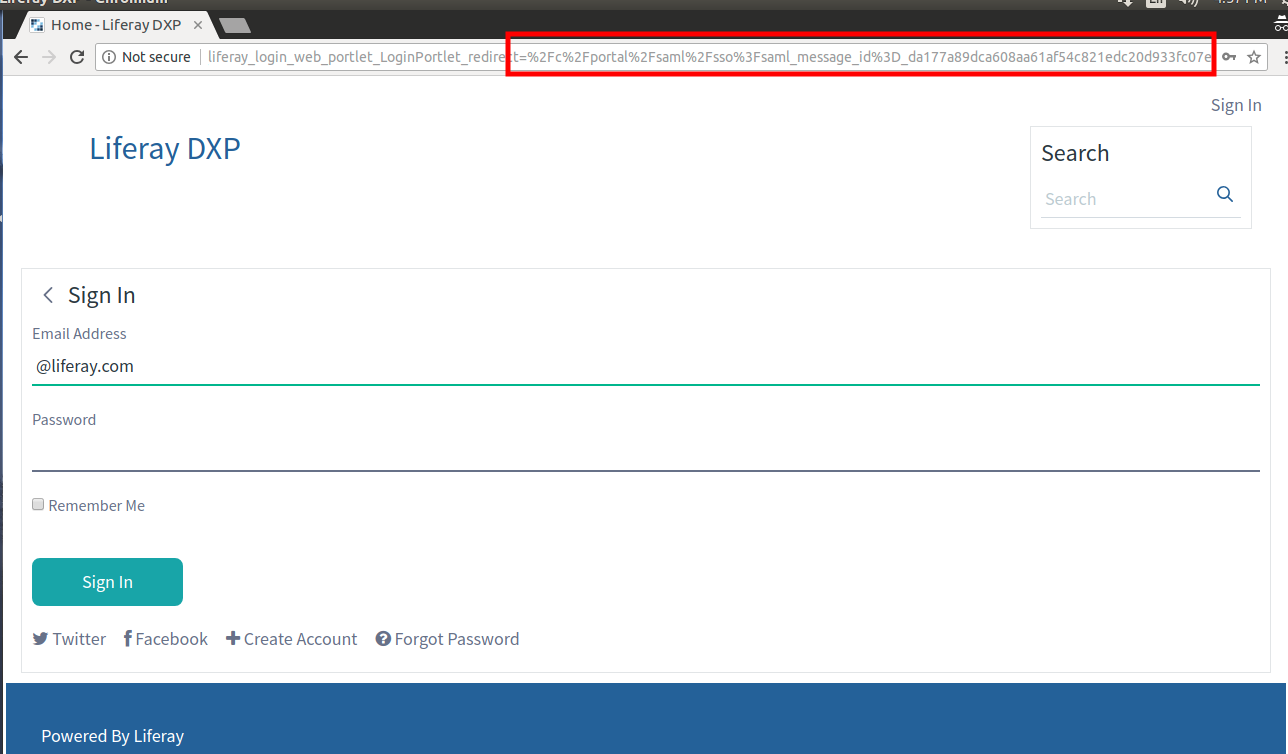
I had tried to Login at http://vmliferay.com:8080/c/portal/login which is service Provider and it will redirect to http://www.lr-localhost.com which is Identity provider with SAML token. You can find in a screenshot.
After filling login credentials and submitting the form Identity provider authenticate a user and return back to the service provider with SAML response.
