Introduction:
At Surekha Technologies, we've been helping businesses streamline their ERP deployments, and one challenge we consistently encounter is the complexity of setting up Odoo with PostgreSQL on AWS. After working with various clients on their Odoo implementations, we decided to develop a standardized approach for Odoo infrastructure automation using Terraform AWS deployment that eliminates the common mistakes we’ve seen in manual setups.
Why We Chose This Approach
Working with Odoo deployments has been a big part of our business for several years now. We've helped everyone from companies getting their first ERP system running to large enterprises migrating from legacy solutions. The manual setup process, especially when configuring Postgres setup on AWS, has often led to inconsistencies between development and production environments. We kept running into the same issues where a client's development environment would work perfectly, but then production would have differences that caused issues later.
That’s why we shifted to deploy Odoo using Terraform because this approach has changed how we make Odoo deployments for our clients, reducing setup time while ensuring consistency across all environments.
This blog covers the important insights our team has gained through years of deploying Odoo for clients. It serves as a guide, covering the strategies we use in our client projects.
In this blog, we will cover:
Configuring AWS infrastructure so that Odoo application has optimal performance.
PostgreSQL configuration best practices, balancing security with performance.
The Terraform modules we have developed and optimized across numerous deployments.
Common mistakes we’ve encountered and the effective solutions we’ve implemented to streamline processes.
Overview of each tool used in this blog:
Amazon Web Services (AWS)
AWS (Amazon Web Services) is a platform where we would create server for hosting the odoo and postgres application docker containers. For our Odoo setup, we'll mainly use EC2 (virtual machines) and VPC. Think of it as renting a data center without worrying about maintaining the actual hardware.
Terraform
Terraform is what we call "Infrastructure as Code" – basically, you write configuration files that describe what you want your infrastructure to look like and Terraform makes it happen. Instead of clicking around in the AWS console, you write everything as code to set up and manage your cloud resources.
PostgreSQL
PostgreSQL is the open-source database that runs behind Odoo .Odoo stores everything here – your customer data, inventory, financial records, the works.
Odoo
Odoo is a tool that can be used by businesses for various purposes such as employee management, inventory management, CRM. It's modular, so you can begin with the basics and expand as your needs grow.
Pre-requisites:
The following prerequisites are required for the odoo setup :
Terraform installed on your local machine. Follow the below mentioned steps for setup.
AWS CLI installed
IAM User Permissions: The IAM user configured through AWS CLI needs to have below permissions for creating EC2 instances, VPCs, security groups, and managing key pairs.
AmazonEC2FullAccess
ec2:DescribeVpcs
ec2:DescribeAvailabilityZones
ec2:DescribeSubnets
ec2:DescribeNetworkInterfaces
1. Install Terraform and AWS CLI
First, we’ll need to install Terraform and the AWS CLI on your local system.
Install Terraform on Ubuntu
sudo apt-get update && sudo apt-get install -y gnupg software-properties-common
wget -O- https://apt.releases.hashicorp.com/gpg | \
gpg --dearmor | \
sudo tee /usr/share/keyrings/hashicorp-archive-keyring.gpg > /dev/null
gpg --no-default-keyring \
--keyring /usr/share/keyrings/hashicorp-archive-keyring.gpg \
--fingerprint
echo "deb [arch=$(dpkg --print-architecture) signed-by=/usr/share/keyrings/hashicorp-archive-keyring.gpg] https://apt.releases.hashicorp.com $(grep -oP '(?<=UBUNTU_CODENAME=).*' /etc/os-release || lsb_release -cs) main" | sudo tee /etc/apt/sources.list.d/hashicorp.list
sudo apt update
sudo apt-get install terraform
Install AWS CLI so that terraform has permission to provision resources in AWS by making API calls:
2. Create Terraform Directory Structure
Move to the desired directory where you want to create terraform files.
Let’s begin by creating a folder structure to organize your Terraform files and configuration:
mkdir SSH-keys
mkdir odoo-conf-files
mkdir -p modules/ec2-instance
mkdir -p modules/key-pair
mkdir -p modules/security-groups

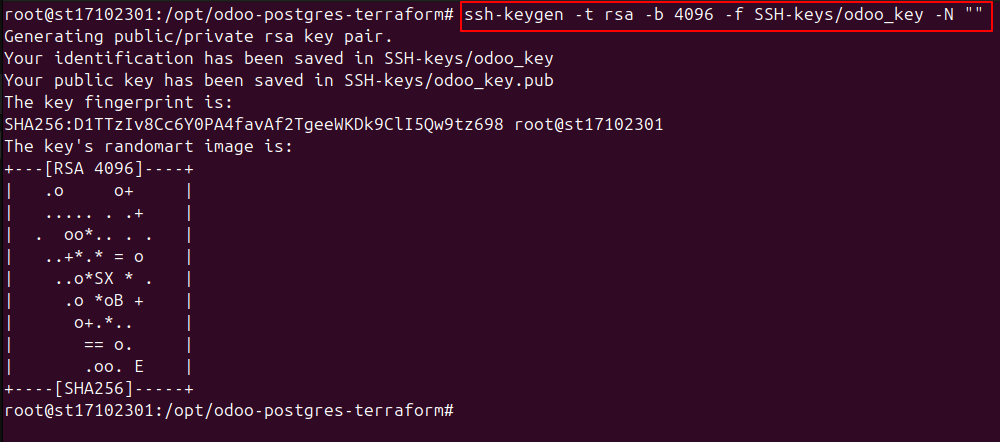
3. Create SSH Key Pair
We need a key pair to access the EC2 instance after it's created:
4. Odoo Configuration and Docker Compose Files
Let’s configure the Odoo application using the odoo.conf and docker-compose.yml files.
Create odoo.conf File
This file will define the Odoo configuration:
nano odoo-conf-files/odoo.conf
[options]
addons_path = /mnt/extra-addons/enterprise-addons, /mnt/extra-addons/custom-addons, /usr/lib/python3/dist-packages/
data_dir = /var/lib/odoo
admin_passwd = admin_password
csv_internal_sep = ,
db_maxconn = 64
db_name =
db_port = 5432
db_template = template1
dbfilter = .*
debug_mode = False
email_from = False
limit_memory_hard = 1677721600
limit_memory_soft = 6291456000
limit_request = 8192
limit_time_cpu = 600
limit_time_real = 1200
list_db = True
log_db = False
log_handler = [':INFO']
log_level = info
logfile = /var/log/odoo/odoo.log
longpolling_port = 8072
max_cron_threads = 2
osv_memory_age_limit = 1.0
osv_memory_count_limit = False
smtp_password = False
smtp_port = 25
smtp_server = localhost
smtp_ssl = False
smtp_user = False
workers = 0
xmlrpc = True
xmlrpc_interface =
;xmlrpc_port = 8069
;xmlrpcs = True
; xmlrpcs_interface =
; xmlrpcs_port = 8071
Create docker-compose.yml File
This file will set up the Docker containers for Odoo and PostgreSQL.
version: '3'
services:
postgres:
image: postgres:13
container_name: postgres-db
ports:
- "5432:5432"
environment:
POSTGRES_DB: postgres
POSTGRES_USER: odoo
POSTGRES_PASSWORD: postgres
volumes:
- ./postgres/data:/var/lib/postgresql/data
- ./postgres/logs:/var/log/postgresql
healthcheck:
test: ["CMD-SHELL", "pg_isready -U odoo"]
interval: 30s
timeout: 10s
retries: 5
restart: always
labels:
- "autoheal=true"
networks:
- default
odoo:
image: odoo:17
container_name: odoo17-web
depends_on:
- postgres
ports:
- "8069:8069"
- "8072:8072"
environment:
- HOST=postgres
- USER=odoo
- PASSWORD=postgres
volumes:
- ./extra-addons/enterprise-addons:/mnt/extra-addons/enterprise-addons
- ./extra-addons/custom-addons:/mnt/extra-addons/custom-addons
- ./conf/odoo.conf:/etc/odoo/odoo.conf
- ./logs:/var/log/odoo
- odoo17_web_data:/var/lib/odoo
healthcheck:
test: ["CMD", "curl", "--insecure", "--fail", "http://localhost:8069"]
interval: 30s
timeout: 10s
retries: 3
start_period: 15s
restart: always
stdin_open: true
tty: true
labels:
- "autoheal=true"
networks:
- default
volumes:
odoo17_web_data:
networks:
default:
external:
name: odoo-docker-network
5. Create User Data Script for EC2 Setup
Create a user-data.sh script to install Docker, Docker Compose, and other dependencies on the EC2 instance.
#!/bin/bash
# Update and install required packages
sudo apt-get update -y
sudo apt-get upgrade -y
DEBIAN_FRONTEND=noninteractive apt-get install -y apt-transport-https ca-certificates curl gnupg lsb-release software-properties-common
mkdir -p /etc/apt/keyrings
# Set up the Docker GPG key and repo
curl -fsSL https://download.docker.com/linux/ubuntu/gpg | gpg --dearmor -o /etc/apt/keyrings/docker.gpg
chmod a+r /etc/apt/keyrings/docker.gpg
# Add the repository to Apt sources:
echo "deb [arch=$(dpkg --print-architecture) signed-by=/etc/apt/keyrings/docker.gpg] https://download.docker.com/linux/ubuntu $(lsb_release -cs) stable" > /etc/apt/sources.list.d/docker.list
sudo apt-get update -y
sudo apt-get install -y docker-ce docker-ce-cli containerd.io docker-buildx-plugin docker-compose-plugin
# Start and enable Docker service
sudo systemctl start docker
sudo systemctl enable docker
while ! sudo systemctl is-active --quiet docker; do
echo "Waiting for Docker service to start..."
sleep 5
done
#Adding the ubuntu user to docker group
sudo usermod -aG docker ubuntu
#Creating folder structure for odoo
sudo mkdir -p /home/ubuntu/odoo
sudo chown -R ubuntu:root /home/ubuntu/odoo
sudo chmod -R 700 /home/ubuntu/odoo
sudo mkdir -p /home/ubuntu/odoo/logs
sudo chmod 777 -R /home/ubuntu/odoo/logs
sudo mkdir -p /home/ubuntu/odoo/conf
sudo mkdir -p /home/ubuntu/odoo/extra-addons
sudo mkdir -p /home/ubuntu/odoo/extraaddons/custom-addons
sudo mkdir -p /home/ubuntu/odoo/extra-addons/enterprise-addons
sudo chmod 775 -R /home/ubuntu/odoo/extra-addons
sudo mkdir -p /home/ubuntu/odoo/postgres/data
sudo mkdir -p /home/ubuntu/odoo/postgres/logs
sudo chown -R ubuntu:root /home/ubuntu/odoo
docker network create odoo-docker-network
# Create a completion marker file
touch /home/ubuntu/odoo/.setup-complete
6. Create Terraform Configuration Files
Now, let’s set up the Terraform files to define the infrastructure.
Main.tf : This file defines the resources we’ll be creating, such as EC2 instances and modules:
terraform {
required_providers {
aws = {
source = "hashicorp/aws"
version = "6.6.0"
}
}
}
provider "aws" {
region = "ap-south-1"
}
module "key_pair" {
source = "./modules/key-pair"
public_key_path = var.public_key_path
key_name = var.key_name
}
module "security_groups" {
source = "./modules/security-groups"
}
module "ec2_instance" {
source = "./modules/ec2-instance"
ami = var.ami
instance_type = var.instance_type
key_name = module.key_pair.key_name
security_group_id = module.security_groups.security_group_id
user_data_file = var.user_data_file
private_key_path = var.private_key_path
compose_file_path = var.compose_file_path
odoo_conf_path = var.odoo_conf_path
volume_size = var.volume_size
volume_type = var.volume_type
}
Note:
Variables.tf : Define all variables for EC2 instance, SSH keys, and other configurations:
variable "key_name" {}
variable "public_key_path" {}
variable "ami" {}
variable "instance_type" {}
variable "private_key_path" {}
variable "compose_file_path" {}
variable "odoo_conf_path" {}
variable "volume_size" {}
variable "user_data_file" {}
variable "volume_type" {}
Outputs.tf : Define outputs to capture information like the EC2 instance public IP and DNS:
output "odoo_instance_public_ip" {
value = module.ec2_instance.instance_public_ip
description = "Odoo instance public ip"
}
output "odoo_instance_public_dns" {
value = module.ec2_instance.instance_public_dns
}
output "odoo_instance_private_IP" {
value = module.ec2_instance.instance_private_ip
}
7. Create Modules for EC2, Key-pair, and Security Groups
Each module represents a specific part of the infrastructure setup. These include the EC2 instance, key pair, and security groups.
EC2 Instance Module
The EC2 instance module will create the instance, configure SSH access, and upload the necessary files.
main.tf file for module of EC2-instance:
resource "aws_instance" "Odoo-server" {
ami = var.ami
instance_type = var.instance_type
key_name = var.key_name
vpc_security_group_ids = [var.security_group_id]
user_data = file(var.user_data_file)
root_block_device {
volume_size = var.volume_size
volume_type = var.volume_type
encrypted = true
}
tags = {
Name = var.instance_name
}
}
resource "null_resource" "upload_config" {
depends_on = [aws_instance.Odoo-server]
connection {
type = "ssh"
user = "ubuntu"
private_key = file(var.private_key_path)
host = aws_instance.Odoo-server.public_ip
timeout = "10m"
}
provisioner "remote-exec" {
inline = [
"echo 'Waiting for setup to complete...'",
"while [ ! -f /home/ubuntu/odoo/.setup-complete ]; do echo 'Still waiting...'; sleep 10; done",
"echo 'Setup completed. Proceeding...'"
]
}
provisioner "file" {
source = var.compose_file_path
destination = "/home/ubuntu/odoo/docker-compose.yml"
}
provisioner "file" {
source = var.odoo_conf_path
destination = "/home/ubuntu/odoo/conf/odoo.conf"
}
provisioner "remote-exec" {
inline = [
"echo 'Starting Docker Compose...'",
"cd /home/ubuntu/odoo",
# Try without sudo first, then with sudo if needed
"docker compose up -d || sudo docker compose up -d",
"echo 'Docker Compose started successfully'"
}
}
outputs.tf file for EC2-instance module:
output "instance_public_ip"{
value = aws_instance.Odoo-server.public_ip
}
output "instance_public_dns"{
value = aws_instance.Odoo-server.public_dns
}
output "instance_private_ip"{
value = aws_instance.Odoo-server.private_ip
}
variables.tf file for EC2-instance module:
variable "ami" {}
variable "instance_type" {}
variable "key_name" {}
variable "security_group_id"{}
variable "user_data_file" {}
variable "volume_size" {
default = 30
}
variable "volume_type" {}
variable "instance_name" {
default = "Odoo-instance"
}
variable "private_key_path" {}
variable "compose_file_path"{}
variable "odoo_conf_path"{}
Key-pair Module
The key-pair module generates the SSH key for accessing the EC2 instance.
main.tf file for module of Key-pair:
resource "aws_key_pair" "instance_key_pair" {
key_name = var.key_name
public_key = file(var.public_key_path)
}
outputs.tf file for key-pair module :
output "key_name"{
value = aws_key_pair.instance_key_pair.key_name
}
variables.tf file for key-pair module :
variable "public_key_path"{}
variable "key_name"{}
Security Groups Module
The security group module will create the required security group rules for accessing Odoo and PostgreSQL.
main.tf file for module of security-groups:
resource "aws_default_vpc" "instance_default_vpc" {
tags = {
Name = "default_VPC"
}
}
resource "aws_security_group" "Odoo-SG" {
name = "Odoo-SG"
description = "Odoo Postgres Security Group"
vpc_id = aws_default_vpc.instance_default_vpc.id
tags = {
Name = "Odoo-SG"
}
ingress {
from_port = 22
to_port = 22
protocol = "tcp"
cidr_blocks = ["0.0.0.0/0"]
}
ingress {
from_port = 80
to_port = 80
protocol = "tcp"
cidr_blocks = ["0.0.0.0/0"]
}
ingress {
from_port = 8069
to_port = 8069
protocol = "tcp"
cidr_blocks = ["0.0.0.0/0"]
}
egress {
from_port = 0
to_port = 0
protocol = "-1"
cidr_blocks = ["0.0.0.0/0"]
}
}
outputs.tf file for security-groups module :
output "vpc_id" {
value = aws_default_vpc.instance_default_vpc.id
}
output "security_group_id"{
value = aws_security_group.Odoo-SG.id
}
Finally create terraform.tfvars file to pass environment variables to all modules:
You can even customise the file, based on your requirements of usage.
key_name = "odoo_key"
public_key_path = "./SSH-keys/odoo_key.pub"
private_key_path = "./SSH-keys/odoo_key"
ami = "ami-0f918f7e67a3323f0"
instance_type = "t3.large"
user_data_file = "./user-data.sh"
compose_file_path = "./odoo-conf-files/docker-compose.yml"
odoo_conf_path = "./odoo-conf-files/odoo.conf"
volume_size = 30
volume_type = "gp3"
8. Apply the Terraform Configuration
Once you’ve set up all the configuration files, you can proceed with applying the Terraform configuration.
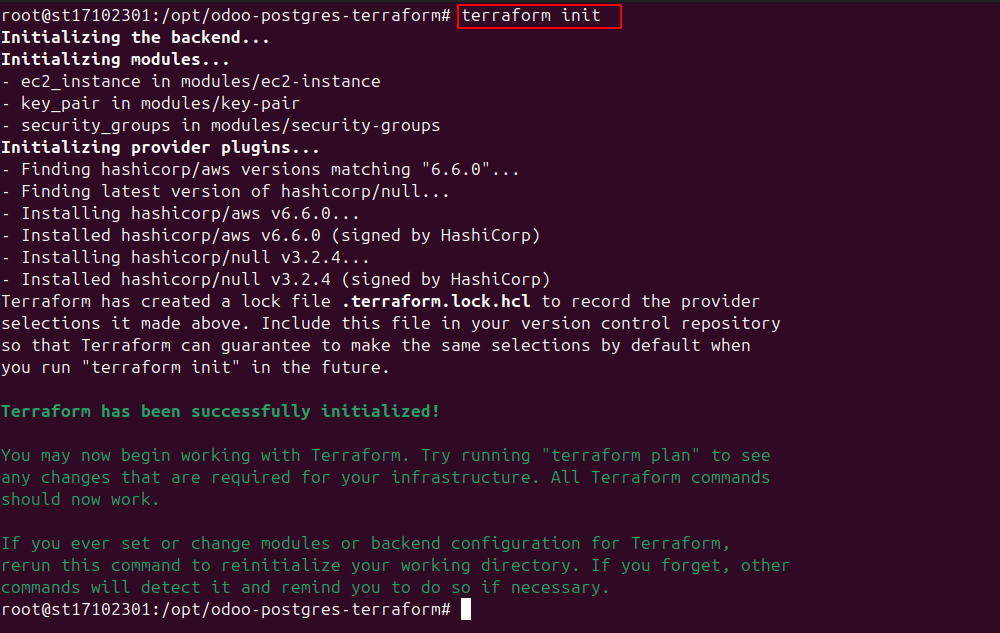
Firstly, initialize Terraform to create all the providers mentioned:
Format the Terraform code to correct the indentation of Terraform files:

Validate the syntax of terraform code as:

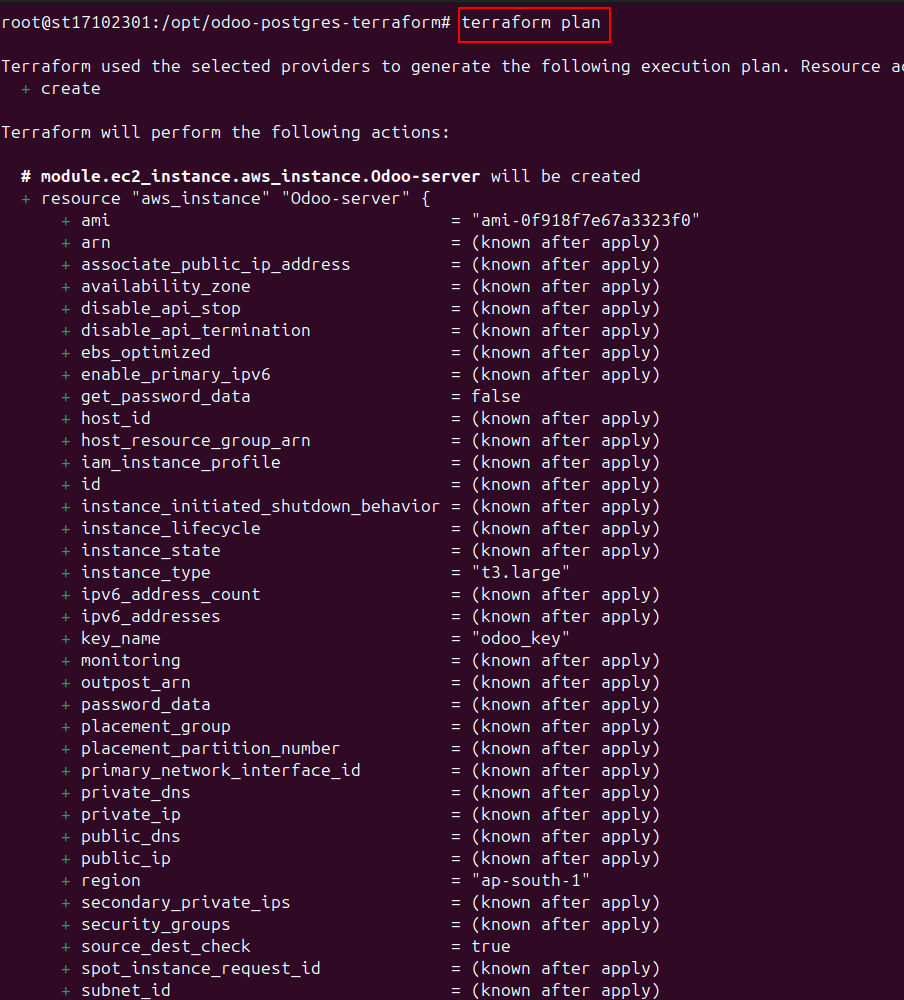
To see what resources would be created after applying the terraform code:
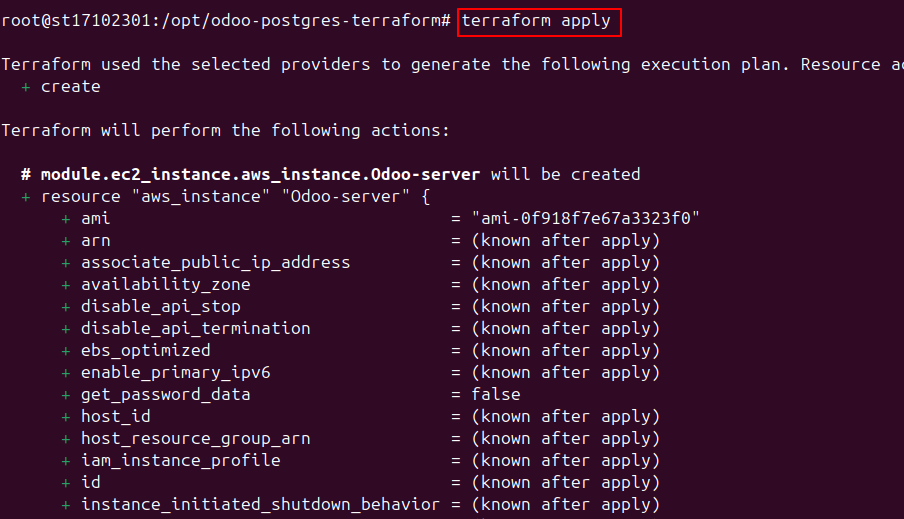
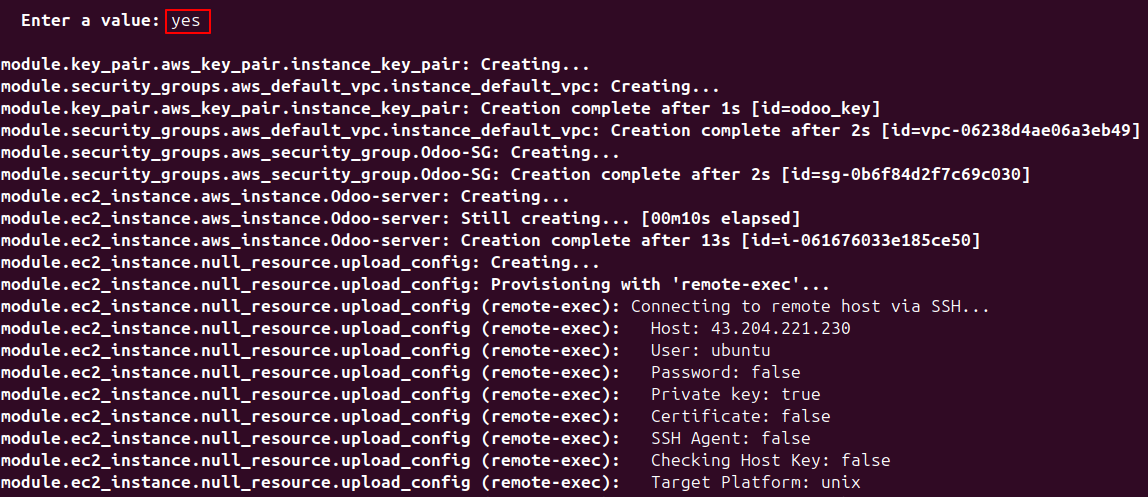
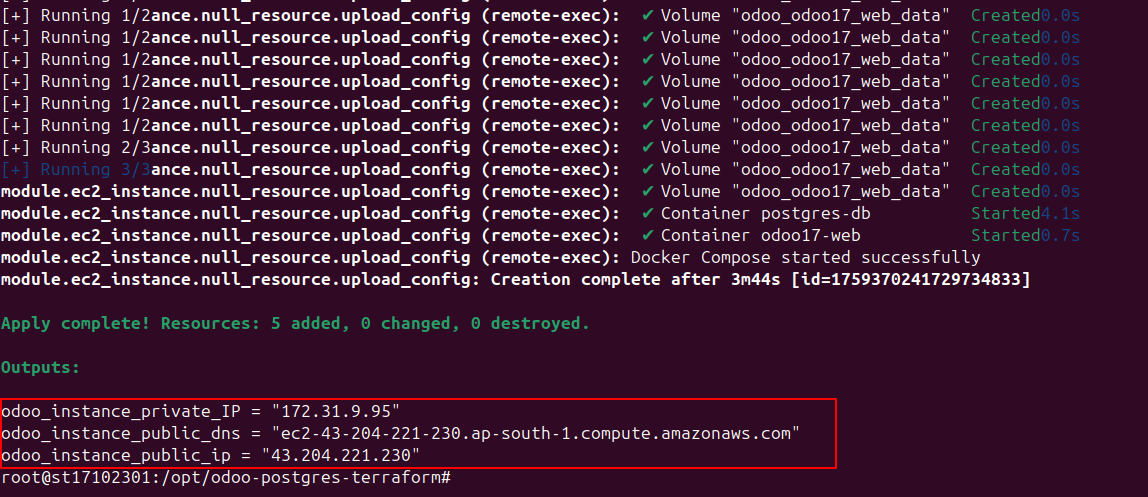
To apply and provision the infrastructure:
9. Accessing the Odoo Instance
After successful deployment, Terraform will output the public IP of your EC2 instance:
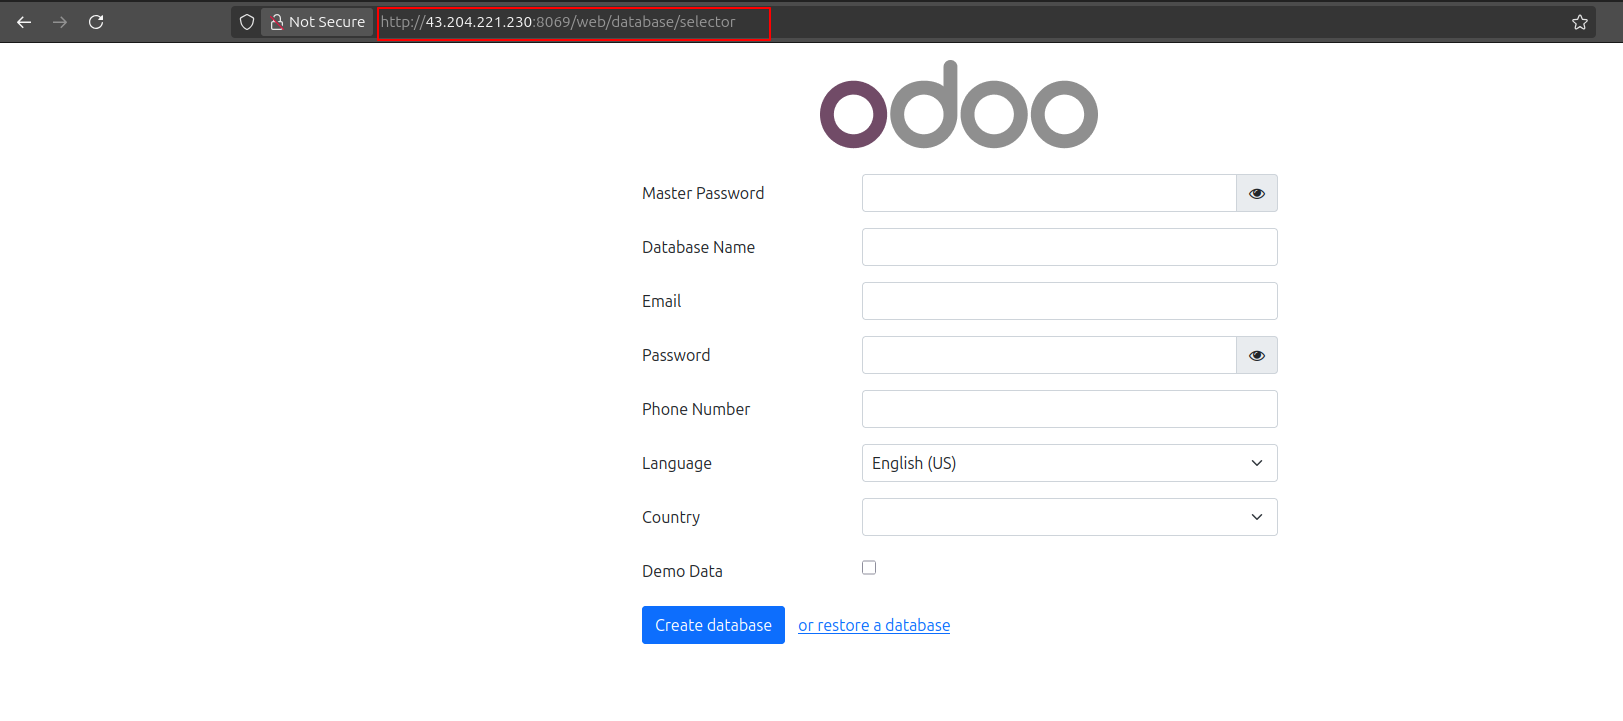
You can access Odoo by navigating to the Public IP as:
http://13.200.40.168:8069
You can also find the created ec2-instance in AWS console with all other resources

Conclusion
Through this guide, we've shared the automated deployment approach that our team has developed and refined. This approach works whether you're a startup launching your first ERP system or an enterprise standardizing across multiple environments, as it eliminates the inconsistencies in manual Odoo deployments.
At Surekha Technologies, we believe that robust infrastructure shouldn't be a barrier to business growth. We’ve helped businesses at every stage of their Odoo journey with multi-environment deployments.
If you're considering an Odoo implementation or looking to modernize your existing deployment process, we'd love to discuss how our expertise can help streamline your project.