In today’s fast-paced digital landscape, the demand for responsive, scalable, and efficient applications is higher than ever. Liferay Objects are a valuable tool for developers, allowing them to easily create data structures (schemas) and define relationships between them. They also provide APIs for basic operations like creating, reading, updating, and deleting (CRUD) objects. However, integrating the Message Bus with Liferay Objects is essential for more complex tasks, such as sending messages or emails, or performing other time-consuming operations after an object action. The Message Bus helps developers perform these operations asynchronously, so they don’t have to wait for these tasks to complete, leading to better application performance.
Prerequisite:
- Basic knowledge of Liferay
- Familiarity with Liferay Objects and Message Bus
- Liferay DXP/Portal 7.4+
- An IDE like Liferay Developer Studio, Eclipse, or IntelliJ IDEA
What are Liferay Objects?
Liferay Objects, introduced in Liferay 7.4, allow you to build and deploy applications without needing to write code or deploy modules. You can create and manage schemas without using a service builder. When creating an Object, you can set up data fields, define relationships with other objects, and trigger actions based on specific conditions. This functionality simplifies application development, providing flexibility and ease of use.
What is a Liferay Message Bus?
Liferay's Message Bus is a tool for asynchronous communication within different parts of a Liferay application. It enables components to send and receive messages without waiting for a response, thereby improving communication efficiency. The Message Bus operates like a messaging system where messages are sent to specific "destinations." Components listening to these destinations will receive the messages and can perform actions accordingly. This design ensures loose coupling between the sender and receiver.
Steps to Trigger Messages from Liferay Object Actions:
Register the Message Bus:
- Create an OSGI Module.
blade create -t api -p com.stpl.training.object.message.bus -c ObjectMessageBusConfigurator object-with-message-bus
Replace com.stpl.training.object.message.bus with your desired package name. - Create a configuration class for the message bus and register it as an OSGI service.
@Component (
		immediate = true,
		service = ObjectMessageBusConfigurator.class
		)
public class ObjectMessageBusConfigurator {
- Use the @Activate annotation to create a destination and register the message bus and its destination.
@Activate
protected void activate(BundleContext bundleContext){
	_bundleContext = bundleContext;
	DestinationConfiguration destinationConfiguration = DestinationConfiguration.
			createParallelDestinationConfiguration(ObjectMessageBusConstants.DESTINATION_NAME_ADD_OBJECT_MESSAGE);
	Destination destination = _destinationFactory.createDestination(destinationConfiguration);

	Dictionary dictionary = HashMapDictionaryBuilder.
			put(ObjectMessageBusConstants.HASH_MAP_KEY_DESTINATION_NAME,destination.getName()).build();
	_serviceRegistration = bundleContext.registerService(Destination.class,destination, dictionary);
	}
- Use the @Deactivate annotation to unregister the message bus and destroy the registered destination.
@Deactivate

protected  void deactivate() {
	if(Validator.isNotNull(_serviceRegistration)){
		Destination destination = _bundleContext.getService(_serviceRegistration.getReference());
		_serviceRegistration.unregister();
		destination.destroy();
	}
	_bundleContext = null;
}
- Add the necessary variables, references, and organize the imports accordingly.
    private BundleContext _bundleContext;

    @Reference
    private DestinationFactory _destinationFactory;

    private ServiceRegistration _serviceRegistration;
- Create a constants class to define static string constants.
public class ObjectMessageBusConstants {
	public static final String DESTINATION_NAME_ADD_OBJECT_MESSAGE = "add/object/message";
	public static final String HASH_MAP_KEY_DESTINATION_NAME = "destination.name";
	}
Create the Message Listener Class:
Create a listener class that listens to messages sent to a specific destination. Implement the logic to perform actions when messages are received.
@Component(
        immediate = true,
	property = {"destination.name=add/object/message"},
	service = MessageListener.class)
public class ObjectMessageBusListner extends BaseMessageListener {

        private static final Log _log = LogFactoryUtil.getLog(ObjectMessageBusListner.class);

        @Override
	protected void doReceive(Message message) throws Exception {
	   _log.info("this is destination class of message bus");
	   _log.info("Object entry Id ="+message.getLong("entryId"));
		   // TODO: Write your custom logic for mail or message send here
	}
}
Configure Liferay Object:
For learn about creating and managing Liferay objects click here.
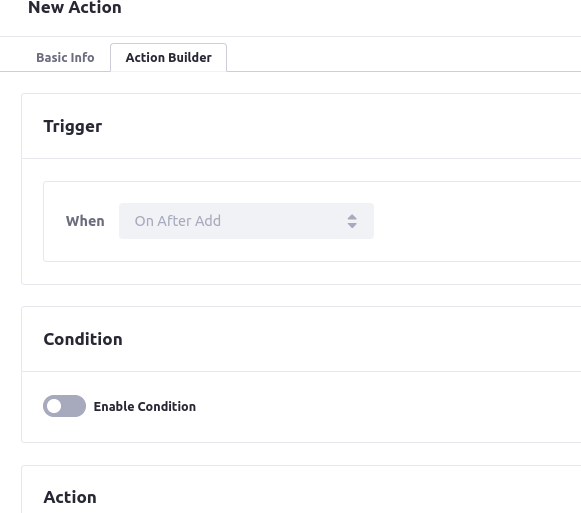
- Navigate to the action tab and create a new action, provide an action label for it.
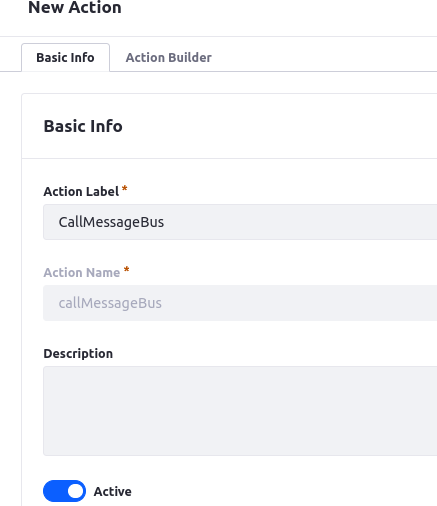
- In the action builder, create an action and select the trigger option to specify when the action should be performed.
- Add a Groovy script to handle the action. For example, use the "entryId" as the key and the "id" as the objectEntryId of the object on which the action will be performed.
import com.liferay.portal.kernel.messaging.Message;
import com.liferay.portal.kernel.messaging.MessageBusUtil;

Message message = new Message();
message.put("entryId",id);
MessageBusUtil.sendMessage("add/object/message",message);
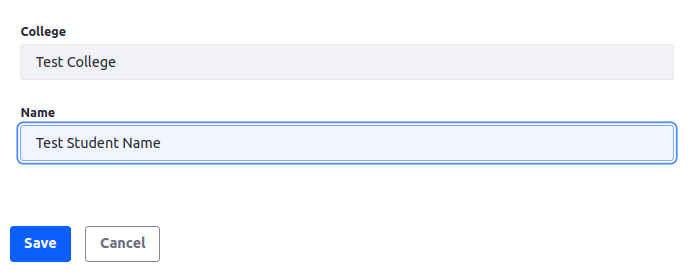
- Open the object and add or update data based on when you want to trigger the message bus. Simply fill in all the required fields as shown in the screenshot below.
Output:
Here is the output of successfully configuring the message bus with an object.

Conclusion
By following these steps, you can effectively integrate Liferay Objects with the Message Bus, allowing for enhanced functionality and more efficient communication within your Liferay application. This integration makes it possible to trigger complex actions and workflows, improving the responsiveness and modularity of your applications. Liferay's flexible architecture and powerful tools like Objects and the Message Bus make it easier to build robust and scalable solutions. Leveraging Liferay Consulting Services can further optimize this process and ensure a seamless integration tailored to your specific needs.