As we all know recently Odoo version 9 has been released. So we all are excited to try it at our end. But for getting easy control over odoo we will provide you installation manual for Odoo 9 on your Ubuntu system. This “How to guide” will allow you to install odoo manually. Just follow below mentioned steps to configure and setup odoo 9 at your end.
Steps to install and configure required packages:
Step 1 : Install required packages and libraries:
Before installation of odoo there are few required packages list that should be installed on linux/Ubuntu distribution before running Odoo Server.
You have to just Copy and Paste below command for packages in the terminal:
Command :
- sudo apt-get install python-dateutil python-feedparser python-gdata python-ldap python-libxslt1 python-lxml python-mako python-openid python-psycopg2 python-pybabel python-pychart python-pydot python-pyparsing python-reportlab python-simplejson python-tz python-vatnumber python-vobject python-webdav python-werkzeug python-xlwt python-yaml python-zsi python-dateutil python-feedparser python-pip python-dev libevent-dev gcc libxml2-dev libxslt-dev node-less
Note: It will ask for entering password, so here you have to give password of your system login.
Command :
- sudo apt-get install curl
- curl -sL https://deb.nodesource.com/setup_0.10 | sudo bash -
- sudo npm install -g npm
- sudo apt-get install python-software-properties
- sudo apt-add-repository ppa:chris-lea/node.js
- sudo apt-get install -y nodejs
- sudo npm install -g less less-plugin-clean-css
- sudo apt-get update
Step 2 : Now turn to install and configure Postgres:
Command :
- Log in to Azure DevOps and navigate to your project.
- sudo apt-get install postgresql
Note: If you will not give any specific postgresql version with above mentioned command it will take automatically version 9.1. If you want to install any specific version of postgresql, you have to write that version.
Example :
odoo@odoo:/$ sudo apt-get install postgresql-9.3
Let’s install PgAdmin by using following command:
Command :
- Log in to Azure DevOps and navigate to your project.
- sudo apt-get install pgadmin3
The default superuser for PostgreSQL is called postgres. You may need to login as this user first.
Command :
- Log in to Azure DevOps and navigate to your project.
- sudo su postgres
Example :
odoo@odoo:/$ sudo su postgres
password: ENTER YOUR SYSTEM PASSWORD
Now create PostgreSQL user openerp using the following command:
Command :
- Log in to Azure DevOps and navigate to your project.
- createuser openerp
Example :
postgres@odoo:/$ createuser openerp
Shall the new role be a superuser? (y/n) y
Note: Make this new user a superuser by writing y. Only then you can create a database using OpenERP Client. In short, openerp is the new user created in PostgreSQL for OpenERP. This user is the owner of all the tables created by OpenERP Client.
Now check the list of tables created in PostgreSQL using following command:
Command :
Example :
postgres@odoo:/$ psql -l
You can find the table template1, run the following command to use this table:
Command :
Example :
postgres@odoo:/$ psql template1
To apply access rights to the role openerp for the database which will be created from OpenERP Client, use the following command:
Command :
- alter role openerp with password 'postgres';
Example :
template1=# alter role openerp with password 'postgres';
ALTER ROLE
Note: "ALTER ROLE" is the message which shows that you have successfully changed password of role named openerp.
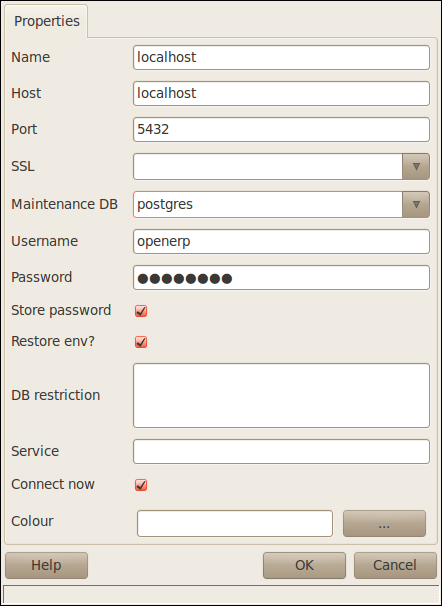
To access your database using PgAdmin3, you must configure the database connection as shown in the following figure:
Now let’s start a server by going to the path of your system in terminal where odoo v9 addons and server exist and start odoo server by using:
Command :
Steps to create a new database:
Step 1:
After starting a server, now open a web browser and in address bar just type localhost:8069 and press enter button.
Step 2 :
It will open a database selector page from where you have to click on 'Manage Databases' button.
Step 3 :
Now you have to click on 'Create Database' button to create a new database.
Step 4 :
It will open a new popup window in which you have to give database name and password of admin user and after that wait for few minutes to create a database.
Step 5 :
After successfully creation of database it will display a home page with all standard odoo addons as below: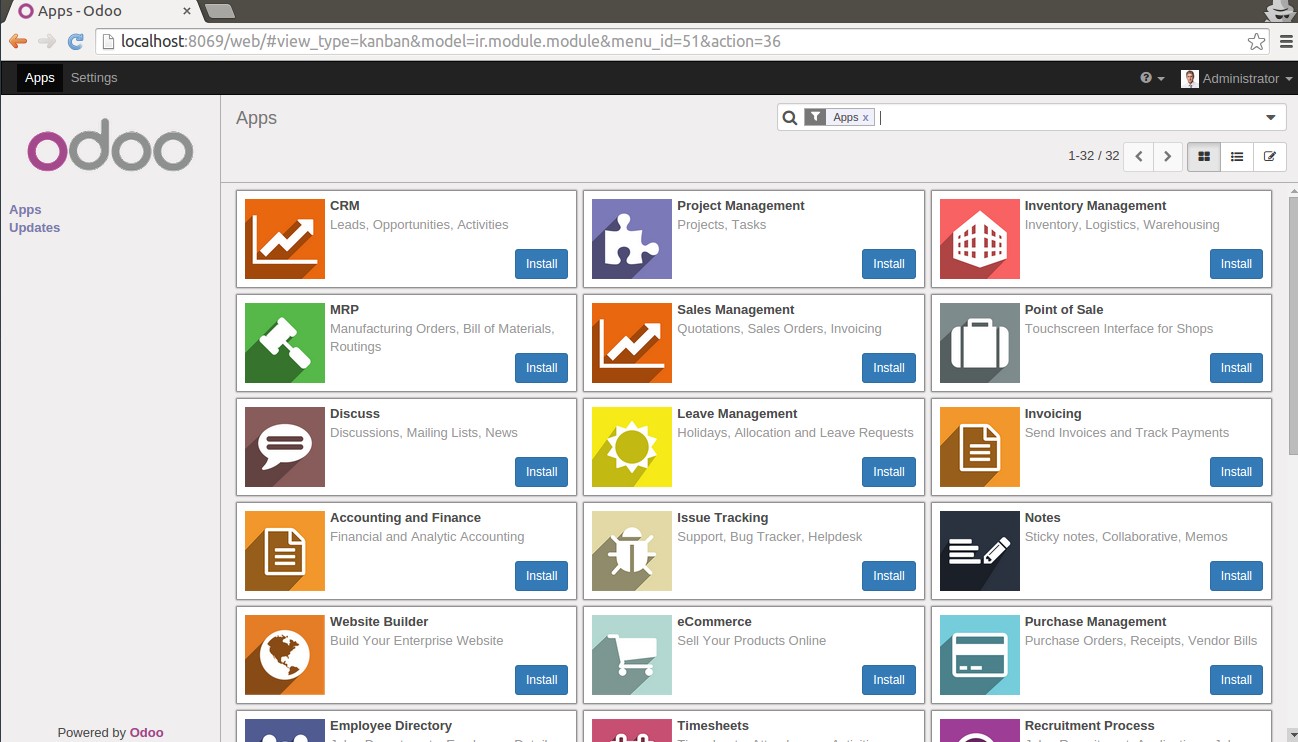
Step 6 :
Now install a module of your wish from 'Apps' and enjoy odoo!
For professional paid support, you may contact us at [email protected] .