Liferay provides many benefits to developers that encourage the mobile app development with Liferay as a backend server. One of them is Liferay mobile SDK. Liferay mobile SDK is available for both widely used platforms Android and iOS. If you are planning to develop mobile app with Liferay 6.1 or 6.2 server, Liferay mobile SDK makes it much easier and faster to develop the app.
For this blog, I am going to show that how we can use Liferay’s iOS SDK with Swift project. There are two ways to integrate iOS SDK with Swift project. I will briefly describe both the ways:
Using CocoaPods
Manual integration
As per the CocoaPods website, CocoaPods is a dependency manager for Swift and Objective-C Cocoa projects. It has over ten thousand libraries and can help you scale your projects elegantly. To integrate iOS SDK this way, you need the cocoapods installed in your system. For this blog, I am not covering how to setup cocoapods. You can find more information on how to install and use cocoapods here
Once you have installed and created Podfile in your project’s directory, write following line in podfile to download Liferay’s iOS SDK to your project.
pod 'Liferay-iOS-SDK'
Then, fire the command pod install from the project directory where the podfile is created. It will download dependency for your project. Once it is downloaded, Liferay services are available to use in your project. Now, close current xcode sessions, if any and open .xcworkspace file for your project.
In your swift class where you want to use Liferay’s service classes, just import the following:
import LRMobileSDK
Now, you can use all the Liferay services in your swift project. To use User Services, implement following code:
let auth = LRBasicAuthentication(username: usernameValue, password: passwordValue)
var session:LRSession? = LRSession(server: serverURL, authentication: auth)
let userService:LRUserService_v62 = LRUserService_v62(session: session)
var usersAnyObject:NSObject?
do{
usersAnyObject = try userService.getUserByEmailAddressWithCompanyId(companyId, emailAddress: usernameValue)
} catch let error as NSError {
print("Error Occurred ==> \(error)")
}
2. Manual Integration
For integrating Liferay SDK manually, you need to download zip file of latest version of the SDK. Once it is downloaded, unzip the file. Copy the unzipped folder liferay-ios-sdk-version to your project directory.
Now, open xcode. Right click on your project name and click on “Add files to XXXX”. Select the sdk folder. Refer following screenshot.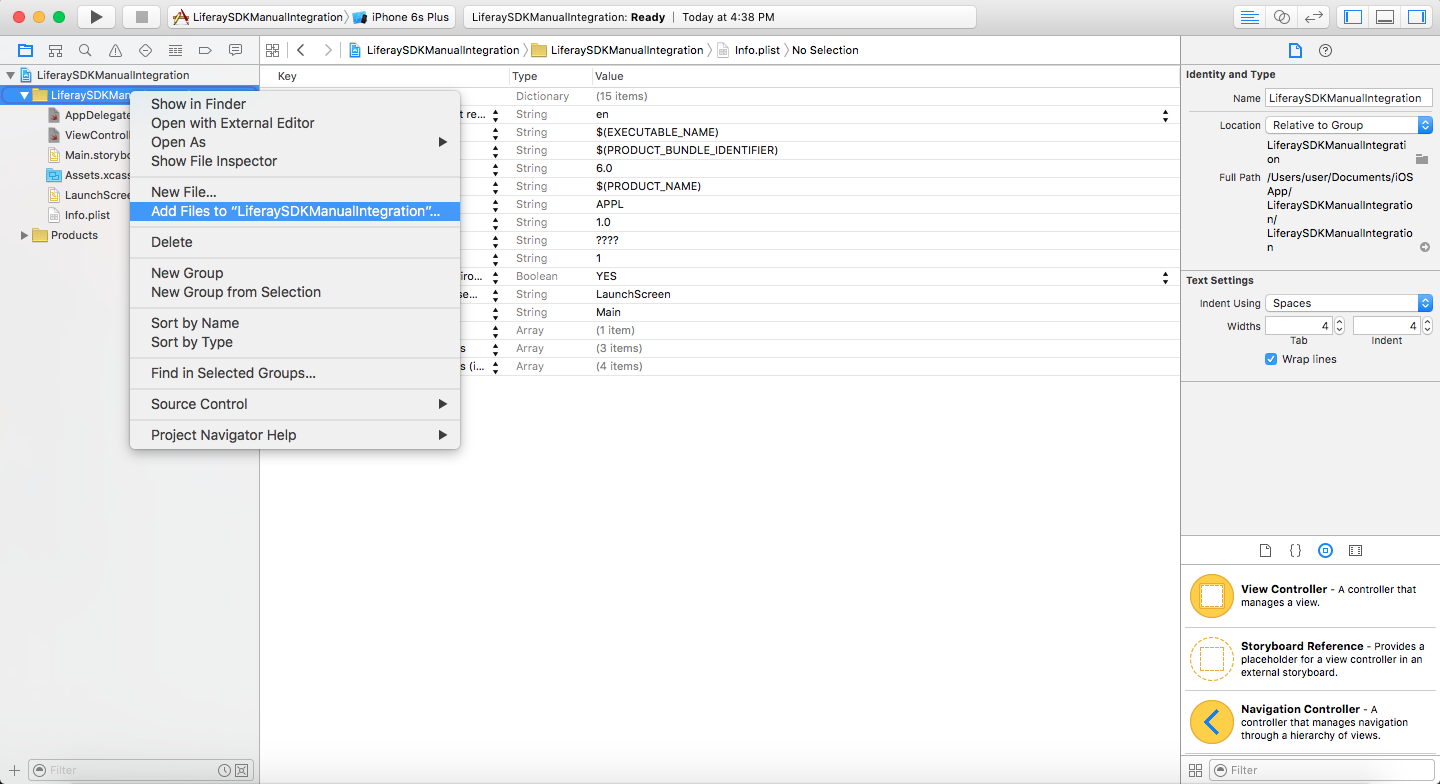
Liferay’s SDK for iOS is written in Objective-C. To use it in Swift project, we need to create an Objective-C bridging header file. You can find more information on objective-c bridging header file here.
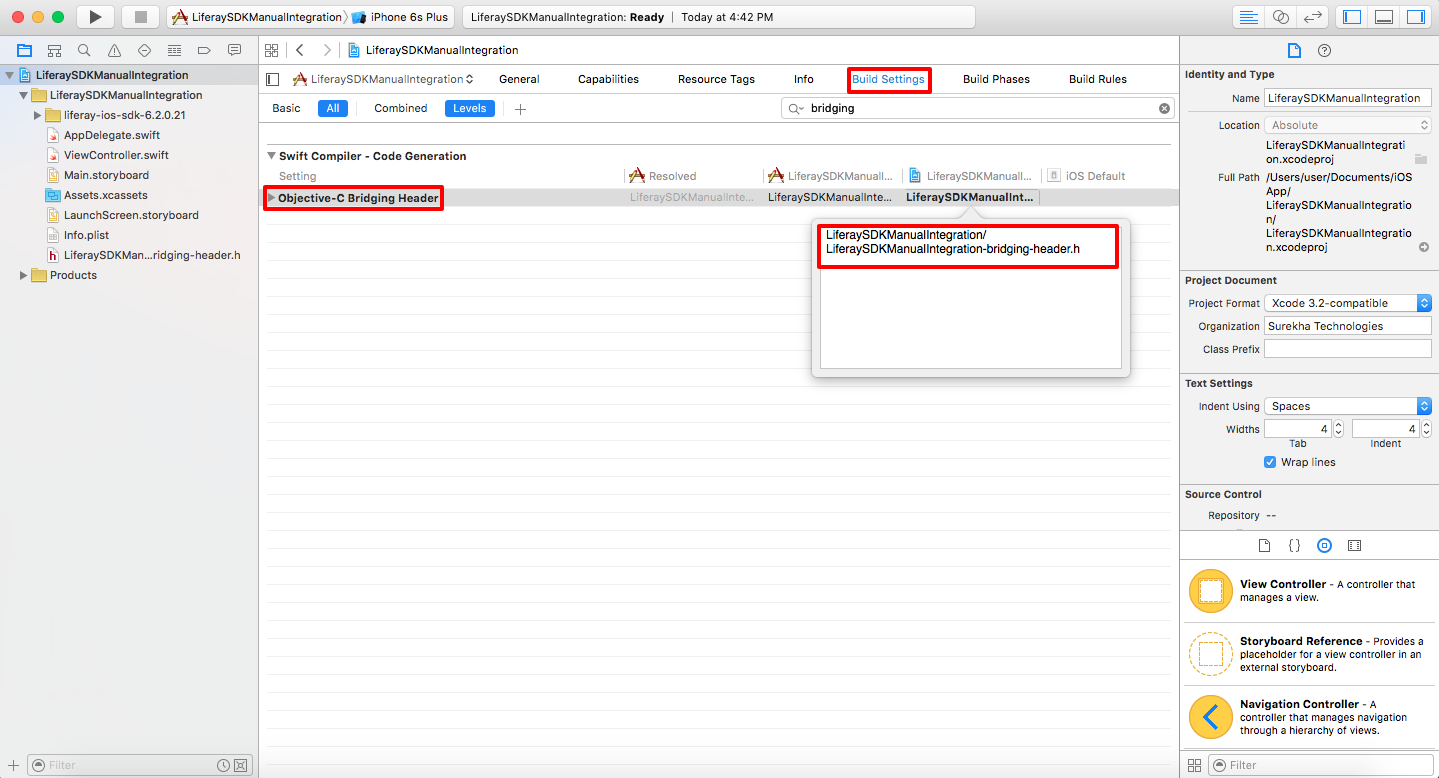
Make sure to include bridging-header-file to build setting of the project. Refer following screenshot:
Once the bridging header file is created, import the class that you want to use in your Swift project like following classes:
#import "LRSession.h"
#import "LRBasicAuthentication.h"
#import "LRUserService_v62.h"
If you are installing manually, you need to make sure to include AFNetworking 2.5.3 source code in your project.
Note: There are chances that you might receive some compilation errors in SDK source files. Importing Foundation class #import <Foundation/Foundation.h> in those classes resolves the compilation errors.
For reference of manual integration, you can use attached zip file of sample project LiferaySDKManualIntegration.zip.
Attachment
LiferaySDKManualIntegration.zip
For professional paid support, you may contact us at [email protected] .