Odoo's frontend development utilizes the OWL (Odoo Web Library) framework, which offers a powerful way to build interactive components. For developers working with Odoo, understanding how to implement event handling and input bindings is crucial for creating responsive, user-friendly applications that enhance the overall user experience.
In this blog post, we'll explore two concepts: event handling using the t-on directive and data binding with the t-model directive.
Event Handling in Odoo Components
Odoo components have templates that define the user interface (UI). To make these templates interactive and responsive, event handlers can be registered on DOM elements. This is where the t-on directive comes into play.
The Role of t-on
The t-on directive allows developers to bind specific events, like clicks, key presses, and form submissions, to methods defined within a component. This event-driven approach "brings the template to life" by enabling it to react dynamically to user interactions.
Common t-on Event Examples
Let's go through some common use cases for the t-on directive and how they can be used effectively in your Odoo components.
Handling Click Events
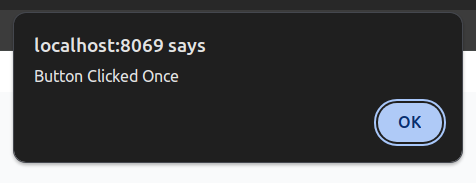
The most common use case is to handle click events on buttons or interactive elements.
Example
XML Template
<button t-on-click="handleButtonClick">Click Me</button>
In JavaScript, this would be equivalent to:
button.addEventListener("click", component.handleButtonClick.bind(component));
This example binds the click event to the handleButtonClick method. This method could, for instance, show a modal, submit data, or change a component's state.
Handling Double Click Events
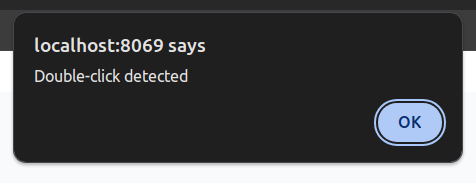
You can also handle double-click events, useful for actions that should only be triggered with a double click.
Example
XML Template
    <!-- Handling double click event -->
    <div t-on-dblclick="handleDoubleClick">Double Click Me</div>
The t-on-dblclick directive binds the dblclick event, triggering the handleDoubleClick method when the element is double-clicked.
Handling Mouse Events
The t-on directive supports various mouse events, such as mouseover,mouseout, and mousemove. These are helpful for implementing hover effects, tooltips, or custom cursor behavior.
Mouse Over and Mouse Out Example
XML Template
    <!-- Handling mouseover and mouseout event -->
      <div t-on-mouseover="handleMouseOver" t-on-mouseout="handleMouseOut">
        Hover Over Me
    </div>
- t-on-mouseover triggers handleMouseOver when the mouse enters the element.

- t-on-mouseout triggers handleMouseOut when the mouse leaves the element.
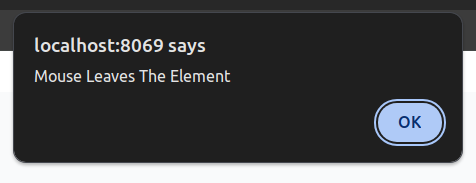
These handlers can be used to display additional information or highlight UI elements dynamically.
Handling Keyboard Events
Keyboard events like keydown, keyup, and keypress are critical for implementing features such as shortcuts, live input validation, or form navigation.
Key Down Example
XML Template
    <!-- Handling any key press in the Keyboard -->
    <input t-on-keydown="handleKeyDown" />
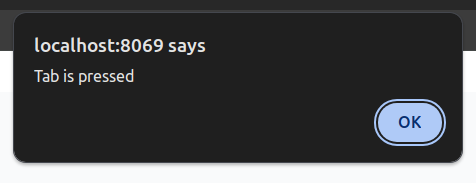
The t-on-keydown directive calls handleKeyDown when any key is pressed down. This can be particularly useful for monitoring user input or detecting specific keys.
Key Up Example
XML Template
    <!-- Handling any key release in the Keyboard -->
    <input t-on-keyup="handleKeyUp" />
Similarly, t-on-keyup is triggered when a key is released, which can be useful for updating state only after the user finishes typing.
Handling Form Events
Form-related events, such as submit, are essential for managing user data input efficiently.
Form Submit Example
XML Template
    <form t-on-submit="handleFormSubmit">
      <input type="text" />
      <button type="submit">Submit</button>
    </form>
The t-on-submit directive binds the submit event to handleFormSubmit. This method could perform form validation, data submission, or any other action required when the form is submitted. Note that you may need to call event.preventDefault() within your handler to prevent the default form submission behavior.

Handling Focus and Blur Events
Focus and blur events are useful for handling scenarios where you need to track when an input element gains or loses focus.
Focus Example
XML Template
    <input t-on-focus="handleFocus">
    <input t-on-blur="handleBlur">
- t-on-focus tis triggered when the input element gains focus.
- t-on-blur is triggered when the input element loses focus.
These events are commonly used for input validation or to provide hints and feedback to users.
Handling Change Events
The change event is triggered when the value of an input element is changed and the change is committed (e.g., when a user selects an option from a dropdown menu).
Change Example
XML Template
    <select t-on-change="handleChange">
      <option value="option1">Option 1</option>
      <option value="option2">Option 2</option>
    </select>
t-on-change binds the change event to handleChange, which can be used to process or validate the new value.
Input Bindings in Odoo Components
Managing input values efficiently is crucial in dynamic forms or applications where data is frequently updated based on user input. Odoo's OWL framework makes this seamless with two primary ways: using event listeners like t-on-input and utilizing the built-in t-model directive.
Input Handling with t-on
A common way to handle input changes is by listening to events like input and updating the component's state accordingly.
Form Submit Example
JavaScript File
    import { Component } from '@odoo/owl';
    class CustomForm extends Component {
        setup() {
            this.state = useState({ text: "" });
        }
        _updateInputValue(event) {
            this.state.text = event.target.value;
        }
    }
XML Template
    <div>
      <input t-on-input="_updateInputValue" />
      <span t-esc="state.text" />
    </div>
In the above example, whenever the input field changes, the _updateInputValue method updates the text property in the component's state. The updated value is then reflected in real-time within the template using t-esc.
Simplifying Input Handling with t-model
While t-on works well, OWL provides a more efficient way to bind input values directly using the t-model directive. The t-model directive links the input element's value to a property in the component's state, automatically syncing the data.
Simplified Example Using t-model
JavaScript File
    import { Component } from '@odoo/owl';
    class CustomForm extends Component {
        setup() {
            this.state = useState({ text: "" });
        }
    }
XML Template
    <div>
      <input t-model="state.text" />
      <span t-esc="state.text" />
    </div>
Here, t-model binds the input's value to state.text. Any changes made in the input field automatically update state.text, and any updates to state.text immediately reflect in the input field. This two-way data binding simplifies code and reduces boilerplate, making your components cleaner and easier to maintain.
Practical Example of Using t-model
The t-model directive is versatile and can be used with various HTML elements, including:
- Text Inputs: t-model="state.text" />
- Checkboxes: t-model="state.isChecked" />
- Radio Buttons: For radio buttons, t-model syncs the selected value.
- Select Dropdowns: t-model="state.selectedOption">
Full Example t-model
Let's look at a comprehensive example that covers different input types:
JavaScript File
    import { Component } from '@odoo/owl';
        class CustomForm extends Component {
            setup() {
                state = useState({
                    text: "",
                    isChecked: false,
                    color: "",
                });
            }
        }
XML Template
    <div>
            <div>Text Input: <input t-model="state.text" /></div>
            <div>Checkbox: <input type="checkbox" t-model="state.isChecked" /></div>
            <div>Select Color:
                <select t-model="state.color">
                    <option value="">Select a color</option>
                    <option value="red">Red</option>
                    <option value="blue">Blue</option>
                </select>
            </div>
            <div>Radio Buttons for Color:
                <span>
                    <input type="radio" name="color" id="red" value="red" t-model="state.color" />
                    <label for="red">Red</label>
                </span>
                <span>
                    <input type="radio" name="color" id="blue" value="blue" t-model="state.color" />
                    <label for="blue">Blue</label>
                </span>
            </div>
        </div>
Explanation
- Text Input: The text input is bound to state.text, updated automatically as the user types.
- Checkbox: The boolean value of the checkbox is synced with state.isChecked.
- Select Dropdown: The selected option updates state.color.
- Radio Buttons: The selected radio button value is also bound to state.color.
Success Story: Migrating WordPress Website to Odoo
A global tyre brand migrated from multiple WordPress sites to a centralized multilingual Odoo platform, improving site performance, reducing costs, and enhancing user experience.
- Challenge: Multiple WordPress sites caused high costs, content duplication, and limited global scalability.
- Our Solution: We unified all websites into a multilingual Odoo platform with reusable components and CRM integration.
- Result: Reduced costs by 35%, improved content update speed by 60%, and boosted website traffic and engagement.
Read More
Conclusion
Handling events and input bindings is an essential part of Odoo development services for creating modern, interactive applications. The t-on directive makes event handling straightforward, while the t-model directive simplifies two-way data binding. By using these tools effectively, you can build dynamic and responsive interfaces that improve the overall user experience.