Execute Automation Script on Linux
 September 12, 2022

Automation testing mainly focuses on automating the action with minimal manual activities. This type of QA testing involves various tools, scripts, and software to execute the test cases repeatedly.
Benefits of automation testing:
- Automation increases test coverage.
- Optimize the testing speed.
- Improve the testing quality.
- Reduces the cost and execution time of testing.
- Automation scripts can be run several times?.
- Easy to test stress, performance, and load
What is Selenium?
- Selenium is a free, open-source, and widely used automation tool for testing web applications.
- Selenium automation is designed in such a way that automates the functional aspects of a web application.
Here we are going to use Selenium on the Linux platform, which is the most powerful and flexible platform to execute the Linux automation scripts along with the Eclipse IDE.
Pre-requisites
- Java
- TestNg
- Eclipse IDE
- Google Chrome
To begin with, we create a Java project using the Selenium web driver by converting the Project (here named Java Project) package into one TestNG.xml file.
Note: The drivers must be available under the project "bin" and "src" folder
How to convert the package into one TestNG.xml file?
Follow the below steps to convert the package into TestNG.xml in the Eclipse IDE:
- In Eclipse IDE, open your project
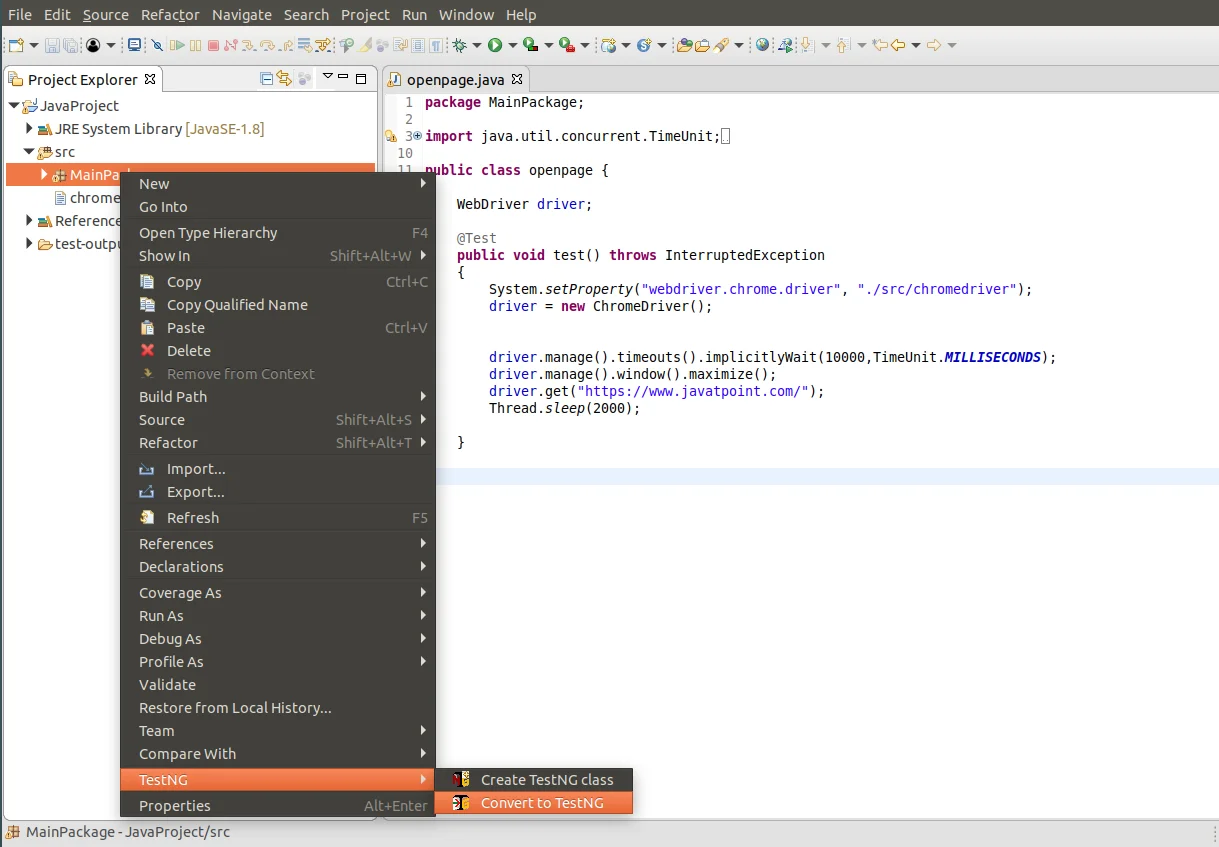
- Click on “src” ? right-click on the package name ?Click on the “TestNG” option
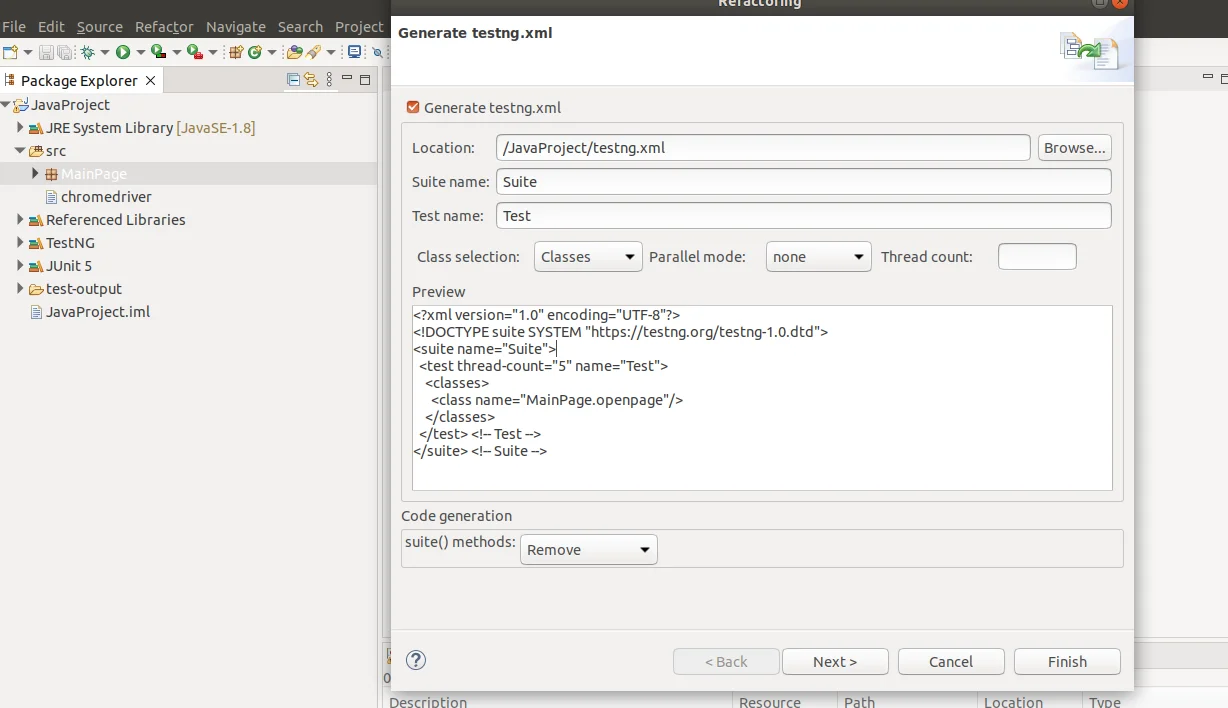
- Click on the “Convert to TestNg” option.


After that, a new testNG.xml file will be created in the project.
Check the testNG.xml file
Execute the testNG.xml file once to check whether it is executable or not. To run, right-click on the testNG.xml file and select Run As -> TestNG Suite as shown below.

Configure the lib files for the project.
- Go to the project location
- Right-click on the project name (here, for example, JavaProject)
- Click on the “Properties” ? Go to Location ?Click on the “System Explorer” icon.
- Open your project -> Create a new folder ? Folder name is “lib”(folder name can be anything)
- Copy all .jar files that we added to the project and paste them into the “lib” folder.
Create a .sh file under the project folder
- Open the terminal
- Go to the project folder by running the below command:
- Run the below command to create and edit a shell file to run the project
- Enter the below content by replacing the <project-path> in the opened file.
#!/bin/bash
export CLASSPATH=$CLASSPATH:~/<project-path>/lib/*
cd ~/<project-path>
java -cp ./bin:./lib/* org.testng.TestNG testng.xml
- Then save the file by pressing Ctrl + X then enter Y and then press the ENTER key.
- Now execute the above-created run_script.sh file
Test result report
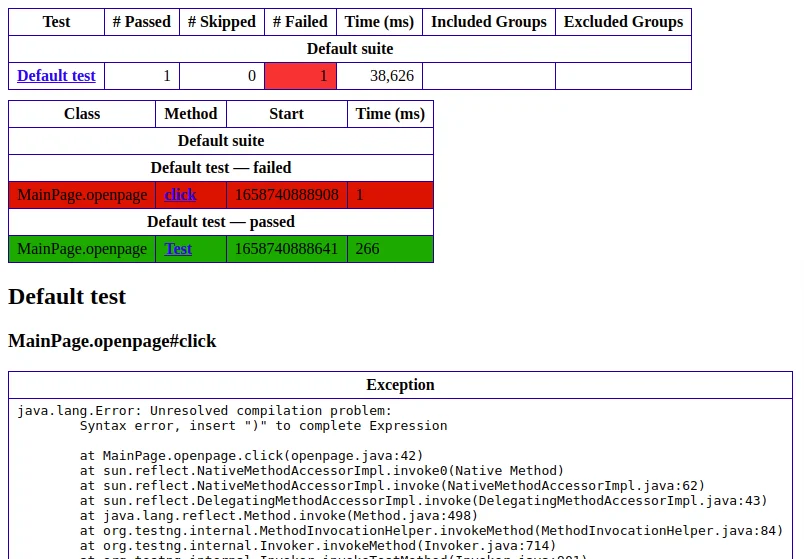
After the program is executed, a report file with test results will automatically be created.
- Open file manager.
- Go to the project location and open the test-output folder.
- Open the emailable-report.html file in the browser.
You will be able to see the test pass and failed results as shown below:

Conclusion:
Here we have covered all the key aspects to run an automation script with the help of Selenium on Linux. As we all know, the importance of QA testing for software products, we should have quality testing along with effective planning, and therefore, automation testing has a plethora of advantages over manual testing that make it useful for various purposes.


