How to Use Cypress Automation Tool: Complete Tutorial
 March 18, 2024
Test Automation has become an integral part of the software development process, providing an efficient means of ensuring the quality and reliability of web applications.
Cypress stands out as one of the most powerful and developer-friendly test automation tools available today. It excels in controlling the entire automation process end-to-end and is designed to test modern web applications comprehensively.
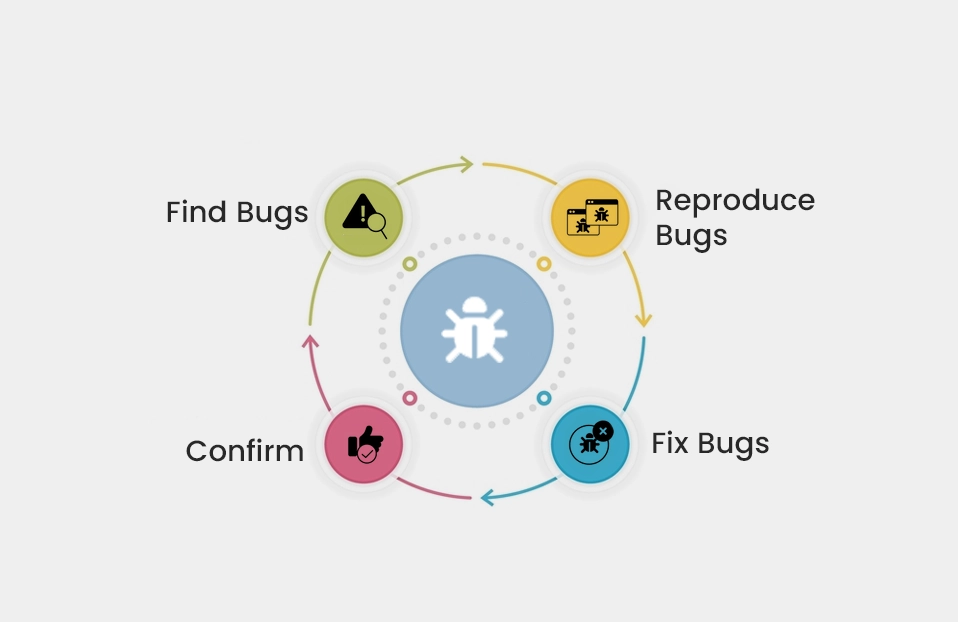
Test Automation is all about checking test scenarios using unique tools and structures. QAs make automated scripts, plug them into automation tools, and then the application is deployed. Test Automation is great for testing that happens repeatedly. It saves a lot of time and effort that a manual QA would have to do.
Cypress comes into the picture as ensuring the robustness and reliability of web applications in the dynamic landscape of software development is paramount. Cypress is a powerful and developer-friendly test automation tool.
What is Cypress Tool for Automation:
Cypress is an open-source framework designed to test modern web applications. It controls the entire automation process end-to-end by comprehending everything within the browser. Offering stable and consistent results, Cypress is one of the most reliable automation tools for testing.
Features of Cypress Automation Testing Tool:
Here is the list of Cypress Automation Tool and that is why Cypress is better than other JavaScript automation tools
- Cypress provides Easy Installation.
- Cypress provides continuous updating of data in real-time as changes occur i.e. Real-Time Reloads which helps developers to see changes instantly.
- Cypress eliminates the requirements of manual waits and timeouts, as it comes with Automatic Waiting feature which automatically waits for commands and assertions.
- One of its features is Time-Travel Debugging where Developers are able to debug their tests with the capabilities of time-travelling by which they can see the state of application at different points in time.
- It supports Cross-browser Testing and Test Execution.
- During test execution, Cypress framework automatically captures screenshots and videos which can help in the test failure diagnosis.
- There is no need to install any additional drivers or dependencies, because Cypress runs inside the browser.
Why choose Cypress Tool for Automation:
- It is easy for teams to get started and master the tool, because it exhibits Comprehensive Documentation.
- Cypress has a vibrant, supportive, and active community that facilitates the continuous improvement of the tool.
- It is a developer-friendly tool because its easy-to-use syntax and intuitive interface make writing tests a seamless experience.
How to use Cypress Automation Tool:
To embark on your Cypress journey, all you need is a basic understanding of JavaScript.
Environment Setup:
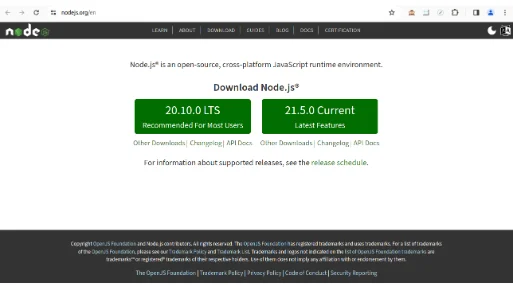
1. Download & install nodejs:
For Windows:
- Download Node.js Installer:
- Visit the official Node.js website at https://nodejs.org/.
- Click on the "Downloads" tab.
- Download the "LTS" (Long Term Support) version.
- Run the Installer:
- Once the installer is downloaded, run the executable (.msi) file.
- Follow the prompts in the Node.js Setup Wizard. You can generally accept the default settings.
- Complete the Installation:
- After the installation is complete, you may need to restart your computer to apply the changes.
- Verify Installation:
- Open a command prompt or PowerShell.
- Type the following commands to check if Node.js and npm (Node Package Manager) are installed:
- If installed correctly, these commands will display the versions of Node.js and npm.
For macOS:
- Download Node.js Installer:
- You can download the installer from the official website as mentioned in the Windows steps.
- Run the Installer:
- Run the downloaded .pkg file and follow the installation instructions.
- Verify Installation:
- Open a terminal.
- Type the following commands to check if Node.js and npm are installed:
- If installed correctly, these commands will display the versions of Node.js and npm.
For Linux:
- Using Package Manager (Example: Ubuntu/Debian):
- Open a terminal.
- Update the package list:
- Install Node.js and npm: sudo apt install nodejs npm
sudo apt install nodejs npm
- Verify Installation:
- Type the following commands to check if Node.js and npm are installed:
- Install Node.js and npm: sudo apt install nodejs npm
- If installed correctly, these commands will display the versions of Node.js and npm.
2. Download & install visual studio code:
For Windows:
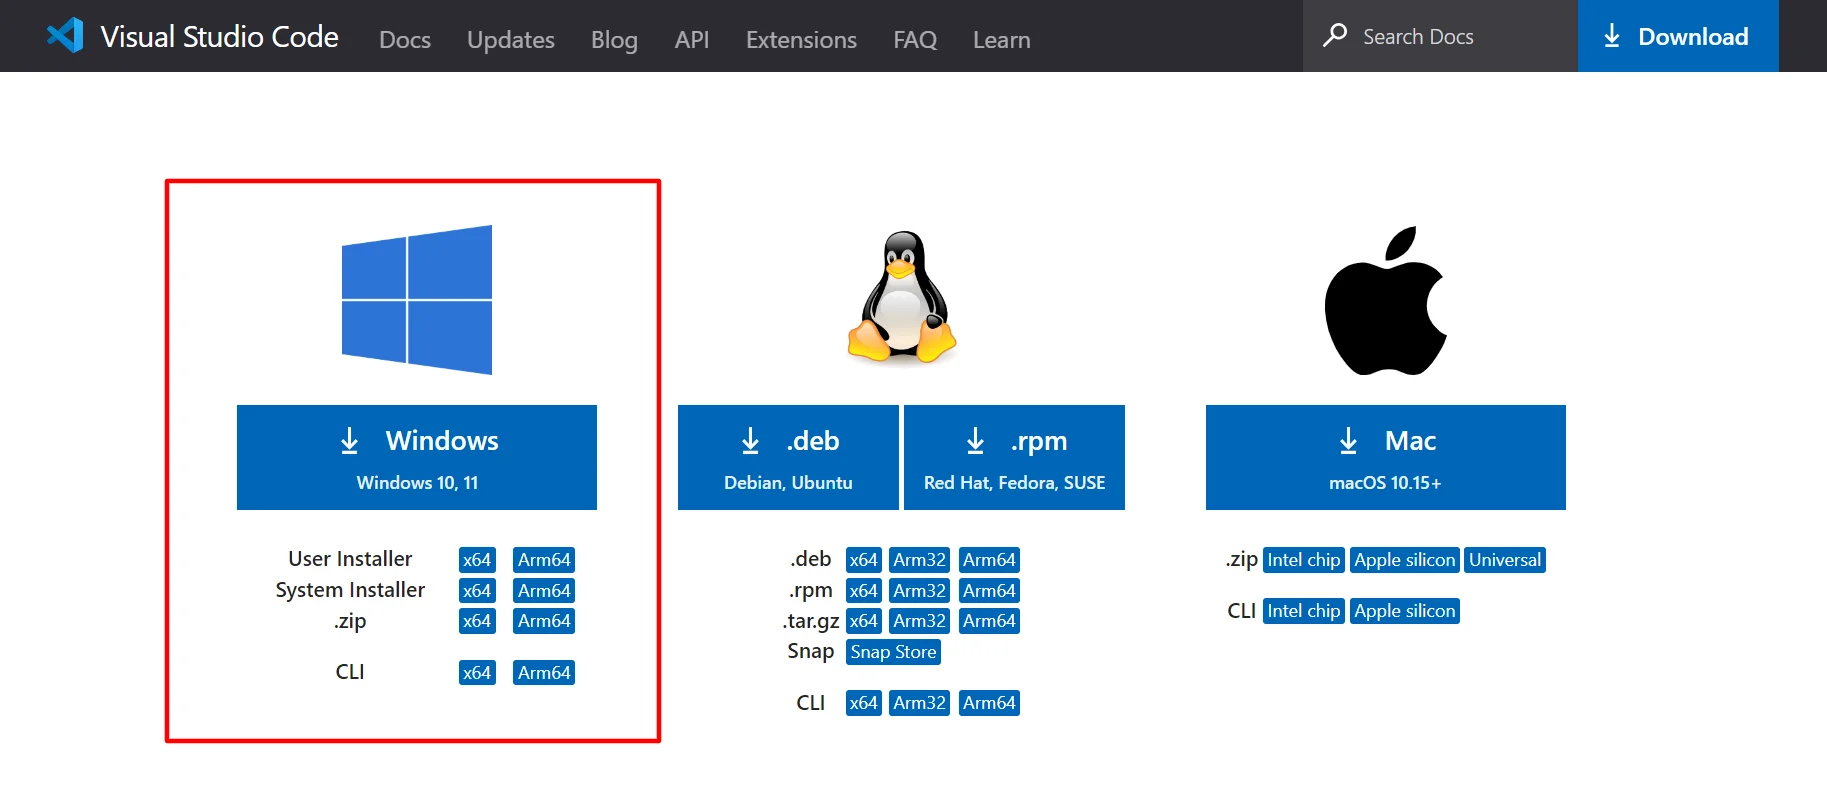
- Download VSCode:
- Visit the official Visual Studio Code website at https://code.visualstudio.com/.
- Click on the "Download for Windows" button.
- Run the Installer:
- Once the installer is downloaded, run the executable (.exe) file.
- Follow the prompts in the installation wizard. You can generally accept the default settings.
- Complete the Installation:
- After the installation is complete, you can launch Visual Studio Code.
For macOS:
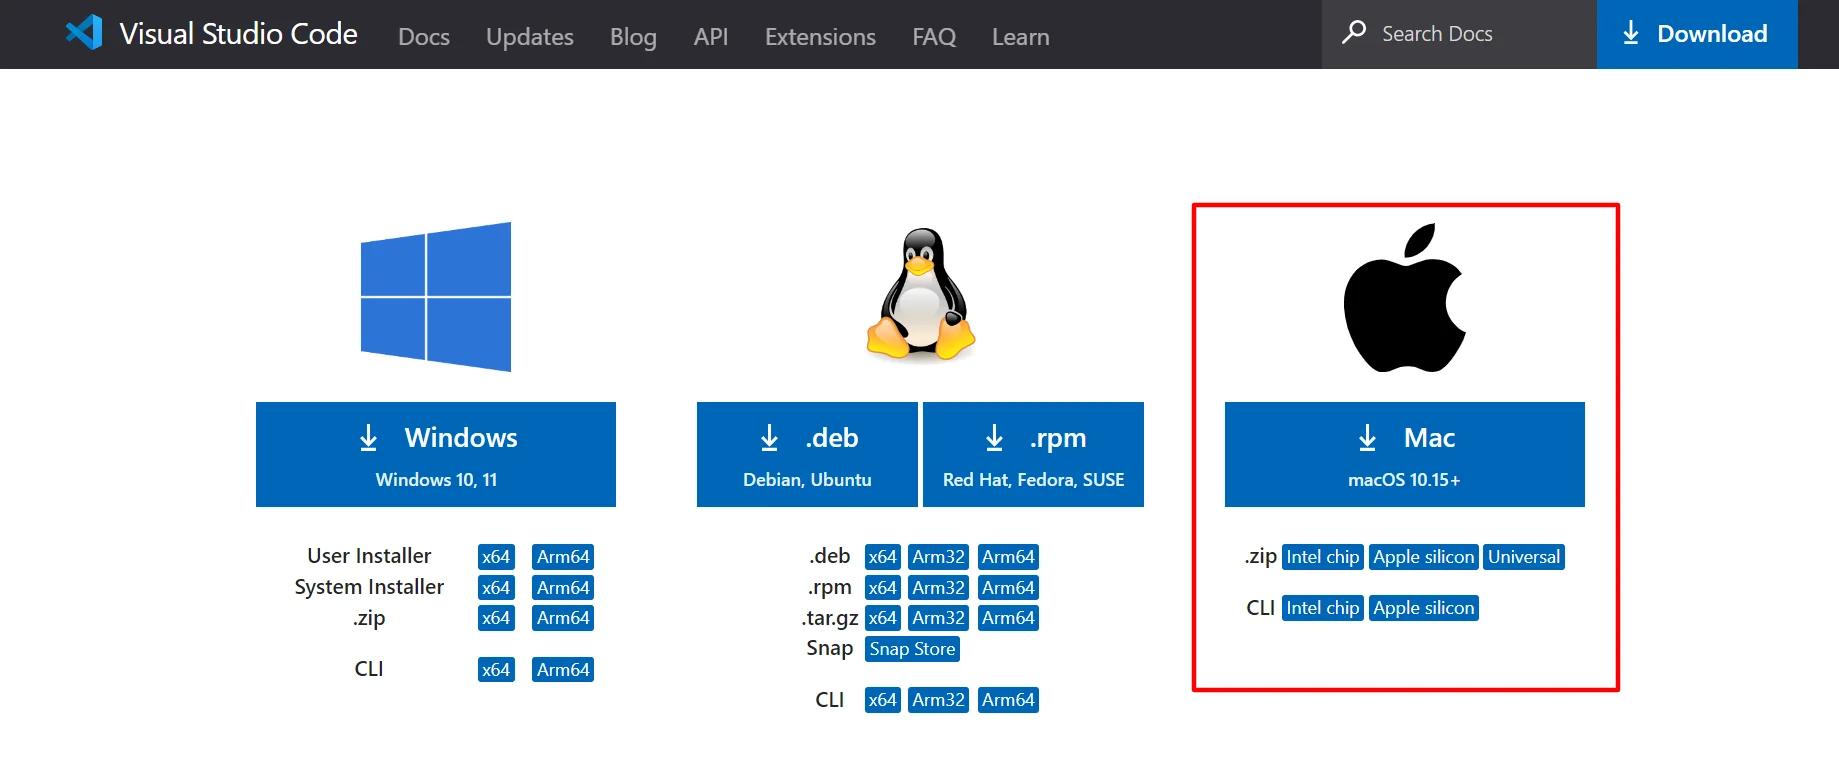
- Download VSCode:
- Visit the official Visual Studio Code website at https://code.visualstudio.com/.
- Click on the "Download for macOS" button.
- Run the Installer:
- Once the installer is downloaded, open the downloaded .zip file.
- Drag the Visual Studio Code application to your Applications folder.
- Launch VSCode:
- Open the Applications folder and find Visual Studio Code.
- Double-click on the application to launch it.
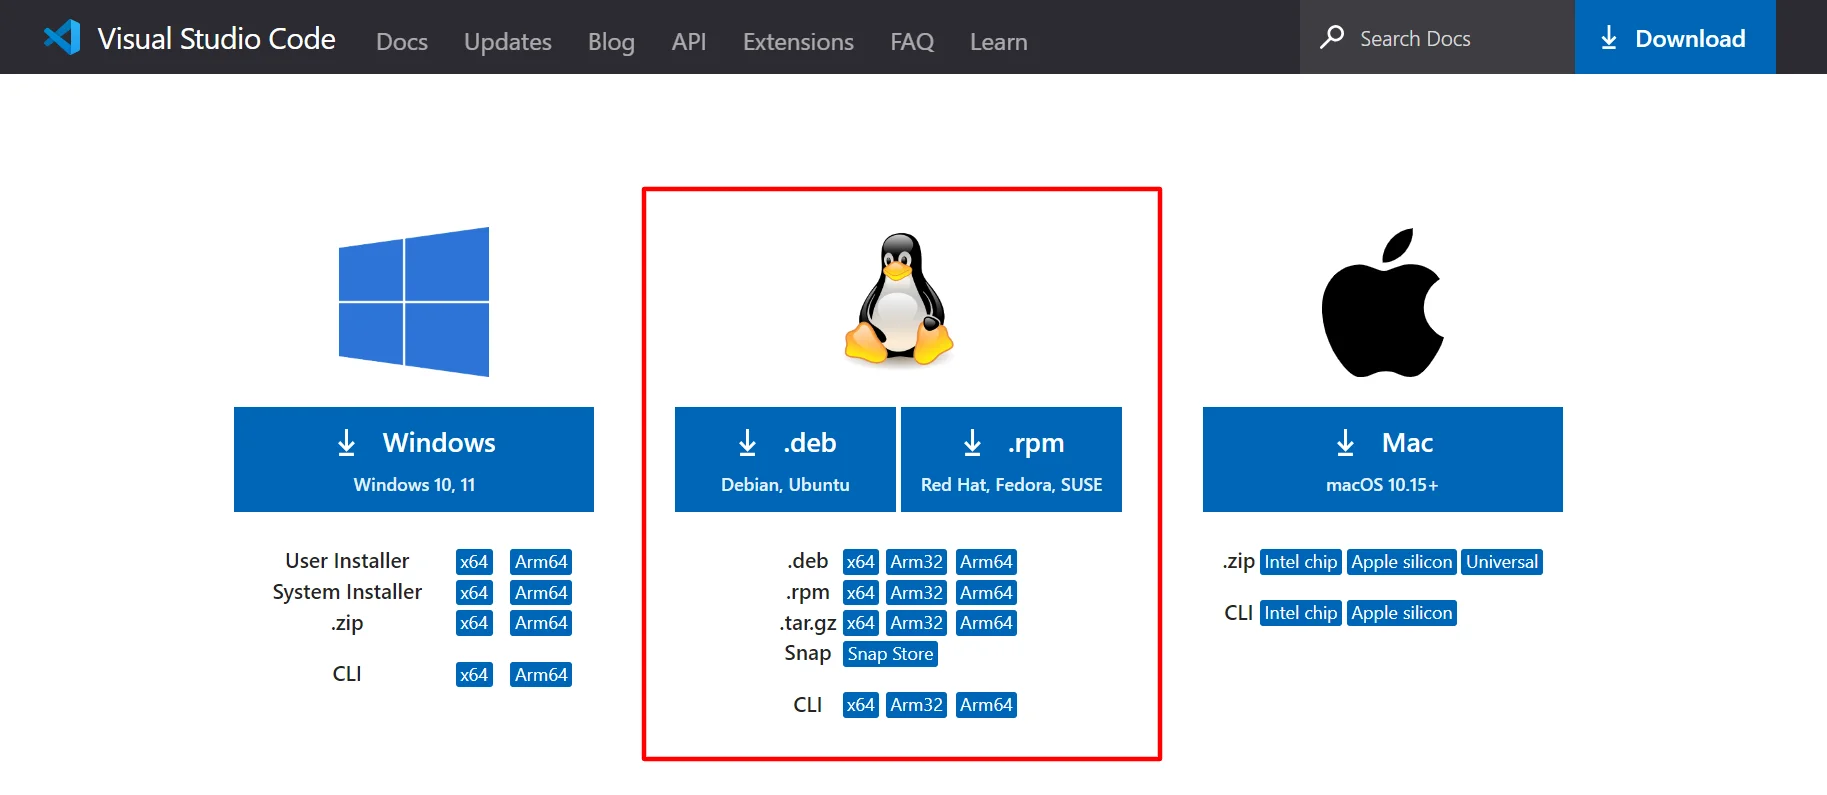
For Linux:
- Download VSCode:
- Visit the official Visual Studio Code website at https://code.visualstudio.com/.
- Click on the "Download for Linux" button.
- Choose the appropriate package for your Linux distribution (e.g., .deb for Debian/Ubuntu or .rpm for Red Hat/Fedora).
- Install VSCode:
- For Debian/Ubuntu, you can use the following commands (replace [version] with the downloaded version):
- Install Node.js and npm: sudo apt install nodejs npm
- For Red Hat/Fedora, use:
- Install Node.js and npm: sudo apt install nodejs npm
< downloaded. file >.rpm
- Launch VSCode:
- You can now launch Visual Studio Code from the application menu or by typing code in the terminal.
- Verify Installation:
- Regardless of your operating system, after installation, you can verify that Visual Studio Code is installed by opening it and checking the version. Additionally, you can open a terminal or command prompt and type: code –version
- This command will display the installed version of Visual Studio Code.
3. Create a new folder for project & open in VSCode:
- Create a New Folder:
- Navigate to the desired location: Open the file explorer (Finder on macOS, File Explorer on Windows, or Nautilus on Linux) and go to the location where you want to create the new project folder.
- Create a new folder: Right-click in the desired location and choose "New" > "Folder" (or similar, depending on your operating system). Give the folder a meaningful name related to your project.
- Open Visual Studio Code:
- Install Visual Studio Code (if not installed): If you haven't installed Visual Studio Code yet, download and install it from the official website.
- Open Visual Studio Code: Open VSCode by either clicking on its icon or using the terminal/command prompt.
- Open the Project Folder: Inside VSCode, click on "File" in the top-left corner, and select "Add Folder to Workspace..." or simply use the keyboard shortcut Ctrl+K and then Ctrl+O on Windows/Linux or Cmd+K and then Cmd+O on macOS.
- Select the Project Folder: A file dialog will appear. Navigate to the location where you created your project folder, select the folder, and click "Add" or "Open" (depending on your operating system).
- Verify the Setup:
- Check the Explorer View: On the left side of VSCode, you should see the Explorer view. It should now display the files and folders within your project folder.
- Verify the Integrated Terminal: You can open the integrated terminal in VSCode by selecting "View" > "Terminal" or using the keyboard shortcut Ctrl+ backtick (`).
- Now, your project folder is open in VSCode, and you can start working on your project. You can create files, write code, and manage your project directly within VSCode.
4.Initialize Project, Install and Open Cypress:
- Initialize Your Project:
- Open a terminal and navigate to your project's root directory.
- If your project doesn't already have a package.json file, create one by running:
- Install Cypress:
- Run the following command to install Cypress as a development dependency in your project:
npm install --save-dev cypress
- Open Cypress Test Runner:
- Once the installation is complete, you can open Cypress by running:
- This command will launch the Cypress Test Runner.
- Run Your First Test:
- In the Cypress Test Runner, you can see example tests. You can run them or write your own tests.
- By default, Cypress will create a cypress directory in your project with example test files.
- To run a test, click on its file name in the Cypress Test Runner.
- Create a Test File and Write Your Own Tests:
- In the cypress/integration directory, create a new file (e.g., first_test_spec.js). This is where your test code will reside.
- Open the test file (first_test_spec.js) in a text editor.
- Write your tests using Cypress syntax. You can refer to the Cypress documentation (https://docs.cypress.io/guides/overview/why-cypress) for guidance.
- For example:
Create a new file in the cypress/integration directory, e.g., google_search_spec.js.
Write your Cypress script in the file as follows: // google_search_spec.js
// Describe the test suite
describe('Google Search Test', () => {
// The actual test case
it('Launches Google and Performs a Search', () => {
// Visit Google
cy.visit('https://www.google.com');
// Type a search query in the search input field
cy.get('input[name="q"]').type('Cypress E2E Testing').should('have.value', 'Cypress E2E Testing');
// Submit the search form
cy.get('form').submit();
// Make assertions on the search results page
cy.url().should('include', 'search');
cy.get('#search').should('exist');
cy.get('.g').should('have.length.greaterThan', 0);
});
});
- This example test visits the Cypress Example Page, clicks on a link containing the text 'type', and asserts that the URL includes '/commands/actions'.
- Run Your Test:
- Go back to the Cypress Test Runner.
- In the Test Runner, you should see your new test file listed. Click on it to run the test.
- Run Tests from the Command Line:
- If you prefer running tests from the command line, you can use the following command:
- This will run all the tests headlessly in the terminal.
- Observe Test Execution:
- Cypress will open a new browser window and execute your test. You can watch the test steps in real-time in the Cypress Test Runner.
- If there are any failures, Cypress will highlight them, and you can inspect the browser's state at the point of failure.
- Review Test Results:
- Once the test is complete, the Test Runner will display the results. You could see if the test passed or failed, along with any error messages or logs.
Conclusion
Cypress is a powerful and easy-to-use test automation tool that is designed to test modern web applications. It offers a wide range of features, including easy installation, real-time reloading, automatic waiting, time-travel debugging, cross-browser testing, parallel test execution, and automatic screenshot and video capture. If you are looking for a reliable and efficient tool to automate your web application testing, Cypress is a great option to consider.